Showing posts with label chocolate. Show all posts

Friday, February 26, 2016

Food Friday - Vegan Deep Chocolate Bundt Cake

from Kris B.


During my adult life I have gone through periods of eating a vegetarian diet, a vegan diet, and an everything diet.  I have come to the point now of just trying to eat a reasonably healthy diet.  For me, that means eating meat because I have had some issues with severe anemia as a result of having systemic lupus.  That said, some of my very favorite recipes are those that I discovered during my days of more restrictive eating.

I make this recipe from the cookbook Veganomicon The Ultimate Vegan Cookbook, by Isa Chandra Moskowitz and Terry Hope Romero, whenever I am asked to make a cake for a potluck or anything like that.  Never has anyone realized that it was vegan simply by its taste.  This cake is loaded with chocolate and coffee.  How can it not be delicious??

My oldest daughter, Brooke, proclaimed herself a vegetarian at age three.  I’m not kidding!  And, she knew exactly what she was saying and doing. With the exception of “flat meat” (pepperoni) that should would occasionally eat on pizza at parties during elementary school, she has led a life almost completely free of meat in her diet.  In high school, she became a vegan and also discovered her real passion for cooking. Not only did she have the culinary skills, but she also did the research to make sure that her diet was nutritionally sound.  During this time, she taught me a lot about cooking and introduced me to foods that I had never had and probably never would have tried on my own.  Brooke also did very well at converting standard recipes for baked goods to being vegan friendly.  It is ironic that she gave up her vegan diet when, after graduating from college, she went to culinary school to get her pastry chef certificate and decided that baked goods were just “not right” without real butter!  Lol!

Whether you are an everyday vegan or just like a good, and reasonably healthy, chocolate cake, this one will not disappoint!

INGREDIENTS

1 3/4 cups fresh brewed coffee
2/3 cup Dutch processed unsweetened cocoa powder
1 1/2 cups granulated sugar
1/3 cup canola oil
1/3 cup applesauce
1/4 cup cornstarch
2 tsp vanilla extract
1 tsp almond extract
2 cups whole wheat pastry flour or all-purpose white flour
(I have done both.  This time I used white all-purpose flour.)
1 tsp baking soda
1 1/2 tsp baking powder
1/2 tsp salt
2 tsp powdered sugar
(I probably used a little more)

Preheat the oven to 325 degrees.  Lightly grease an 8 or 10 inch bundt pan.

Bring the coffee to a simmer in a saucepan over medium heat.  Once it is simmering, turn down the heat and whisk in the cocoa powder until it has dissolved.  Remove from the heat and set aside to bring to room temperature.

In a mixing bowl, whisk together the granulated sugar, canola oil, applesauce and cornstarch until sugar and cornstarch are dissolved, about 2 minutes.  Mix in the extracts.  Once the chocolate has cooled a bit, mix that in as well.

Sift in the flour, baking powder, baking soda, and salt.  beat until relatively smooth, about 1 minute minute with a hand mixer or two minutes with a whisk.  

Pour the batter into the prepared bundt pan and bake for about 45 minutes, or until a toothpick or butter knife inserted through the center comes out clean.  If your pan is on the smaller side, it could take up to 55 minutes.

Remove from the oven and let cool for about 20 minutes, then invert onto a serving plate to cool completely.  Once cool, sift confectioners’ sugar over the top and enjoy!


I am going solo here this week because Tracey has a busy week of family birthdays - Harry’s, hers, and her niece’s.  They are lucky to have had the opportunity to travel to grandma and grandpa’s last weekend and the grandparents are coming to them this weekend.  The best gift I could think to give her was time to enjoy her family and not have to worry about squeezing a Friday post in.  I do wish I could share this cake with her.  I sure don’t need to eat it myself, even if it is lower fat!!!  So, if you have a few minutes, send Tracey some belated birthday wishes!  Her birthday was the 24th.

Also, if you are interested in random glimpses into our everyday lives, scroll back to see the first few posts in our new series "Mug Shots."  Yep, they are the real life images of two coffee addicts!

Sunday, February 21, 2016

Food Friday - Awesome Sauce!

from Kris B.


My mom was a chocoholic; she liked any kind of chocolate, by M&Ms and Breyers ice cream covered in chocolate sauce were her favorites.  Though every now and then I remember seeing a bottle of Hershey's chocolate syrup in the refrigerator, most of the time she made her own sauce.  As it turns out, it is super easy to make!

I am not an ice cream fan.  I'm not sure why that is; it's just one of those weird personality traits.  I do, however, really like this chocolate sauce.  It is thick and when it starts to cool becomes almost chewy like fudge.  I had to fins a way to enjoy it other than on ice cream.  My preference is to eat it swirled in with a bit of coffee flavored yogurt; not frozen yogurt, just plain ol' yogurt.  If your world is in a sad state and you have no coffee flavored yogurt, vanilla is an acceptable substitute.

Because of its thickness, this sauce also works well for dipping.  Some of my favorite dipping devices are animal crackers, pretzels, cinnamon covered tortilla chips, fruit, and this time of year, Girl Scout Trefoil cookies.  Don't judge me!  I am admitting my bad habits here and now.  Lol!  If your cupboard is bare a spoon, spatula, or a finger will do in a pinch!

INGREDIENTS
1 can sweetened condensed milk
4 oz. unsweetened baking chocolate
a pinch of salt
1 tsp vanilla extract
1/2 cup water

Combine all ingredients in a medium sauce pan.  Heat over medium heat stirring continuously.   Once mixture boils, reduce heat to low and continue to stir until until the chocolate is completely melted and thoroughly integrated.  Serve immediately or store in an airtight container in the refrigerator.  Reheat either on the stove top over low heat or in the microwave for a minute and half at about 50% power.  YOU MAY NEED TO ADJUST MICROWAVE TIMES AND SETTINGS BASED ON YOUR MICROWAVE.  Do not leave the chocolate sauce unattended until you are sure of the behavior of your microwave.


from Tracey G.


Ever since I was a kid, I've loved the hard shell chocolate sauces, and now my child does too, along with me! It always kind of irked me that it comes in such a small bottle for what you were paying, but it's fun, so I made sure we had it around! Then one day I ran across this recipe for homemade "Magic Shell", and I filed it away under "to make someday". I'd finally went out and gotten the ingredients necessary, but still, hadn't made it. A Food Friday post seemed like as good of an excuse as any to finally give it a whirl and am I glad I did! It turned out better than I could've ever expected, and it introduced me to working with coconut oil. It worked just like it should and I was rather impressed at how easy it was to make a large batch of chocolate hard shell topping for my ice cream at home - the secret is in the coconut oil - it hardens as it cools.

I have to say, though, that it got strange and mixed reviews from my guys - big and little, which made me laugh. Harry at first loved it, was great, then it was "blah" to him. Jeremy said it tasted like chocolate chips - um well, yeah, that's because that's what it is! But when Harry saw me give my "photo prop" serving to Daddy, he had a fit - so I think it wasn't as blah to him as he'd previously stated!! LOL! Me personally? I loved it - it tasted perfect to me and I was super giddy I could make as much as I wanted whenever I wanted! After chatting with Jeremy, I did decide it would be fun to try and experiment with different chocolates, maybe mix some milk with the semi-sweet chips or whatever, you could have fun combining and trying different chocolates for whatever tasted you're going for.

The method and recipe is so easy it's almost embarrassing, lol. Here it is:

12 oz package chocolate chips - about 2 cups
4 tbsp coconut oil
1/4 tsp salt

Combine all in a large microwavable bowl. Microwave on high, stirring every 30 seconds until melted and blended. . Let cool slightly, then spoon over ice cream or transfer to an airtight container and refrigerate up to 1 month.

For gift giving (and using directions even if not gifting!): Divide among jars and instruct the receivers to microwave the chocolate sauce, uncovered and stirring every 30 seconds, until melted.

That's it! It was scary simple for such a fun treat to be able to make at home, whenever you like for a fraction of the cost of the commercial variety!! 


Monday, December 28, 2015

Monday in Texas - Birthday Gifts


It is Monday, but I am writing to you from Texas,  rather Tracey from Michigan, because today is my birthday and I want to share the recipe for my all-time favorite birthday cake with you.

My mom was not much of a baker, but she did always make this cake for me on my birthday.  Mom has been gone nine years and I can't remember the last time that I made the cake myself.  With a daughter who is a pastry chef I have not gone without birthday sweets; they have just been different.  This year I decided to make my own cake and return to this childhood favorite, Chocolate Cinnamon Cake.

CHOCOLATE CINNAMON CAKE - THE RECIPE

THE CAKE
Mix in a large bowl:
     2 cups flour
     2 cups sugar
     1 tsp cinnamon

Melt in a saucepan:
     1 stick butter
     1/2 cup shortening
     1 cup water
     3 1/2 tsp cocoa
  Bring this mixture to a boil.  Add it to dry ingredients.

With a spoon mix in:
     2 eggs
     1 tsp vanilla
     1/2 cup buttermilk with 1 tsp baking soda mixed in.

Bake at 400 degrees for 40 minutes.

Let cool 30 minutes.

THE FROSTING
In a saucepan melt:
     1 stick butter
     1/3 cup regular milk
     3 TBS cocoa

Pour the above mixture over a box (3 1/2 cups) powdered sugar.  Mix until the sugar is incorporated.  Pour over the cake.

ENJOY!!!

And here is another treat!!!

Because it is my birthday and I believe it is just as much fun to give gifts as it is to receive, Tracey and , with the help of Katrina Kennedy at Capture Your 365, are giving away a premier membership to Capture Your 365 for 2016!  We want all of you to enjoy the community and friendships that are built by sharing a photo of your life every day with a community of like-minded people.  It doesn't matter whether this year will be your first time taking a photo a day or your 54th, it is a wonderful experience!  To see the details of what's included in the Capture Your 365 premier membership, click here.

All you have to do to enter for a chance to win is leave us a comment on this post telling us what you'd like to see here at Pixels, Plates, and LOLs in 2016.  Is there a recipe for a particular dish or ingredient that you are interested in?  Something you'd like to know about us?  Something about our photography process?  You name it.  Almost anything is fair game!

We will announce the winner on New Year's Eve at 11pm Central time.  Good luck and thanks for reading!!!


Monday, November 2, 2015

Food Friday - Pie in the Sky


"Pie in the Sky" is probably not the most honest title for this week's post.  It is actually pie in my belly.  This is one of my favorite pies so as soon as I got the photos taken I felt obliged to eat the model.

In our family, my oldest daughter and her dad (my ex-husband) have had an ongoing battle waging over who makes the best pumpkin pie.  His is the more traditional type, and hers is vegan.  They are both really good.  I am always amazed that the vegan pie is as good as it is.  In all honesty, I bet you wouldn't know that it was vegan unless you were told.  Because I am the non-competitive member of the family, I never joined in the pie battle.  I took a completely different route and always make a pie for the non-pumpkin pie eat that comes to dinner every now and then.

This recipe comes from The Pantry Restaurant in McKinney, Texas, a locally owned family business.  Their recipes are longtime family recipes that have been passed down through generations. Fortunately, they also published a cookbook with the recipe for this pie!

INGREDIENTS

2 eggs
1/2 Cup melted butter
1 Cup granulated sugar
1/2 Cup flour
1 1/2 tsp vanilla
1 Cup semi-sweet chocolate chips
1 Cup pecan pieces
1 10 inch pie shell

Mix eggs, butter, sugar, flour, and vanilla together.  Stir in chocolate chips and pecans.  Pour into the 10-inch pie shell.  Bake at 350 degrees for 55 minutes to an hour.  Serve topped with whipped cream or, if you are feeling really decadent, vanilla ice cream.

I usually melt the butter in a four-cup measuring cup and then mix all the ingredients in.  This makes it easy to pour the filling into the pie crust and it is easy clean up.  Only the measuring cup and a stirring spoon!  I also do not make my own crust for this one.  The pie itself is so rich that the taste of the crust is lost, so save the trouble of a homemade crust for that apple or peach pie!

On a side note, this is another in our "brown food series."   Again I say that brown food is really hard to photograph in an appealing way!


by Tracey G.


This recipe intrigued me, the fact that it's a colonial-era pie caught my attention. Add in the fact I love cranberries in just about any form and I'd never eaten them in the form of a pie, and I was really interested! The yummy ingredient list and the easy-factor sealed the deal for me.I think then next time I have some I'm going to heat it up and put a scoop of vanilla ice cream with it - yum!

I must thank Taste Of Home once again for the recipe and this venue for me having the reason to make this recipe! :-D 

Now, instead of making my own pastry for the pie, I just bought and used the refrigerated crust, made it super simple! But I've included the pastry recipe that came with the pie recipe :-)

And this was my first lattice topped pie - and it was so much easier than I thought it would be! I'd always said, nope, not doing that, that looks way too difficult, lol. Well, it's not and it sure looks pretty when you're done and it's baked! :-D


Cranberry Walnut Pie

Makes 8 Servings

1 pkg (12 oz) fresh or frozen cranberries, thawed
1 1/2 c packed brown sugar
1 c chopped walnuts
1/4 c butter, melted
4 1/2 tsp flour
2 tsp grated orange peel
Dash salt
Pastry for double crust pie (9-in.)

1) Preheat oven to 375° F. Place cranberries in a food processor; cover and process until finely chopped. Transfer to a large bowl; stir in brown sugar, walnuts, melted butter, flour, orange peel and salt.

2) On a lightly floured surface, roll one half of the pastry dough to 1/8-in. thick circle; transfer to a 9-in. pie plate. Trim pastry to 1/2-in. beyond rim of plate. Add filling.

3) Roll remaining dough to a 1/8-in. thick circle; cut into 1/2-in wide strips. Arrange over filling in a lattice pattern. Trim and seal strips to edge of bottom pastry; flute edge. Cover edges loosely with foil.

4) Bake 30 minutes. Remove foil; bake 20-25 minutes longer or until crust is golden brown and filling is bubbly. Cool on wire rack.


Pastry for 9-in double-crust pie:

2 /12 c flour
1/2 tsp salt
1 cup cold butter, cubed
1/3 - 2/3 c ice water

Combine the flour and the salt; cut in the butter until crumbly. Gradually add 1/3 to 2/3 cup ice water, tossing with a fork until dough holds together. Divide in half, shape into disks; wrap in plastic and refrigerate 1 hour.


Saturday, September 12, 2015

Food Friday - Black and White

from Kris B.


This is one of those recipes that brings back all kinds of memories for me.  It is one that my mom made all the time.  In fact, I still use the recipe card, written in her hand, that she gave me when I was in college thirty-five many year ago.


I didn't do much "real" cooking during my college days, but because Fudge Pie is so easy, I could make it as a weekend treat for my friends.  In fact, this is also known as "Pudge Pie" thanks to one of my roommates who, on one such occasion, made a slip of the tongue, one that this pie has never lived down!

Whether you know it as Fudge Pie or Pudge Pie, it is an incredibly rich slice of chocolate!  It only takes a small slice to satisfy the cravings of even the most ferocious chocoholic!


INGREDIENTS

1/4 pound butter
1 3/4 squares unsweetened chocolate
2 eggs
1 Cup sugar
1/4 Cup flour
1 tsp vanilla

Preheat oven to 350 degrees.

Melt the butter and chocolate in a double boiler.


Beat together the eggs, sugar and flour.  Add the vanilla. I usually mix this in a four cup measuring cup because it makes it so easy to then pour into the pie plate.


 Add the chocolate mixture to the egg mixture.  Stir well.

Pour into a greased 8 inch pie pan.  Bake for 25 minutes.

I apparently got distracted here at the end because I failed to photograph the last couple steps.  I suspect this goes back to my inability to multi-task.  While I was baking and photographing, I was also trying to get laundry done because we are going out of town this weekend, coordinate with a friend who I am meeting in the airport once we arrive in Philadelphia, and run down my packing list to make sure I haven't forgotten anything.  As long as I haven't packed any vanilla in more than a 3 oz. container or added sunscreen to the pie all should be well!


Thanks for taking the time to stop by a spend a few minutes with us!


By Tracey G


I was at a total loss this week. We discussed chocolate, and pie and the combination of the two, and all I was coming up blank. I told Kris no worries, I would come up with something to compliment what she had in mind. It was a busy week for the both of us, with her getting to escape for some fun out of town, and me dealing with Harry with an ear infection and the start of school this week ;-) And I am still far behind. *sigh* But, I did some flopping around at some recipe sites and found this one,  courtesy of Taste of Home, lol. One thing I do like when I am at a loss for a recipe out of my recipe library, is it pushes me to find and try something new - so I guess, my wins and my epic fails will be shared with everyone, lol. But that's ok, it's how it is in real life, some recipes you make for yourself or the fam are huge winners and some, are awful losers, lol. And you're generally stuck with them at the time good or bad, lol. I liked this one because it played off of Kris's Fudge Pie in the "opposite" sort of way. ;-)

Fortunately this one turned out pretty darn good. It was iffy there though at first, because my pudding-sweetened condensed milk-cold water mixture just didn't come together as I expected. And it never did really smooth out as I'd thought it would. Where the fault lies for that, I'm not sure. It was a different brand of pudding then I am used to using, normally it's the Jell-O brand, or it just could be a natural occurrence of using water and sweetened condensed milk in place of the normal cold milk that's used. I was kind of in a panic that this wasn't going to be good...or pretty or pretty good, lol. But in the end, even though it still has a slightly grainy look, it doesn't "taste" of feel grainy when it was eaten. ;-)

Unfortunately I have no process shots this week, lol. There really wasn't a lot to document and it was 9 p.m. at night when I was finally getting things done. It's been a heck of a week and my Friday was a blur of things going on, so by the time all was said and done, it was night when I was finally getting to work on it!


So, here's all the ingredients except for the water. It involves the ready-made graham tart shells, whipped topping, sweetened condensed milk and white chocolate instant pudding mix.

It's super easy to pull this together, which was a good thing considering I think I was half asleep when I was attempting this, lol. In a large bowl, you whisk the sweetened condensed milk, cold water and pudding mix for 2 minutes. You then let it stand a couple more minutes. Now you refrigerate it for 10 minutes.

At the end of the 10 minutes, you fold in the whipped topping, then, spoon the filling into the tart shells. Then you refrigerate until serving. Garnish as you'd like. I took my cue from the tart shell package with the raspberries and mint leaves. :-) I was just happy I still had some mint kicking around the flower garden, to complete the garnish!


White Chocolate Tarts 

courtesy of Taste of Home

1 14 oz can sweetened condensed milk
1 c cold water
1 3.4 oz package instant white chocolate pudding mix
2 c whipped topping
2 packages (6 count each, total of 12) individual graham cracker tart shells

In a large bowl , whisk the sweetened condensed milk, water and pudding mix for 2 minutes. Let set for 2 minutes or until soft-set. Cover and refrigerate for 10 minutes.

Fold in whipped topping. Spoon approximately 1/3 cup into each tart shell. Refrigerate until serving. Makes 12 servings.


Thursday, August 20, 2015

Food Friday - After School Snacks

from Kris B.


We all remember those days of getting home from school and rushing to the kitchen because we were starved.  A cookie or two and a glass of milk and then it was off to do homework while mom fixed dinner.  

School lunch schedules never seem to take into account the body's normal hunger patterns.  Lunch often happens way too early in the day, making for extremely long afternoons!  Even as an adult, I still get home from school in the afternoon's hungry.  The problem is that it is nearly 5:00 at that point and I am the one who has to fix dinner!  I often find myself say, "I'll just have a little something to eat before I start cooking."  Well, that often turns into more than "a little something" and by the time dinner is ready, I don't really want it.  This is a terribly bad cycle!

These Peanut Butter Snack Bites are just enough to curb the appetite and take the hunger edge away before fixing dinner.  They have some protein, carbohydrates, fruit, and some sweetness to boost what is for me the inevitable afternoon slump.  And, rather than the childhood favorite of an accompanying glass of milk, it is an afternoon cup of coffee.  Another dose of caffeine helps with the much needed pick-me-up as well.  These may not be the absolute healthiest afternoon snack, but they certainly aren't the worst, either!

INGREDIENTS

2 TBS butter
2/3 Cup natural peanut butter
1/4 Cup powdered sugar
3 TBS honey
1/2 tsp vanilla
1 1/2 Cups Rice Krispies
1 Cup quick cooking oats
*1/4 Cup mini chocolate chips
*1/4 raisins
1/4 Cup finely chopped, lightly salted peanuts


This recipe makes me thankful for my 1980's Tupperware measuring spoon set that has 1/4  and 1/3 measures.  Normally I don't like recipes that require every measuring device that I own, but because you have to work sort of quickly as far as mixing the ingredients, pre-measuring and lining up all of the ingredients works best here.

You probably all know this, but in case you don't, here is a tip that is helpful when using a couple of these ingredients.  To ens ure that you get the full measure of the honey and peanut butter, or any other ingredient that may stick to the sides of the measuring cup, coat the measuring cup or spoon with a light coating of cooking spray.  This allows the "clingy" ingredients to slide right out and none is lost or wasted by sticking.

Melt the butter in a medium saucepan.  Remove it from the heat and stir in the peanut butter, powdered sugar, honey, and vanilla.  Once these are well-mixed add the Rice Krispies and the oatmeal.  

Let the mixture cool completely and then add the raisins and the chocolate chips.


* Because nothing is simple at my house, I make two batches of these - one with only chocolate chips, and one with only raisins, using 1/2 cup of each.  Though I like chocolate covered raisins alone, I really don't care for chocolate and raisins in my cookies.  So I opt for just the chocolate.  Big surprise.  LOL!  My husband also like chocolate covered raisins, but doesn't want chocolate in his cookies, so his batch is made with only raisins.  Because these are so simple to make, doing it twice is no big deal.

Once cooled, shape the mixture into balls.  I use a small cookie scoop to maintain uniformity of size.  Roll each ball in the chopped peanuts.  


Makes about 24 balls.

Store in the refrigerator.

As an aside, Tracey and I often discuss when and how we are shooting these blog photos.  As you may have noticed, the lighting in my kitchen is TERRIBLE!  Tracey has said the same thing about hers as well.  We all know how important good light is to good photos.  We all also know that bad food photos are some of the worst bad photography there is!  These two things make shooting the photos for these posts super challenging for me.  It is forcing me to better my photography skills...at least I am hoping they are improving a little bit.  We remodeled our kitchen a few years ago, before i was addicted to photography, land long before I thought that I would ever engage in food photography.  If I had known then what I know now, I would have designed the kitchen layout to maximize the light for photos rather than for ease of cooking. LOL.  Hindsight is always 20/20!


 by Tracey G


These are one of my favorite treats - a snack that I think works for any time of day, they're not too sweet and nicely tangy and lemony - which for me works anytime. So, as an after-school snack, they're perfect! Maybe not a whole lot of nutritional value, lol, but they sure do taste good and make you smile - and that can be very important after a long day at school, in any grade or any level, whether student, teacher or parent! :-)

I've searched for years for one that I like, last one I had tasted too "eggy" to me, the lemon kind of got lost in all the egginess of the flavor. So, after a bit of searching around, I found this recipe, and with a few tweaks that made it mine and to get it just the way I liked it and wanted it, this is the result, and I couldn't be happier. And apparently neither could Harry because he's been eating way more of these than he ever did of the old recipe! :-D And they are so easy! I actually had everything on hand - usually there's a couple ingredients I need to pick up for whatever treat I'm making, but not this one. Had everything I needed and it came together quickly, longest parts were taking the photos and the cooling time before the dusting of powdered sugar and eating! LOL

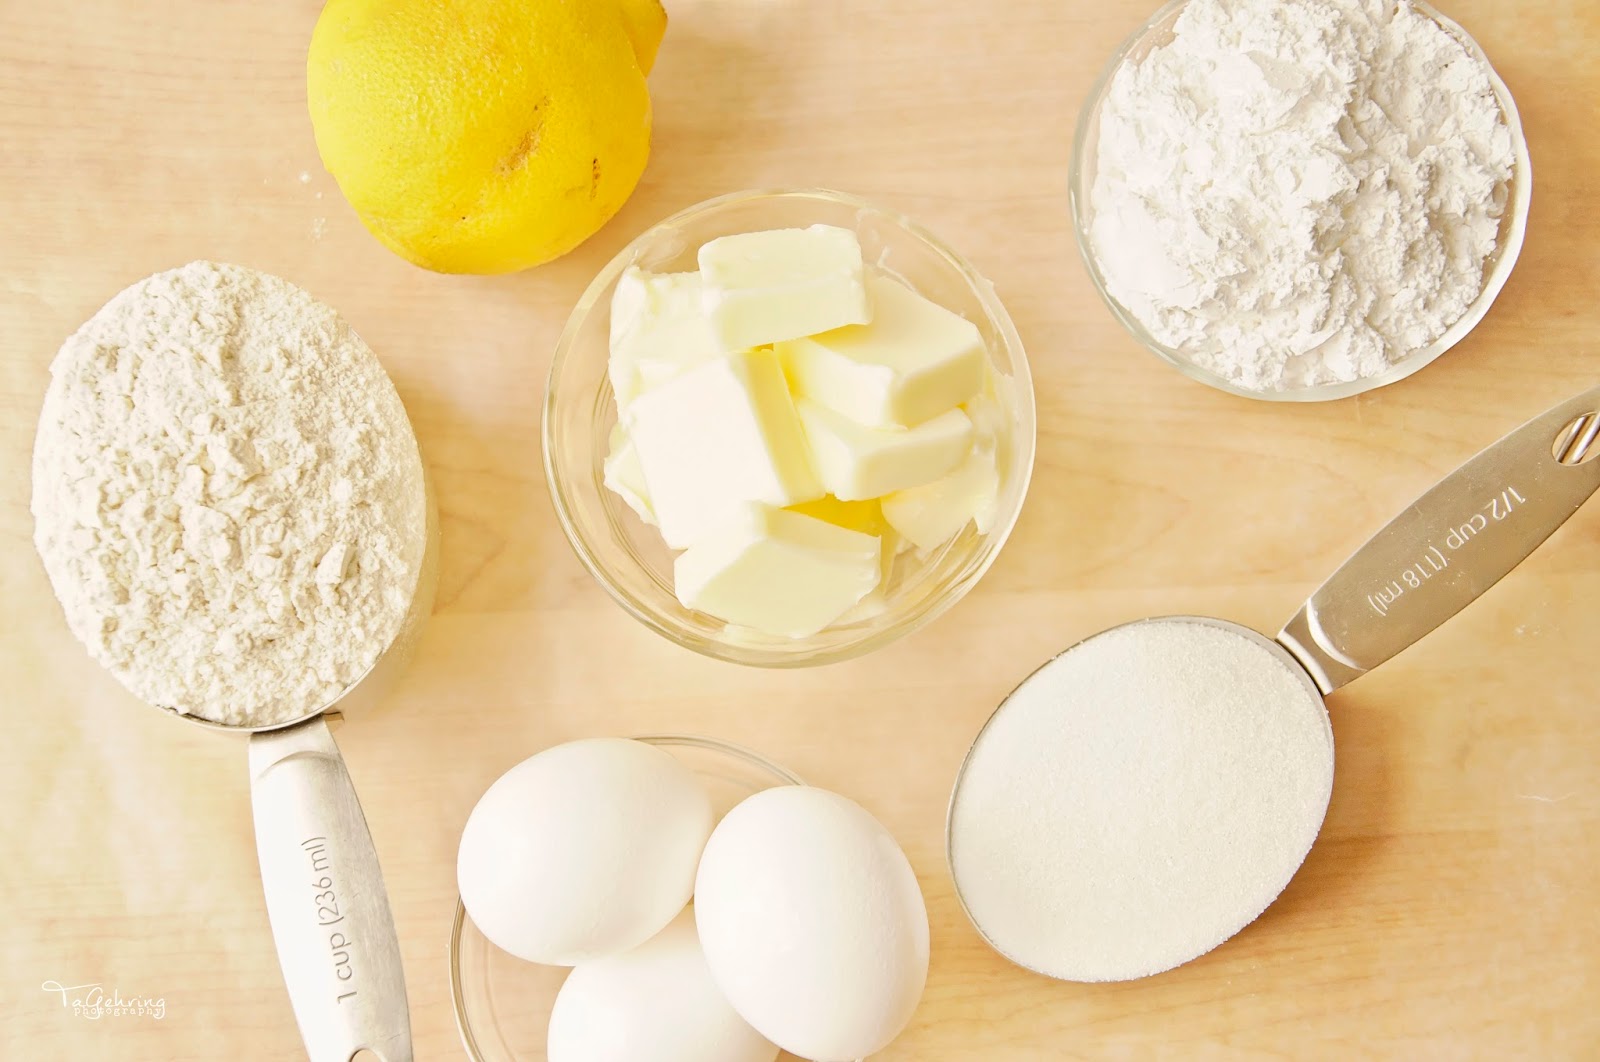
I actually got every ingredient  this time in the photo! LOL The players in this recipe are: flour, lemon juice and zest, powdered sugar, granulated sugar, eggs and butter. That's it. Pretty simple and even if I don't have fresh lemons on hand, which I pretty much always do, but I could even make it with bottled lemon juice and skip the zest. Not that I'd want to, but hey, if a craving hit - anything's in play and fair to use! ;-) 

Preheat the oven to 350°. In a bowl, beat the butter and powdered sugar...

...until smooth and well combined.

Gradually add in the flour until a soft dough forms. Press the dough in the bottom of a greased 9x13" baking pan. Bake 18-20 minutes or until lightly browned. 

Pour the egg mixture over the hot crust.

Bake 20-25 minutes or until lightly browned and lemon mixture is set. Cool completely on a wire rack, then dust with additional powdered sugar. Cut into squares and store the leftovers in the refrigerator - if there are any, lol.


Lovely Lemon Bars


3/4 c butter, softened
2/3 c powdered sugar
1 1/2 c + 3 tbsp all-purpose flour, divided
3 eggs
1 1/4 c sugar
1/3 c lemon juice
zest from one lemon (or more if you prefer!)
additional powdered sugar for dusting

 1) Preheat oven to 350°. In a large bowl, beat butter and powdered sugar until well blended and smooth. Gradually add in 1-1/2 cups flour. Press into the bottom of a greased 9x13 inch baking pan. Bake 18-20 minutes or until crust is golden brown.

2) Meanwhile, in a small to medium sized bowl, whisk eggs, granulated sugar, flour, lemon juice and lemon zest until frothy. Pour over hot crust.

3) Bake 20-25 minutes or until lightly browned and lemon mixture is set. Cool completely on wire rack, dust with additional powdered sugar. Cut into squares. Yield is about 4 dozen. 


Friday, July 10, 2015

Food Friday - Hitting' the Bars!

from Kris B.

In the adapted words of Robert Burns, "The best laid plans of mice and men (or women) may often go awry..."  And did they ever for me this week!   Knowing that we were leaving on Wednesday fro a nearly two week vacation, I told Tracey that I would get my post for today done before we left.  And, I almost did, sort of.  Here is where the plans went awry...

I decided that I would make an old recipe of my mom's for a dessert bar that she called "Hello Dollies."  I have no idea why they have that name.  My choice for  making these was two-fold: 1.  They are good and easy so would not take a great deal of time away from my vacation preparations and 2. We would have a treat to pack and bring along with us.  It seemed like a win-win situation.

I did make the Hello Dollies early in the week and got all of the photos taken.  Literally at the eleventh hour before we were to leave, I was packing them in a to-go container and realized that we did not have room for it in our carry-on luggage, so I ditched the idea of bringing them along.  The only picture that I had not taken at this point was the final plated photo.  I had thought that I would shoot that once we got to North Carolina.  So, I quickly took a few shots with my phone.  I had all the shots I had taken earlier in the day.  I was good to go, even if that last photo wasn't the greatest.

At 35,000 feet somewhere between Dallas and Charlotte, I realized that I had left the SD card with all of the photos that I needed in my computer at home.  The last thing I did the night before we left was take a picture of the final item to be packed, my camera.  And then I took the card out and uploaded that photo.  I had gotten two new SD cards for the trip, so I didn't worry about putting the "used" card back in my bag. And my phone shots are TERRIBLE!   So here I am with no food photos for today's recipe.  LOL!

I will, however, share the recipe.

HELLO DOLLIES (an old recipe from my mom)

11 stick butter
 Cup crushed saltine crackers (about 25 crackers)
1 Cup shredded coconut
1 Cup chocolate chips
1 Cup chopped pecans
1 can sweetened condensed milk

Preheat oven to 350 degrees.

Melt the butter in a 9x13 glass baking dish.  Mix in the crushed crackers and spread evenly along the bottom to make a "crust."  Layer the coconut, then the chocolate chips, and finally the pecans, evenly on the only over cracker mixture.  Pour the entire can of sweetened condensed milk evenly over the top.  Bake for 30 minutes.  

Allow the bars to cool completely and then cut into 1 inch squares.  Refrigerating the pan will make it easier to cut the bars.

Cheers!


by Tracey G


There's a funny story connected to the first time I ever made these bars, lol, well, it is to me anyway, lol. It was back in early 2000's I think, and I'd made this recipe for a fundraiser. The fundraiser was for a local man, who was also a local businessman and friend, not close friend, but in a small town like mine, everyone knows everyone, lol. He'd been diagnosed with some kind of health issue, so the community set up a few things for fundraising to take place on a Saturday at the local pub/restaurant that everyone went to for fun in the evenings and it was the hopping place during the business day for lunch :-) So, I'd found this recipe and thought it sounded like a perfect bake sale kind of thing. The night before, I made a batch and put them in these really nice foil tins and left them on the kitchen island as they would be dropped off the next morning before the bake sale began.

At this time my mom lived with me, I'd moved her in a few years before as it was just more financially feasible for all of us - it was a win-win kind of thing, and she was so busy and active in the local Eagles club and the daytime bartender there, she was never home. Was more like having a teenager around than my mom, lol. Anyway, I got up Saturday morning, the day of the bake sale, and find that the tins had been rifled through. Apparently my mom saw treats and helped herself, lol. I was so mad (at the time, now it's funny, lol)! I can't remember now just what she'd taken, but I know it was enough that I had to go out, buy more ingredients and make another batch in a hurry, because I had to have them there by like noon or something. I get the next batch made, and while they were still warm, I put them in more tins and got them to the bake sale. One of my dearest friends was then an owner of the place, and worked there too, so it was her I delivered them to. I dropped them off, and then went back home to get ready to go back for the fundraising festivities. When I get back there, my friend tells me they never made it to the bake sale table - the employees bought them on the spot when I brought them in since they were still warm, lol. They had my mom to thank for that ;-) Ah good times, good times, lol.

So, every time I make a batch of these, I am reminded of that day ;-)

They're really easy to make too, and that makes me happy, I'm always all in for something easy to make!

The ingredient list is easy, and I think I remembered to get them all into the shot this time! Yay me! LOL It's simple stuff: oatmeal, flour, brown sugar, vegetable shortening, chocolate chips, butterscotch chips, vanilla, molasses, eggs, baking soda and salt. The only things I don't always have around, and needed to pick up for the recipe, are the molasses and the butterscotch chips. The butterscotch chips are a recipe modification I made - just a couple handfuls and it really added something to it. :-)

The first thing you do, is beat the brown sugar and shortening until light and fluffy. I'll admit, every time I make these, I wonder if that will happen, as in the very first stages of mixing, that looks like an impossible feat, lol. But as you can see, it does happen! :-) While that's doing it's thing, getting fluffy and all, I take that time to grease my 9x13" pan.

Next step is to mix in the dry ingredients. I dumped the brown sugar/shortening mixture into a bit of  a larger bowl as I knew that my mixer bowl was not going to be quite big enough to mix in everything neatly, lol. And it's a snap to stir in the flour, oatmeal (I combine the oatmeal, flour, salt and baking soda in a bowl beforehand for easy mixing), salt, baking soda and baking chips.

Once everything is mixed together thoroughly, spread it in the pan evenly. 


Bake at 350° F for 20-25 minutes or until the middle is set. I think it took 35 minutes for me today. You can cool them slightly and cut into bars, or you can let them cool completely. They're pretty gooey when they come out, which is good too, lol, and they set up more the longer they sit. And that's it :-) They are simple and yummy and I consider them "healthy" since there's oatmeal - well, that's what I tell myself anyway, lol. ;-)


Oatmeal Chocolate Chip Bars

makes approximately 48 bars

 1 1/2 c firmly packed brown sugar
1 c shortening
2 tbsp molasses
2 tsp vanilla
2 eggs
3 c quick cooking rolled oats
1 c flour
1 tsp baking soda
1 tsp salt
3/4 c chopped nuts (optional)
1 12 oz. package chocolate chips
butterscotch chips, about 2 handfuls (approximately half a 12 oz package)

1) Grease either a 9x13" pan or 15x10x1" pan.

2) In a large bowl, beat brown sugar and shortening until light and fluffy. Add molasses, vanilla and eggs; blend well.

3) Stir in oats, flour, baking soda and salt; blend well. Stir in nuts, chocolate chips and butterscotch chips.


4) Spread in greased pan. Bake 20-25 min or until light golden brown and center is set. Cool slightly. Cut into bars. Serve warm or cool.