Showing posts with label cereal. Show all posts

Saturday, June 25, 2016

Food Friday - Breakfast or Dessert!

From Tracey G.


This is one of those recipes I am so glad I ran across and so glad I tried! I absolutely love it and have since realized the base batter would take blueberries really well too! That was Harry's idea, he doesn't like raspberries much because of the seeds, admittedly I am not a seed fan either, but I love raspberries too much to let it stop me! (But I do buy seedless jams when I have that option!) I think just about any berry would work really lovely in this now that I stop to think past raspberries and blueberries.

It does call for almond milk, and the first time I made these I happened to have some around and have had it around since because I really do like the stuff. But I suppose if you don't have it, regular milk or skim would work well too. It's worth a try anyway!

I originally made these to use up some frozen raspberries I had on hand and some ricotta cheese I had left-over from another recipe I'd made. It's so nice when something like that happens, and you end up with a lovely product to show for it!

There's really not too much to say about the recipe. It initially sounds like a bit of work, but it's really not and does come together rather easily. The only thing sort of time consuming is whipping the egg whites up, first time I did it by hand, lol, I now make that aspect of it in the stand mixer, just to save some time - they're whisking up while I'm getting the rest of the stuff going.

This is another recipe I found courtesy of Taste Of Home in one of my magazines!

Lemon-Raspberry Ricotta Pancakes


Yield: about 24

1 1/2 cups cake flour or all-purpose (I've only used all-purpose)
1/4 sugar
2 tsp baking powder
1/4 tsp salt
1/4 tsp ground cinnamon
1 cup unsweetened almond milk (I used unsweetened vanilla flavored)
1 cup part-skim ricotta cheese
3 large eggs, separated
2 tsp grated lemon peel
3 tbsp lemon juice
1 tsp almond extract
1 cup fresh or frozen raspberries (I've only used frozen)
Whipped cream, maple syrup and additional raspberries

1) In a large bowl, whisk flour, sugar, baking powder, salt and cinnamon. In another bowl, whisk the almond milk, ricotta cheese, egg yolks, lemon peel, lemon juice and almond extract until blended. Add to dry ingredients, stirring just until moistened . In a clean small bowl, beat egg whites until stiff but not dry. Fold into batter. Gently stir in raspberries.

2) Lightly grease a griddle;  heat over medium heat. Pour batter by 1/4 cupfuls onto griddle. Cook until bubbles on top begin to pop and bottoms are golden brown. Turn; cook until second side is golden brown. Serve with whipped cream, syrup and additional raspberries.

Nutritional Facts - 3 pancakes (calculated without toppings): 203 calories; 5g fat (2g saturated fat); 79 mg cholesterol; 254mg sodium; 31g carbohydrates (7g sugars, 2g fiber); 8g protein


from Kris B.


Hands down, breakfast is my favorite meal.  I'm not always fond of mornings, but breakfast food of any kind always makes me happy.  During the school year, however, I am a creature of habit - vanilla yogurt topped with cheerios and blueberries, a banana, and the obligatory cup (or two) of coffee every morning.  Now that it is summer, our morning routine is a bit less structured.  Translation: I am not teaching any 7:30 am classes so I am more coherent and creative when it comes to fixing and eating breakfast.   And now that my hubby is retired, breakfast may have more variety even when I go back to school in the fall!  That is exciting.

The best thing about summer eating in general is all of the fresh veggies and fruit.  It all looks so good at the market.  I was trying to think of a good way to use all the fruit I have in a creative breakfast, without just making a fruit bowl as a side.  When my kids were little, I used to make "fruit pizza" - sugar cookie dough, vanilla frosting, and fruit topping.  I decided that I wanted a variation on that that didn't begin with a cookie base.  Don't get me wrong; sadly, I would be perfectly happy to eat cookies for breakfast, but neither the scale or my waistline would be very happy with that choice. Lol!  I searched for a recipe that had a healthier "crust."  I found one that is perfect!  It is created from cereal and rolled oats.  The "sauce" is cream cheese and powdered sugar.  The toppings are the fruit of your choice.

This is probably not the recipe I should have chosen to share this week.  I week ago, while dicing figs for a fig compote,  in addition to cutting the figs, I also sliced my finger, which required a few stitches.  Because of this unfortunate encounter with my knife, I am not allowed to use knives at the moment. :-)  As you can tell, there is quite a bit of sliced fruit used here.  Since my husband placed the moratorium on knife use, at least for me, he got to slice all of the fruit.  I am glad that he was willing to help.

Whether it is scrambled eggs, pancakes, oatmeal, or fruit tart, I will eat breakfast foods any time of day for any meal.  This fruit tart is no exception!  And like the sugar cookie fruit pizzas that I made for my girls, this also makes a fantastic snack or dessert as well!

INGREDIENTS
For the base
1 Cup breakfast cereal with flakes (I used vanilla-almond Special K.)
1 Cup rolled oats
1 Cup sweetened coconut
3/4 Cup honey or maple syrup  (( used honey.)

For the "sauce"
8 oz. cream cheese
3/4 Cup powdered sugar
1 tsp vanilla (or other extract, starting with 1/2 tsp and working to taste)

For the topping
Fruit of your choice (I used strawberries, kiwi, blueberries, peaches, and banana

Preheat oven to 375 degrees.

Grease a 9 inch tart pan with cooking spray and set aside.  *Do use cooking spray rather than butter because the tart is refrigerated before serving.  If you use butter, it will harden and the tart will be difficult to remove from the pan.

Use a rolling pin to crush the cereal into crumbs.  mix them with the oatmeal, coconut, and honey or syrup.  Press this mixture into the prepared tart pan.  Bake for 10 minutes.  Cool completely before adding the next two layers.


Using a mixer, combine the cream cheese, powdered sugar and extract.

Once the crust is cooled, spread the cream cheese mixture on top.  Refrigerate for 10-15 minutes.

While the crust and cream cheese chill, slice the desired fruits.  Remove the pan from the refrigerator and arrange the fruit on top, pushing it gently into the cream cheese mixture.  Return the completed tart to the fridge for about 30 minutes.

To serve, remove rim from the tart pan and slice into ten pieces.

Nutritional Facts : 270 calories; 6.3g fat (4.1g saturated fat); 10mg cholesterol; 144mg sodium; 52g carbohydrates (38g sugars, 2g fiber); 3.9g protein


***I also can't type very well with the stitches in my finger, so I apologize for any typos here!


Saturday, October 10, 2015

Food Friday - Halloween Treats

from Tracey G.


When I saw this recipe, I knew I had to make it - I've had the darn thing for a couple years now and I'd yet to make it - until now. Yeah! Finally!  The dip tastes just like pumpkin pie - it's so yummy! And the pie crust dippers are perfect with it, only next time I think I'd do something a little "stronger" to dip - the cats legs kept breaking off and the tails barely made it off the cookie sheets, lol. Maybe pumpkin cut outs or ghosts or something - but the cats are pretty darn cute, lol. Another good thing about this recipe is it's holiday-versatile, lol. I mean, you could make it around Thanksgiving, using leaf cookie cutters in place of the Halloween themed cutters. Just tint the egg wash the appropriate color for the leaves and you're all set. :-)

This was a pretty easy recipe to execute - which was really nice! Would be a good last minute thing to throw together - I had everything on hand that I needed. I always have pumpkin puree in the freezer (canned is called for in the recipe though, but I always make my own every fall and freeze it), the pie crusts are usually in the freezer and the cream cheese is usually in the fridge, lol. So, this was an easy throw-together for me! :-)

Here's the filling ingredients - Honey, pumpkin pie spice, cream cheese, pumpkin and powdered sugar. I also make my own pumpkin pie spice as well, and that's super easy too - I'll include my recipe in this post as well. :-)

In a large bowl, beat the cream cheese until fluffy (this is not the bowl I beat it in, lol, this is the one I used to store it in the fridge in while the dippers were baking). Add the pumpkin, honey, powdered sugar and pumpkin pie spice.

The dipper ingredients are cinnamon, granulated sugar, milk, refrigerated pie crusts, an egg and black paste food coloring (I used the new Wilton Color Right system Black color). 

Roll out the dough directly on the cookie sheet to 1/8-in thickness...

Cut out the dippers leaving about an inch in between them, just peel the excess dough from between them - you can re-roll the scraps too if you'd like, I did. 

Beat the egg, add milk and food color. Mix the cinnamon with the sugar and set aside. Brush the colored egg mixture over the cats, then sprinkle with some cinnamon sugar. 

Bake at 400°F for 6-7 minutes, or until edges begin to brown. Cook on wire racks. Serve with pumpkin dip!


Pumpkin Pie Dip with Black Cat Dippers

courtesy of Taste of Home

1 8 oz. package cream cheese, softened
1 15 oz. can solid-pack pumpkin
1 cup powdered sugar
1 tbsp pumpkin pie spice
1 tbsp honey

Dippers:
1 pkg (15 oz.) refrigerated pie pastry
1 egg
1 tbsp milk
black paste food coloring
1/4 c granulated sugar
1/2 tsp ground cinnamon

1) In a large bowl, beat cream cheese until fluffy. Add the pumpkin, pumpkin pie spice, honey and powdered sugar; mix until smooth.  Cover and refrigerate until serving.

2) Roll out each pastry sheet directly on an ungreased cookie sheet to 1/8-in. thickness. Cut with floured 2-in. cookie cutter, leaving at least 1 inch in between cutouts. Remove excess dough, and re-roll scraps if desired. Beat the egg with the milk and food coloring; brush over cut outs. Combine the cinnamon and sugar and sprinkle over cutouts.

3) Bake at 400°F for 6-7 minutes or until edges begin to brown. Cool on wire racks. Serve pumpkin dip.

Pumpkin Pie Spice:
Makes about 7 1/2 tsp

4 tsp cinnamon
2 tsp ground ginger
1 tsp ground cloves
1/2 tsp ground nutmeg

Mix all together and store in an airtight container. I have made it before without using ginger and I've also added a bit more clove - because I love clove, lol. Feel free to add or subtract whatever to suit your tastes :-) 


from Kris B.


All I can say is that it is a good thing that Tracey titled this week’s post because if I had done it, it would have been “the agony of defeat.”  LOL!  First of all, time got away from me and I found myself scrambling to get things done at the end of the week.  I had everything planned out, but the execution certainly did not work according to that plan.  That I can actually cope with since I have on ongoing struggle with time management.  And time whoops me in every battle!

The second defeat was in the recipe itself.  Looking back, this is because I didn’t trust my own instincts.

So here’s the story…

A few Sunday’s ago at church, someone had made for coffee hour the good, old fashioned, remind you of your childhood, Rice Krispie treats.  Weber had one and commented as to he couldn’t remember when he had last had one and that he really liked them.  That afternoon, I made a batch of the tried and true off -the-box recipe for us to take in our lunches that week.  When Tracey and I started talking about Halloween treats, I had the idea to just add pumpkin spices to the original Rice Krispie Treats recipe to give them a little festive spirit.  

Knowing that virtually no ideas are really original, I turned to the Internet to see what had been done along these lines.  Of course I discovered that my thoughts were not original; no surprise there.  LOL!  What I did find, is that several recipes added pumpkin purée.  Though I was hesitant about that, I read this blog where the writer chronicled her own process of trying to create pumpkin Rice Krispie treats.  She told of several failed attempts, but finally, by paying careful attention to the cooling process of the marshmallow and pumpkin mixture, was successful.  Being that she had gone through the trial and error, I decided to follow her recipe, with full disclosure.  

Here it is:
Pumpkin Spice Rice Krispie Treats
serves 12
3 tablespoons unsalted butter
1/4 cup canned pumpkin puree
1 (10 ounce) bag mini marshmallows plus one cup
1/4 teaspoon pure vanilla extract
1/4 teaspoon ground cinnamon
Pinch of allspice
Pinch of freshly grated nutmeg
Pinch of kosher salt
6 cups crispy rice cereal
 Butter a 9x13-inch baking dish (or a smaller dish — see Note below).
 In a heavy saucepan or Dutch oven, melt butter over medium-low heat. Add the pumpkin puree and continue to cook until it is warmed through. Fold in 10 ounces of the marshmallows, stirring frequently until almost completely melted. 
Stir in vanilla, cinnamon, allspice, nutmeg, and salt, and remove from heat. 
Allow the marshmallow mixture to cool 10 minutes; fold in the remaining cup of marshmallows.
 Continue to cool the mixture for another 20 to 25 minutes until it is room temperature (failure to cool the mixture will result in soggy rice crispy treats.) Add the puffed rice cereal and stir, using a silicone spatula, until combined. 
Press the mixture into the greased rectangular baking dish. Let set for 30 minutes before cutting and serving.
 • Note: I call for a 9x13-inch dish here, but I often use an 8x11-inch because I like taller treats. Any size in this range should do.

I'll admit that when it comes to cooking I do not always measure ingredients exactly, nor to I always follow suggested timing for things.  I have learned to adjust for me own taste and the quirks of my own oven.  That said, I followed this recipe exactly because I knew that there was a fine line between success and failure.  I actually set a timer for the two different cooling periods.  All seemed well.

After allowing the pan to fully cool, I gave Weber the first square.  His comment, "The flavor is really good, but the Rice Krispies are tough."  Ooh.  Not a good thing.  I tasted them.  He was right, the flavor is good.  What he described as "tough" was actually soggy, masked by the stickiness of the marshmallow mixture.  So, they tasted good, but didn't feel good in your mouth, especially since we all know what Rice Krispie Treats are supposed to taste like both in flavor and texture.

So what did I learn?  I am not one who thinks that I know everything.  I'm far from that.  But, in this case, I knew that the added liquid from the pumpkin purée would change the science of this recipe and I should have followed my initial instinct to only add the pumpkin pie spices.  And honestly, the pumpkin purée adds no additional flavor.  So, if you want to make Pumpkin Spice Rice Krispie treats, skip the "bad guy,"


and follow the basic recipe on the cereal box, 

1. Melt 3 TBS of butter in a heavy sauce pan over low heat.  Add the marshmallows, stirring until completely melted.
 and add 1/4 tsp of cinnamon and a dash of nutmeg and allspice to taste, to the marshmallow mixture.   
2. Stir in 6 Cups of Rice Krispies.
3. Using a buttered spatula, spread the mixture into a buttered 9x15 pan, or a smaller pan for thicker treats.  Let cool completely and then cut into squares. 

Most often the "KISS" method (Keep It Simple Stupid) is best.  Lesson learned.  LOL!

So there you have it, my story of being defeated by Rice Krispie Treats.  If any of you choose to take on the pumpkin puree in this arena, I'd love to know your secrets!


Thursday, August 20, 2015

Food Friday - After School Snacks

from Kris B.


We all remember those days of getting home from school and rushing to the kitchen because we were starved.  A cookie or two and a glass of milk and then it was off to do homework while mom fixed dinner.  

School lunch schedules never seem to take into account the body's normal hunger patterns.  Lunch often happens way too early in the day, making for extremely long afternoons!  Even as an adult, I still get home from school in the afternoon's hungry.  The problem is that it is nearly 5:00 at that point and I am the one who has to fix dinner!  I often find myself say, "I'll just have a little something to eat before I start cooking."  Well, that often turns into more than "a little something" and by the time dinner is ready, I don't really want it.  This is a terribly bad cycle!

These Peanut Butter Snack Bites are just enough to curb the appetite and take the hunger edge away before fixing dinner.  They have some protein, carbohydrates, fruit, and some sweetness to boost what is for me the inevitable afternoon slump.  And, rather than the childhood favorite of an accompanying glass of milk, it is an afternoon cup of coffee.  Another dose of caffeine helps with the much needed pick-me-up as well.  These may not be the absolute healthiest afternoon snack, but they certainly aren't the worst, either!

INGREDIENTS

2 TBS butter
2/3 Cup natural peanut butter
1/4 Cup powdered sugar
3 TBS honey
1/2 tsp vanilla
1 1/2 Cups Rice Krispies
1 Cup quick cooking oats
*1/4 Cup mini chocolate chips
*1/4 raisins
1/4 Cup finely chopped, lightly salted peanuts


This recipe makes me thankful for my 1980's Tupperware measuring spoon set that has 1/4  and 1/3 measures.  Normally I don't like recipes that require every measuring device that I own, but because you have to work sort of quickly as far as mixing the ingredients, pre-measuring and lining up all of the ingredients works best here.

You probably all know this, but in case you don't, here is a tip that is helpful when using a couple of these ingredients.  To ens ure that you get the full measure of the honey and peanut butter, or any other ingredient that may stick to the sides of the measuring cup, coat the measuring cup or spoon with a light coating of cooking spray.  This allows the "clingy" ingredients to slide right out and none is lost or wasted by sticking.

Melt the butter in a medium saucepan.  Remove it from the heat and stir in the peanut butter, powdered sugar, honey, and vanilla.  Once these are well-mixed add the Rice Krispies and the oatmeal.  

Let the mixture cool completely and then add the raisins and the chocolate chips.


* Because nothing is simple at my house, I make two batches of these - one with only chocolate chips, and one with only raisins, using 1/2 cup of each.  Though I like chocolate covered raisins alone, I really don't care for chocolate and raisins in my cookies.  So I opt for just the chocolate.  Big surprise.  LOL!  My husband also like chocolate covered raisins, but doesn't want chocolate in his cookies, so his batch is made with only raisins.  Because these are so simple to make, doing it twice is no big deal.

Once cooled, shape the mixture into balls.  I use a small cookie scoop to maintain uniformity of size.  Roll each ball in the chopped peanuts.  


Makes about 24 balls.

Store in the refrigerator.

As an aside, Tracey and I often discuss when and how we are shooting these blog photos.  As you may have noticed, the lighting in my kitchen is TERRIBLE!  Tracey has said the same thing about hers as well.  We all know how important good light is to good photos.  We all also know that bad food photos are some of the worst bad photography there is!  These two things make shooting the photos for these posts super challenging for me.  It is forcing me to better my photography skills...at least I am hoping they are improving a little bit.  We remodeled our kitchen a few years ago, before i was addicted to photography, land long before I thought that I would ever engage in food photography.  If I had known then what I know now, I would have designed the kitchen layout to maximize the light for photos rather than for ease of cooking. LOL.  Hindsight is always 20/20!


 by Tracey G


These are one of my favorite treats - a snack that I think works for any time of day, they're not too sweet and nicely tangy and lemony - which for me works anytime. So, as an after-school snack, they're perfect! Maybe not a whole lot of nutritional value, lol, but they sure do taste good and make you smile - and that can be very important after a long day at school, in any grade or any level, whether student, teacher or parent! :-)

I've searched for years for one that I like, last one I had tasted too "eggy" to me, the lemon kind of got lost in all the egginess of the flavor. So, after a bit of searching around, I found this recipe, and with a few tweaks that made it mine and to get it just the way I liked it and wanted it, this is the result, and I couldn't be happier. And apparently neither could Harry because he's been eating way more of these than he ever did of the old recipe! :-D And they are so easy! I actually had everything on hand - usually there's a couple ingredients I need to pick up for whatever treat I'm making, but not this one. Had everything I needed and it came together quickly, longest parts were taking the photos and the cooling time before the dusting of powdered sugar and eating! LOL

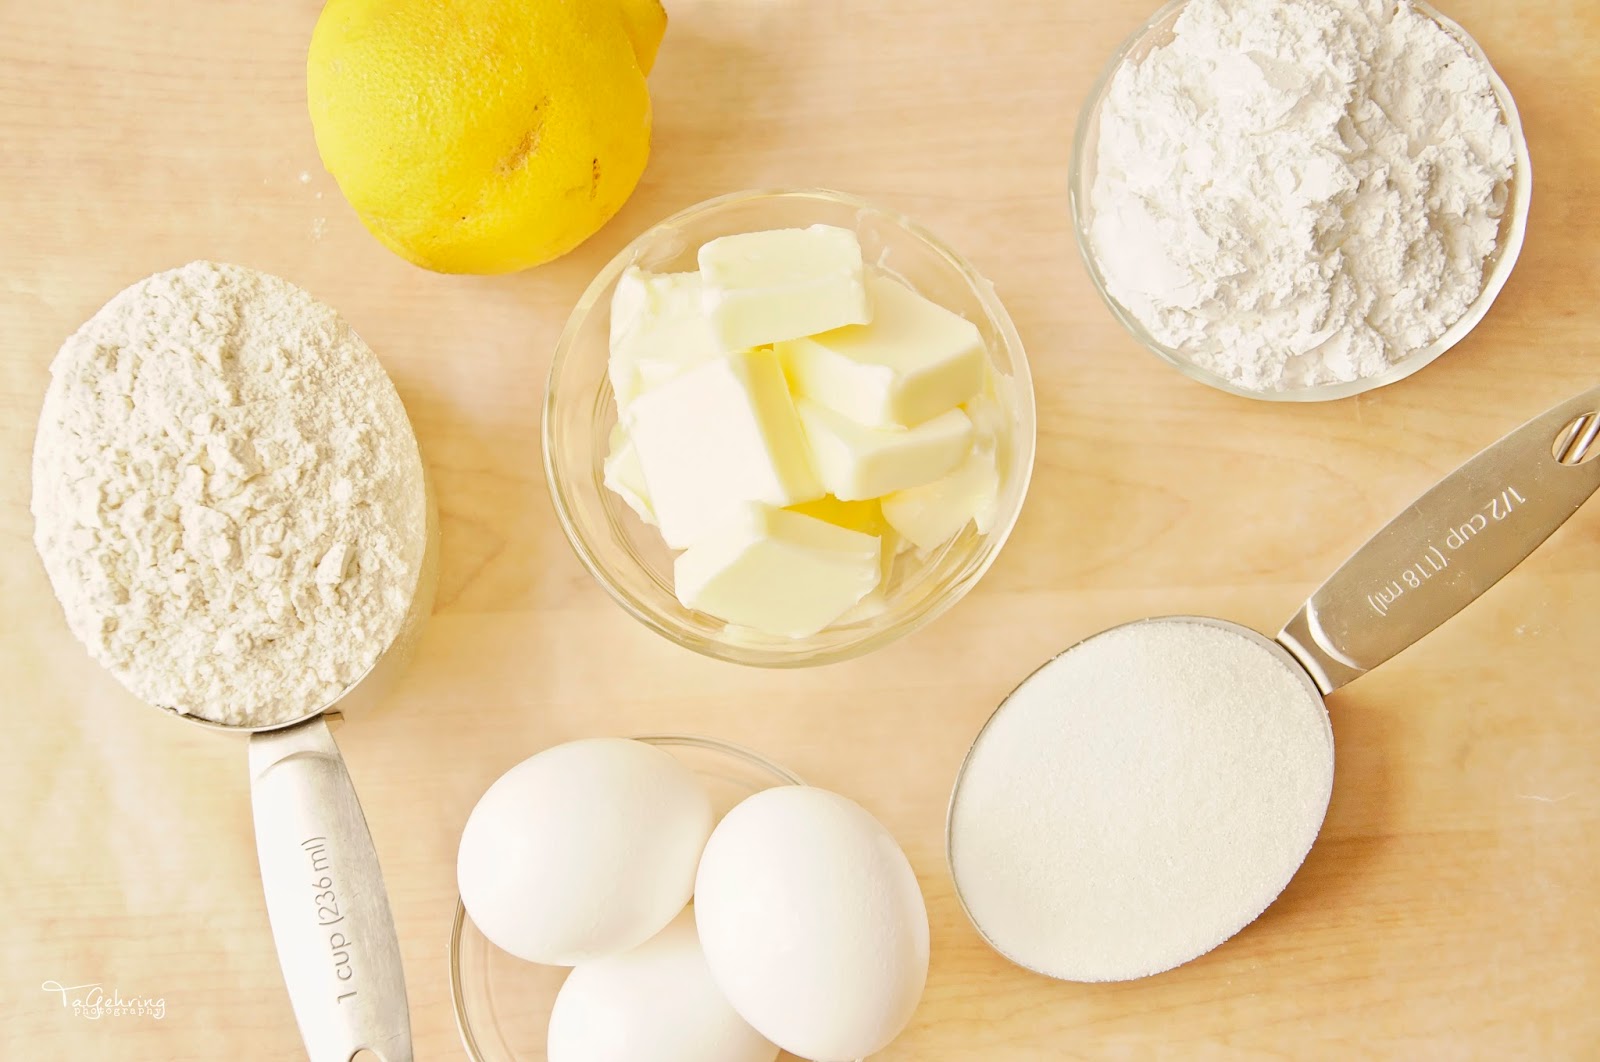
I actually got every ingredient  this time in the photo! LOL The players in this recipe are: flour, lemon juice and zest, powdered sugar, granulated sugar, eggs and butter. That's it. Pretty simple and even if I don't have fresh lemons on hand, which I pretty much always do, but I could even make it with bottled lemon juice and skip the zest. Not that I'd want to, but hey, if a craving hit - anything's in play and fair to use! ;-) 

Preheat the oven to 350°. In a bowl, beat the butter and powdered sugar...

...until smooth and well combined.

Gradually add in the flour until a soft dough forms. Press the dough in the bottom of a greased 9x13" baking pan. Bake 18-20 minutes or until lightly browned. 

Pour the egg mixture over the hot crust.

Bake 20-25 minutes or until lightly browned and lemon mixture is set. Cool completely on a wire rack, then dust with additional powdered sugar. Cut into squares and store the leftovers in the refrigerator - if there are any, lol.


Lovely Lemon Bars


3/4 c butter, softened
2/3 c powdered sugar
1 1/2 c + 3 tbsp all-purpose flour, divided
3 eggs
1 1/4 c sugar
1/3 c lemon juice
zest from one lemon (or more if you prefer!)
additional powdered sugar for dusting

 1) Preheat oven to 350°. In a large bowl, beat butter and powdered sugar until well blended and smooth. Gradually add in 1-1/2 cups flour. Press into the bottom of a greased 9x13 inch baking pan. Bake 18-20 minutes or until crust is golden brown.

2) Meanwhile, in a small to medium sized bowl, whisk eggs, granulated sugar, flour, lemon juice and lemon zest until frothy. Pour over hot crust.

3) Bake 20-25 minutes or until lightly browned and lemon mixture is set. Cool completely on wire rack, dust with additional powdered sugar. Cut into squares. Yield is about 4 dozen.