Friday, July 31, 2015

Food Friday - Dinner on the Grill


July 31st!  All of the sudden the summer seems to be speeding by.  Soon it will be back to school and the freedom of our summer schedules will disappear.Tracey is enjoying some time away with her in-laws this week, so it is my turn to go it alone.  She and Harry have done a little back to school clothes shopping, but otherwise I think that they are trying to squeeze a little more fun and adventure into these last few weeks of their summer break and not think too much about the fast approaching beginning to a new school year.  

I am grateful that Tracey and I have an easy going relationship, one that allows us to work well together through the ebbing and flowing of our lives.  For me, this is a big deal.  I have never really been a fan of group projects because it always seems the work is never evenly distributed and I end up doing way more than my fair share.  That is certainly not the case with us.  Tracey has restored my faith in working with others. It is nice to have a project that you enjoy and the opportunity pursue with someone who is truly a joy to work with!  I have missed our conversations this week, but I am glad that Tracey and Harry had have this time with Grandma and Grandpa.

And now on to food...

I am still on my outdoor cooking kick.  This may be because we are about to have some major landscaping done at our house and I am trying to justify including a small outdoor kitchen in the plan.  Or, it may just be that it is easier and burgers taste better when they are grilled.  Whatever the case, this week's recipe is an open faced grilled burger topped with creamed spinach.  This recipe is adapted from one in the current issue of Cuisine at Home magazine.  

Creamed Spinach
2 TBS butter
1/4 Cup minced onion
2 TBS flour
1/2 Cup milk (I used 2%)
1/2 Cup low sodium chicken broth
Salt, pepper, ground nutmeg, and cayenne pepper to taste.  I probably used a 1/2 tsp of each, maybe?  I'm not sure.  Focus here on the "to taste" part of the instructions.
4 Cups rough cut spinach
1/4 Cup of grated Parmesan cheese
1 tsp lemon juice

Melt the butter in a saucepan.  Add the onion and cook until it is translucent.  Stir in the flour and cook for a minute.  Whisk in the milk and chicken broth followed by the seasonings. Bring this mixture to a boil.  Reduce heat and simmer for 2 minutes.  Add the spinach stirring until it is wilted, then add the cheese and lemon juice.


The spinach is rough cut to keep it from being too "stringy" when the dish is served.


The spinach sauce can be made ahead of time and stored in the refrigerator.  Reheat before serving.

Burgers
1 Lb ground beef
garlic
Worcestershire sauce
onion
garlic
salt and pepper
Texas toast

Using a pound of ground beef, make your favorite burger.  I added a little onion, garlic, salt and pepper, and Worcestershire sauce.  Shape the burgers and grill to your desired level of done-ness. 


In the final minutes of grilling the burgers, brush both sides of Texas toast with olive oil and place them directly on the grill.  Toast until it is golden.  The turn and repeat on the second side.

To serve, place a burger on a single slice of Texas toast and top with the creamed spinach.

The recipe makes 4 servings.  

The creamed spinach sauce can also be used to top chicken or a pork roast.


Have a great weekend!


Friday, July 24, 2015

Food Friday - Simply Salads

from Kris B.


I grew up with a stay-at-home mom who cooked dinner nearly every night, a dinner that most often was meat, potatoes, and vegetables.  Our family meals were like those that restaurants now try to lure you in with by touting their fare as "home cooking."  Of late, both meat and potatoes have gotten a bad rap from various diet gurus.  I have to admit that though we do not eat meat and potato dinners every night, I do like both.  In my cooking now, I live by the motto, "Everything in moderation."  I am always trying new ways to enjoy both of these things while still being conscious of healthy eating habits.

This Grilled Red Potato Salad is a healthier way to enjoy a potato side than is, let's say, a loaded baked potato, french fries, or even those home style mashed potatoes that my mom made.  Potatoes really are not "the enemy."  It is the way we cook and dress them that often pushes their calorie count over the top.  Served atop a fresh green salad with a honey mustard dressing, these grilled potatoes are "just enough" to satisfy that meat and potato kid that still lurks inside me.  This salad is a perfect light, but also filling, side to serve with any kind of grilled meat.  If you are firing up the grill to cook the potatoes, it makes sense to throw some chicken, steak, a pork roast, or even burgers on the grill at the same time.  And then you have a complete meal and you didn't have to heat up your kitchen!

INGREDIENTS

4 large red potatoes 
Non-stick cooking spray
2 cloves of garlic, minced
2 tsp honey mustard
Juice from 1 lemon
2 TBS olive oil
2 tsp vinegar
4 Cups any kind of salad greens
1 Cup shredded carrots
1 diced red bell pepper
1 diced red onion

Dice the red pepper, onion, and shred the carrots.  


(I cheat and buy shredded carrots in a bag at the grocery store.)  Place them in a large bowl and toss with the salad greens.

Whisk together the garlic, honey mustard, lemon juice, olive oil and vinegar.to make the dressing.  


This can be done ahead of time and stored in the refrigerator.

Preheat the grill.  Slice the potatoes about 1/2 inch thick.  


Spray one side with non-stick cooking spray/  Place the sliced potatoes with the sprayed side directly on the grill.  cook for 10 minutes or until the potatoes are a deep golden color.  Spray the top side and flip the potatoes.  Cook for another 5-10 minutes or until the potatoes are cooked through.


When you are ready to serve, toss the salad and the dressing together in a large salad bowl.  Either layer the potatoes on top, or plate each serving, placing the potatoes on top of the tossed salad.

This recipe serves 4-6.

A few more thoughts:

  • Because there are only two of us for most meals at my house, I don't toss the full amounts of salad and dressing at once.  I do it on an "ass needed basis."
  • Make the salad your own by adding any other salad fixings that make you happy.  The carrots, red pepper, and red onion add color that makes this a pretty dish when served.
  • If you want to make a hearty meal out of this salad, add some diced ham or bacon.
  • The grilled potatoes alone are also a tasty side if you sprinkle them with a little garlic pepper after spraying them with the non-stick spray.
Happy eating!


from Tracey G


It's been a busy summer week for sure! The weather has been beautiful and we've been able to enjoy the beach quite a few days this week - nice! But that also means needing easy suppers that can be ready to go when we get home - Harry and I are usually there until at least 6 pm, so planning ahead is a good idea, lol. I try to have things ready to go for when we get home, because if I have to do prep work and cook, it's 7:30  by the time we're actually eating, if not later, because you have to get the car unpacked etc - and that's where this salad can come in handy! I remember the first time my mom made this - I was totally skeptical that this combination of ingredients was going to be weird and a flop, lol. Was I wrong! They go fabulous together, and I was happily surprised ;-)

This salad is pretty much a meal in itself - with the bacon, pasta and olives - you don't need anything else if you don't want to have anything else! But it goes great with anything really, burgers, chicken, pork chops etc. I like to use the high protein pasta - that gives it a little more "oomph" in my opinion. ;-) I think the one I used for this batch was high protein and higher fiber too.

There's really not a whole lot of steps to this one, it's pretty basic and a lot can be adjusted to your tastes, more bacon, less bacon and same thing for the olives - more or less, up to you! I guess that can even be said for the dressing too, lol - go with whatever your tastes dictate! :-)

The ingredients are simple: elbow macaroni (even that can be adjusted to whatever you like or whatever you have on hand), crisply cooked bacon (holds up better after it's mixed in the salad with the salad dressing), sliced salad olives and salad dressing. Mayo works too if that's what you prefer. I've always had it with salad dressing, so that's generally how I make it.

I happened to have some bacon leftover from a breakfast-for-dinner night I had with Harry, it was a 24 oz package of bacon and I normally use 16 oz of cooked bacon in the salad, so after our simple supper there was just enough bacon leftover to make my salad with, which made it even easier to prepare, lol. Usually to get my crispy pieces of bacon, I cut up the raw bacon then fry the bacon until crisp. This particular batch I'd cooked in the oven, my favorite way to prepare bacon these days, lol. Much easier and less mess - although, firing up the oven in the summer can be brutal, lol. But it's about 20 min on a cookie sheet at 
400 ° F, give or take. I start keeping a close eye on it at around the 15 minute mark - doesn't take long to over-do it! LOL My smoke alarms have been proven to work a few times, lol.

So, all you do is cook your pasta according to the package directions, then combine that with a pound of chopped crisply cooked bacon, sliced green salad olives and salad dressing. And that's that, lol.

There's really not a set recipe for this, as sometimes it takes more salad dressing than other days for some reason and so forth, but here's some basic amounts to get you started:


Bacon Green Olive Macaroni Salad

1 lb elbow macaroni, cooked according to package directions, drained well
1 lb bacon, chopped and crisply cooked
1 large jar of sliced salad olives - that's to taste, I get the largest jar I can generally find as I love green olives!
1 1/4 to 1 1/2 c salad dressing (or mayo if desired)

Combine all the ingredients, mix well. Refrigerate until ready to serve, allowing at least an hour for the flavors to blend.

Enjoy! 


Saturday, July 18, 2015

App Gift Card Giveaway Winner!

 I am happy to announce that the randomly chosen winner of our App Gift Card giveaway is.... Linda Stroud! Congrats Linda! :-D All you have to do is send me your information either via Facebook private message or to my email address (traceygehring24@gmail.com)! Once we get that we can get your prize to you! :-)

Again, I'd like to thank all who took the time to visit us and leave comments! I know that I can speak for Kris, as well as myself, when I say that we truly appreciate your support and friendship!! And as always, stop by often - you never know when we might have a giveaway!! 

Thank you again!!

Tracey 

Friday, July 17, 2015

Beans and Corn - Oh My! ;-)

by Tracey G


This Food Friday I'm on my own as my wonderful cohort is vacationing it up and loving every minute of it! ;-) Which is exactly what you're supposed to do on a vacation! I am happy she's having a great time, even if she did forget to stuff me in her suitcase, but that's ok - I'll forgive her ;-)

This week I stuck with something even more simple, I think, than usual, for a yummy salad. And it's totally customizable, I can think of lots of variations on it, adding cilantro, parsley, jalapeno etc and I know I've added some crushed garlic a time or two. It also goes with lots of things - I served this particular batch with a new grilled pork chop rub recipe I ran across - it involved brining, and that was something I'd never done. I gave it a whirl and was it easy and produced such a lovely chop! Only thing was it required a bit of pre-planning due to the brining time needed. But, I digress, lol - that's a recipe for another time! ;-)

Back to the Black Bean and Corn Salad - I love the fact it uses frozen corn - so you can make this any time of the year, not just in corn season! And it's easy because you don't cook the corn, just dump it into the bowl and add your stuff to it. It even chills the salad for you, lol. 

The ingredients are simple ones - (clockwise from bottom) a lime or two, can of black beans, frozen corn, cumin, red pepper sauce, olive oil  and red onion. Now, you can also add salt and pepper to taste, I usually don't until I dish up my own personal serving. That's because when I was cooking for my mom, I had to find ways to omit the salt in things I was making as she was on a salt restricted diet. Lemon or lime juice is a great substitute for the salt flavor, so it's not really missed in this salad!

Combine all your salad ingredients - the chopped red onion, corn and beans - in a bowl large enough to mix it up in without having beans and corn flying out everywhere, lol. 


In a small bowl, combine your dressing ingredients. Sometimes I have to use 2 limes depending on how "juicy" they are, sometimes I end up with the driest limes - getting at least 2 prevents that from messing me up ;-)

Then all you do is dump your dressing over the salad ingredients in the bowl and mix well. That's it. I let mine sit out for awhile to defrost the corn and chill the salad as I usually am serving it that day with dinner, but you can store in the refrigerator until ready to serve.

I also sub ingredients as needed, if no lime, I use lemon juice, no red onion – I use regular, etc. and I usually double the recipe!


Black Bean and Corn Salad


1 can, 14oz, Black Beans – rinsed and drained
2 c frozen Corn kernels
½ Red Onion, chopped
1 ½ tsp Cumin (I eyeball it, and go to taste)
2 tsp Hot Sauce
1 Lime, juiced
2 tbsp Olive Oil or Vegetable Oil
Salt and Pepper

Combine all ingredients in a bowl. Let stand for at least 15 min for corn to defrost & flavors to combine, salt and pepper to taste, then toss and serve.

And don't forget you have until midnight tonight (07.17.15) to add your comment and receive a chance (entry) to win the $20 iTunes or Google Play gift card! Winner will be announced Saturday, July 18, 2015!! Good luck!! :-)


Thursday, July 16, 2015

App Gift Card Giveaway! Extended!

Hey everyone, hope you are all enjoying your week so far! This is just to let you know we've extended the entry deadline through midnight Friday (07.17.15) for the $20 iTunes or Google Play gift card - your preference! We'll announce the winner on Saturday 07.18.15, so that gives you until Midnight EST on Friday to get your comments in, here on the blog, for an entry! Good luck and thanks for reading! :-)

Cheers,
Tracey

Tuesday, July 14, 2015

Tuesday (Not) in Texas - Layers


My husband and I are enjoying a glorious vacation in Asheville, NC.  It has been a much needed time of rest, relaxation, and rejuvenation.  We have been careful to balance our time between doing and being.  It is funny to me that when you have the opportunity to slow down and make every move intentionally, a theme often emerges.  For me this week, it has been layers.

When we first arrived in Asheville, I immediately noticed the layers of the mountains, both the colors and the textures.  Nature is full concrete and tangible examples of layers, all something complete in themselves yet all necessary to create another whole.  Since while here my goal is to break completely free from my photo funk,  I started thinking about how all of these layers of the mountains appear in photographs; how, as photographers, we rely on light and shadows to create depth in photographs, which themselves are two dimensional objects.

While I was contemplating photographs, I realized that the whole premise of editing in Photoshop is based on layers, and that I really have no clue how to use this tool.  I have heard people talk about having many, many layers of editing on a single photo.  My first question is "how?"  And my second question is "why?"  That, however,  is a whole different discussion hearkening back to last Tuesday"s post.  I thought I was over my need to rant on editing, but I guess it runs through several layers of my being...how many is apparently yet to be determined.

Ah yes, the multiple psychological  emotional, and spiritual layers of human beings...probably infinite in number, thus resulting in job security for an almost equal number of psychologists and psychiatrists out there.  Dermatologists, those dealing with our physical layers,  have nothing on these guys...with only the three, or maybe eight depending on how you count, layers of skin we all have.  The visible and the invisible layers that make up each of us, how do we understand the "I" that they create.

This brings me to my own personal object lesson on layers from a few days ago.

My husband and I did one of those painting adventures where a room full of artistically challenged people show up and in a couple of hours produce an actual, loosely termed, work of art.  I am by no means an painter, but I do understand the process theoretically.  We began our masterpieces by laying down the background.  Next was the middle ground, which was to be some rather abstract trees, almost shadow-like representations of trees that were intended to add depth to the painting.  This is where my husband started to get frustrated.   He can't see depth in paintings or photographs; so, trying to create them seemed impossible to him.  He kept saying, "These don't look like trees."  To which I kept saying, "They are not supposed to look like trees; they are just a layer to add texture and depth to the image."  That did not compute for him.  The best I could do was to encourage him to keep doing what the instructor told him to do even if he "couldn't see it" at the time.  He did; and ultimately created a respectable first painting.

And so here I am left internally debating the  notion of whether the whole of something is greater than the sum of the parts. as I have been taught.  Did he need to see and understand each of those layers in his painting as complete and finite in their own right in order to appreciate the completed product? This debate is still raging within my mind..a mind .that is technically on vacation.

So since I have nothing conclusive to share here, I'll leave you with the poem, The Layers (1978), by Stanley Kunitz,  American poet and U.S. poet laureate in 2000.
The Layers 
I have walked through many lives,
some of them my own,
and I am not who I was,
though some principle of being
abides, from which I struggle
not to stray.
When I look behind,
as I am compelled to look
before I can gather strength
to proceed on my journey,
I see the milestones dwindling
toward the horizon
and the slow fires trailing
from the abandoned camp-sites,
over which scavenger angels
wheel on heavy wings.
Oh, I have made myself a tribe
out of my true affections,
and my tribe is scattered!
How shall the heart be reconciled
to its feast of losses?
In a rising wind
the manic dust of my friends,
those who fell along the way,
bitterly stings my face.
Yet I turn, I turn,
exulting somewhat,
with my will intact to go
wherever I need to go,
and every stone on the road
precious to me.
In my darkest night,
when the moon was covered
and I roamed through wreckage,
a nimbus-clouded voice
directed me:
“Live in the layers,
not on the litter.”
Though I lack the art
to decipher it,
no doubt the next chapter
in my book of transformations
is already written.
I am not done with my changes.
Enjoy pondering the layers of your life.

Friday, July 10, 2015

Food Friday - Hitting' the Bars!

from Kris B.

In the adapted words of Robert Burns, "The best laid plans of mice and men (or women) may often go awry..."  And did they ever for me this week!   Knowing that we were leaving on Wednesday fro a nearly two week vacation, I told Tracey that I would get my post for today done before we left.  And, I almost did, sort of.  Here is where the plans went awry...

I decided that I would make an old recipe of my mom's for a dessert bar that she called "Hello Dollies."  I have no idea why they have that name.  My choice for  making these was two-fold: 1.  They are good and easy so would not take a great deal of time away from my vacation preparations and 2. We would have a treat to pack and bring along with us.  It seemed like a win-win situation.

I did make the Hello Dollies early in the week and got all of the photos taken.  Literally at the eleventh hour before we were to leave, I was packing them in a to-go container and realized that we did not have room for it in our carry-on luggage, so I ditched the idea of bringing them along.  The only picture that I had not taken at this point was the final plated photo.  I had thought that I would shoot that once we got to North Carolina.  So, I quickly took a few shots with my phone.  I had all the shots I had taken earlier in the day.  I was good to go, even if that last photo wasn't the greatest.

At 35,000 feet somewhere between Dallas and Charlotte, I realized that I had left the SD card with all of the photos that I needed in my computer at home.  The last thing I did the night before we left was take a picture of the final item to be packed, my camera.  And then I took the card out and uploaded that photo.  I had gotten two new SD cards for the trip, so I didn't worry about putting the "used" card back in my bag. And my phone shots are TERRIBLE!   So here I am with no food photos for today's recipe.  LOL!

I will, however, share the recipe.

HELLO DOLLIES (an old recipe from my mom)

11 stick butter
 Cup crushed saltine crackers (about 25 crackers)
1 Cup shredded coconut
1 Cup chocolate chips
1 Cup chopped pecans
1 can sweetened condensed milk

Preheat oven to 350 degrees.

Melt the butter in a 9x13 glass baking dish.  Mix in the crushed crackers and spread evenly along the bottom to make a "crust."  Layer the coconut, then the chocolate chips, and finally the pecans, evenly on the only over cracker mixture.  Pour the entire can of sweetened condensed milk evenly over the top.  Bake for 30 minutes.  

Allow the bars to cool completely and then cut into 1 inch squares.  Refrigerating the pan will make it easier to cut the bars.

Cheers!


by Tracey G


There's a funny story connected to the first time I ever made these bars, lol, well, it is to me anyway, lol. It was back in early 2000's I think, and I'd made this recipe for a fundraiser. The fundraiser was for a local man, who was also a local businessman and friend, not close friend, but in a small town like mine, everyone knows everyone, lol. He'd been diagnosed with some kind of health issue, so the community set up a few things for fundraising to take place on a Saturday at the local pub/restaurant that everyone went to for fun in the evenings and it was the hopping place during the business day for lunch :-) So, I'd found this recipe and thought it sounded like a perfect bake sale kind of thing. The night before, I made a batch and put them in these really nice foil tins and left them on the kitchen island as they would be dropped off the next morning before the bake sale began.

At this time my mom lived with me, I'd moved her in a few years before as it was just more financially feasible for all of us - it was a win-win kind of thing, and she was so busy and active in the local Eagles club and the daytime bartender there, she was never home. Was more like having a teenager around than my mom, lol. Anyway, I got up Saturday morning, the day of the bake sale, and find that the tins had been rifled through. Apparently my mom saw treats and helped herself, lol. I was so mad (at the time, now it's funny, lol)! I can't remember now just what she'd taken, but I know it was enough that I had to go out, buy more ingredients and make another batch in a hurry, because I had to have them there by like noon or something. I get the next batch made, and while they were still warm, I put them in more tins and got them to the bake sale. One of my dearest friends was then an owner of the place, and worked there too, so it was her I delivered them to. I dropped them off, and then went back home to get ready to go back for the fundraising festivities. When I get back there, my friend tells me they never made it to the bake sale table - the employees bought them on the spot when I brought them in since they were still warm, lol. They had my mom to thank for that ;-) Ah good times, good times, lol.

So, every time I make a batch of these, I am reminded of that day ;-)

They're really easy to make too, and that makes me happy, I'm always all in for something easy to make!

The ingredient list is easy, and I think I remembered to get them all into the shot this time! Yay me! LOL It's simple stuff: oatmeal, flour, brown sugar, vegetable shortening, chocolate chips, butterscotch chips, vanilla, molasses, eggs, baking soda and salt. The only things I don't always have around, and needed to pick up for the recipe, are the molasses and the butterscotch chips. The butterscotch chips are a recipe modification I made - just a couple handfuls and it really added something to it. :-)

The first thing you do, is beat the brown sugar and shortening until light and fluffy. I'll admit, every time I make these, I wonder if that will happen, as in the very first stages of mixing, that looks like an impossible feat, lol. But as you can see, it does happen! :-) While that's doing it's thing, getting fluffy and all, I take that time to grease my 9x13" pan.

Next step is to mix in the dry ingredients. I dumped the brown sugar/shortening mixture into a bit of  a larger bowl as I knew that my mixer bowl was not going to be quite big enough to mix in everything neatly, lol. And it's a snap to stir in the flour, oatmeal (I combine the oatmeal, flour, salt and baking soda in a bowl beforehand for easy mixing), salt, baking soda and baking chips.

Once everything is mixed together thoroughly, spread it in the pan evenly. 


Bake at 350° F for 20-25 minutes or until the middle is set. I think it took 35 minutes for me today. You can cool them slightly and cut into bars, or you can let them cool completely. They're pretty gooey when they come out, which is good too, lol, and they set up more the longer they sit. And that's it :-) They are simple and yummy and I consider them "healthy" since there's oatmeal - well, that's what I tell myself anyway, lol. ;-)


Oatmeal Chocolate Chip Bars

makes approximately 48 bars

 1 1/2 c firmly packed brown sugar
1 c shortening
2 tbsp molasses
2 tsp vanilla
2 eggs
3 c quick cooking rolled oats
1 c flour
1 tsp baking soda
1 tsp salt
3/4 c chopped nuts (optional)
1 12 oz. package chocolate chips
butterscotch chips, about 2 handfuls (approximately half a 12 oz package)

1) Grease either a 9x13" pan or 15x10x1" pan.

2) In a large bowl, beat brown sugar and shortening until light and fluffy. Add molasses, vanilla and eggs; blend well.

3) Stir in oats, flour, baking soda and salt; blend well. Stir in nuts, chocolate chips and butterscotch chips.


4) Spread in greased pan. Bake 20-25 min or until light golden brown and center is set. Cool slightly. Cut into bars. Serve warm or cool. 


Tuesday, July 7, 2015

Tuesday in Texas - WYSIWYG


I have come to a realization in the last week that may help me pull myself out of my creative funk.  As is often the case, that realization came from some serious searching within.  When we seek inwardly, the answers are there.  So what did I find during the perusal of the depths of my soul?  I am a purist, plain and simple.  I like things (and people) to be real and honest.

It’s not that at age 53 I didn’t know this about myself; what’s new to me is all the ways that this part of my personality impacts my outlook and my “inlook.”  Here is an example: I have never been a fan of science fiction and fantasy.  Why?  Because the situations are not “real.”  I prefer reading non-fiction. (Before you say it, I do have an imagination and I do understand the literary principles of metaphor and allegory.  That’s not what this is about.) I also don’t believe in dressing a certain way to manipulate a person’s perception of me; I have neither the energy or inclination to maintain that fictional persona.  I don’t hide my thoughts regarding religion and politics either because they are, for better or for worse, what make me who I am.  Conversely, I make clear my belief that everyone is entitled to their opinions and I will respect them as long as they are coming from a place of personal integrity.

So what does all of this have to do with my recent photo/creative funk?  Here it is.  The more I learn about photography, the more I realize that so much of it is not real.  That makes me, the purist who wants things to be honest, very sad.  My feelings are almost like those of a child who has no option but to accept the fact that Santa Claus is fictitious.  Just like I don’t want to read fantasy, I don’t want to create it in my photos either.  That said, I must add here that I am a huge fan of imagination.

This recent journey of discovery started last week when I was doing the photos for the last Food Friday post.  I knew that I wanted to photograph ice cream, so I looked up suggestions that might help me from ending up with a melted ugly mess.  What I found was ugly, but not a melted mess.  Why was it not a melted mess?  Because most of the “ice cream” that you see in professional food photography is probably not ice cream at all.  It is a mixture of play dough, mashed potatoes, or frosting.  There are many recipes out there for photographable ice cream, ice cream that will make photographers look like super hero in that they can keep ice cream from melting under bright lights.  Here is one such recipe:
Berry Ice Cream Substitute Recipe
1/3 cup instant mashed potato flakes
1 cup vegetable shortening
4-plus cups powdered sugar
2 tablespoons light corn syrup
About 1/4 cup of mashed berries
This concoction certainly is not going to melt!  No wonder my ice cream photos look like a melted mess.  Because they are!  In some weird way, this makes me feel better.  It’s not that I am necessarily a bad photographer; it is that I am an honest photographer.  Just like with me the person, what you see is what you get in my photos as well.  If I say it’s ice cream, it’s ice cream!

I also do not believe in editing reality.  What do I mean by that?  As a photographer, I will edit for camera user error - exposure adjustments, contrast, temperature, but I don’t edit to make someone or something look “perfect.”  In my weird way of thinking, perfection comes in one’s ability to accept and embrace imperfection.  If I seriously edit a photo, there is no question that it is edited.  The editing becomes part of the creation, not a means to hide some perceived flaw.

When my girls were little, they often had marker on their hands or face in photos.  That was life then and that is what I want to remember.  When they were teenagers, they had skin imperfections.  Again, that was a part of their life at that stage.  I have wrinkles.  I earned them.  When we erase these things from our photos, we are erasing a part of a person and a part their life.  We are saying that something about them or their life was “not good enough.”  When my children’s children look back at photos of their mothers as teenagers, I don’t want them to feel bad about themselves because they have acne and they believe that their mothers didn’t.  I want to preserve the life that I have lived, not the life I wish that I had lived.

Another “ah-ha” moment for me and my own photography recently is that I have realized that can only photograph things that have real (there’s that word again!) meaning to me…unless someone wants to pay me for photos and then we’ll talk.  LOL!  Seriously, yesterday’s CY365 photo prompt had to do with creating a still life.  I know that there are people out there who collect stuff just to photograph it.   Their sole purpose for having those things is to take pictures of them.  I can’t do that.  If I don’t have a personal connection or attachment to something, I can’t make art with it in a meaningful way.  As I was unpacking these feelings, I heard me saying to me, “Woa. Wait a minute here.  Let’s talk about all those Lego mini figures that you have.”  Ouch!  Busted!  Well, not really.  I went back through my photos and looked at all of those in which I had photographed mini figures and realized that in every instance in which I photographed a Lego figure, there was a direct and meaningful correlation to something that was going on in my life at that moment.  Those mini figures were often me.  Whew!  I now feel vindicated!

I don’t mean this to sound judgmental in any way here. I am saying that I can’t, if I am true to myself, create in certain ways.  And because I can’t, my photos will probably never be as “good” (whatever that really means) as many others.  My funk stemmed from believing that they could.  The truth is that doing things the way I do, they won’t; they can’t.


Today I can say that that is OK.  Whatever comes from my camera is an extension of what rests deep inside me.  What you see is what you get.  Nothing more.  Nothing less.

I'm curious how others feel  about such things.  Leave a comment here letting us know your thoughts and  be enetred for another chance to win a phone app gift card to be given away at the end of this week!

Friday, July 3, 2015

Food Friday - An Apple Today

from Tracey G


Happy 4th of July! I can't believe it's the 4th of July already, today was actually pretty warm - it's been in the 60's for the most part around here, lol. So, it honestly snuck up on me this year. :-)

Kris and I talked about what we'd want to do in honor of Independence Day, so we thought what's more American than apple pie - or some variation on that, lol. Apple recipes I seem to have a few good ones of, but I decided on this one because they're like little mini apple pies and easy as pie to make, lol. And they are super yummy, the batch I made for this week's post got Harry's stamp of approval, lol. And from Mr. Picky, that's saying something, lol.  ;-) 

And for today's post I decided to use my iPad for the photos, with my Hipstamatic app: Loftus lens and DC film.  

There's not a lot involved, so I seem to have ended up with more photos than usual, lol, maybe to make up for the lack of trouble it is to make these, lol. The ingredient list is easy, it's refrigerated crescent roll dough butter, sugar, vanilla, a Granny Smith apple, cinnamon sugar, apple pie spice, and a lemon-lime soda. And of course, I forgot an ingredient in the photo above (big surprise there, lol), the sugar. ;-)

After you get your apple peeled and cut into 8 wedges, it's time for the crescent roll dough...

Get the dough unrolled and separated into the 8 triangles. 

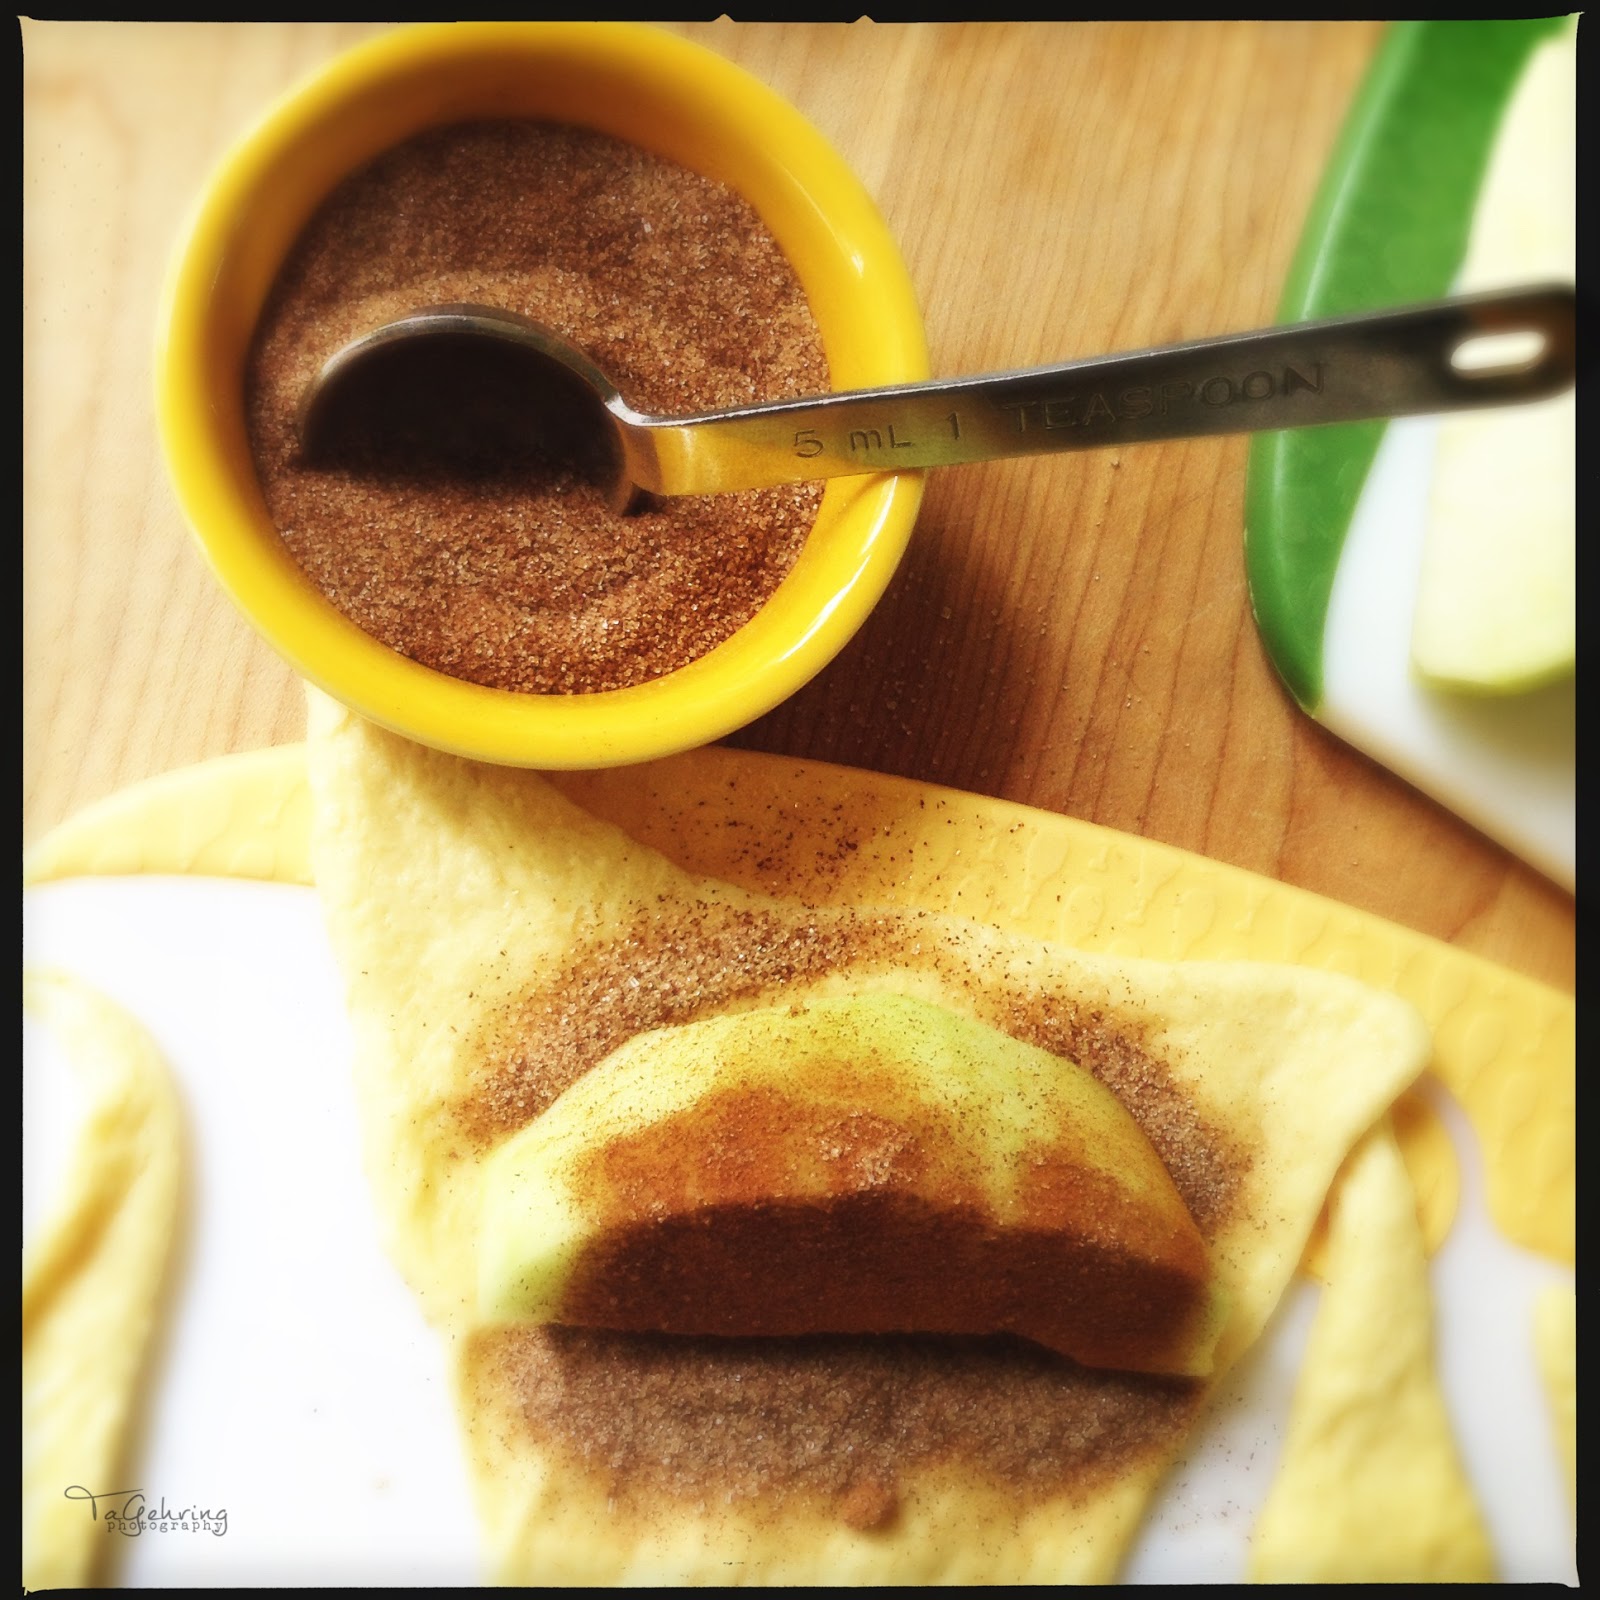
Place your apple wedge on the triangle, sprinkle with cinnamon sugar, bring up the corners to the center and pinch to seal, then roll them up. 

This is what your little dumpling should look like :-)

As you get them rolled up, place them in a greased 8x8" square baking pan...

Once you get them rolled up and in the pan, assemble your sugar-butter-vanilla mixture ingredients. Melt the butter...

Stir the sugar, vanilla and melted butter until well mixed. 

Spoon the mixture over the dumplings in the greased baking pan.

Pour the soda slowly around the dumplings - do not stir the soda into the pan. 


Once you get that done, it's time to sprinkle the apple pie spice on the top before baking. I didn't have any apple pie spice laying around, so I just used a combination of 2 tsp cinnamon and 1 tsp freshly grated nutmeg and it worked just fine. :-)


Bake them at 350° F for 25-30 min or until they're golden brown. You can serve them warm with ice cream as the recipe suggests, or actually mine sat for awhile, lost a bit of crispness, but tasted just as good! :-D


Crescent Roll Apple Dumplings

makes 8

1 8 oz tube refrigerated crescent rolls
1 medium Granny Smith apple, peeled and cut into 8 wedges
cinnamon sugar (I used approximately 2 tbsp or so)
1/2 c sugar
1/4 c butter, melted
1 tsp vanilla
6 tbsp lemon-lime soda
1-2 tsp apple pie spice

1) Unroll crescent roll dough and separate into 8 triangles. Place an apple wedge on each crescent triangle. Sprinkle apple wedge with cinnamon sugar. Bring up corners of dough to center; pinch edges to seal. Place in a greased 8 inch square baking dish.

2) In a small bowl, combine the sugar, melted butter and vanilla; spoon over rolls. Slowly pour soda around the dumplings (do not stir). Sprinkle with apple pie spice. Bake, uncovered, at 350° F for 25-30 minutes or until golden brown. Serve warm with ice cream if desired.


from Kris B.


When Tracey told me that she was going to do all of her photos for today's post with her phone or iPad, there was a part of me that just wanted to sit down and cry...not having anything to do with Tracey and her photos, but because I have a terrible relationship with my phone camera right now.  In fact, my relationship issues with my phone are the reason that you did not get a Tuesday in Texas post this week.  Let me try to explain that.

I want to love my phone camera.  I want to trust it.  I want to have it by my side at all times.  I want to create beautiful things with it.  Lately that just hasn't been happening.  All of my photos seem unfocused, grant, flat, or all of the above.  Honestly, I don't know what the problem is.  My phone and I are going to seek counseling and hope that we can get back on the right track.  

One of the things that I have done is tried different camera apps to see if that makes any difference.  Earlier in the week, my husband, who subscribes to all of the app gone free websites, sent me a link to an iPhone app called ProShot.  It allows you to set all of your shooting settings just like on your "big" camera.  Since it was free, I downloaded it knowing that I could delete it if it wasn't worthy of the space on my phone.  Upon first glance, I really liked the user interface.  The dials are all easily accessible.  You have a lot of creative control.  It looked like a great app.  I figured I would share this free app with all of you, but I thought that I should include some photos taken with it.  Here comes the problem.  My photos were still terrible and I couldn't make myself post them.  So I baled on the whole post.  Mature, I know.  Like Tracey and I have said many times here, we don't promise much, but we do promise honesty.  So there.  I have come clean.  

The app is free through July 3...today.  I know.  That gives you no time.  Here is my/our concession.  We are giving away a gift card so that you can add some photograph apps to your phone.  We are extending the time to enter until the middle of next week.  Leave a comment here to be entered into the random drawing.  The winner will receive a $20 gift card for their phone of choice.  

Now for this week's recipe...

During the school year, my husband and I take an apple in our lunches every day.  Somewhere along the line we became firm believers in "an apple a day keeps the doctor away."  Now that school is out, we still eat quite a few apples, but not every day.  On one hand I miss them, and on the other I could use a change.

The 4th of July here in the states is a big day for cooking on the grill and sharing good times with family and friends.  Rather than the traditional picnic dessert fare of cookies or brownies this year, I decided to go with grilled apples.  They are equally as tasty and maybe a tad bit healthier, but I'm not sure.  LOL!

These are not difficult to make, but they use ingredients that you don't usually think about when you are packing your picnic basket so a little forethought is in order.  If you are eating away from home, the ingredients can be prepped before you leave and the apples themselves easily prepared once you get to your destination.  Here's how you makes these:

Preheat your grill to medium.  Obviously I use a gas grill and thus can control the temperature.  You can also make these over a charcoal grill or campfire.  You just want to make sure that the sugar doesn't get super burned.  

Peel and core the apples.  My knife skills are terrible, so I rely on a good ol' potato peeler to peel the apples.  I then cut around the core.  I have found that rather than trying to remove the core from the whole apple, it is easier to cut the apple into rings at this point and punch out the centers of each slice.  This reduces the chance of breaking your apple rings, not that apple pieces are any less yummy, they are just a little more difficult to deal with on the grill.  


Once your apples are sliced, place the rings in a bowl of lemon water.  You want to keep the apples from turning brown.  


Or, if you have leftover lemon-lime soda from making Tracey;s recipe, that will work too.  Any kind of citric acid will do the trick.  

In a small glass container, melt 4 TBS of butter.  Then stir in the spices - 1 TBS brown sugar, 1 tsp cinnamon, and some nutmeg.  This ratio is sufficient for two good sized apples that each yield six rings.  


Brush both sides of the apple rings with this mixture and the place them on the preheated grill.  Brush the apples another time or two on each side while they are cooking.  


Cook the apples 5-10 minutes on each side.  They are done when they feel soft when you insert a fork into them.  


The Grilled Cinnamon Apples can be eaten just as the come off the grill, but if you are feeling decadent, serve them with a scoop of vanilla ice cream.  It is kind of like apple pie without the crust.

After we had fired up the grill so that I could take these shots, my husband decided it was dinner time and he threw a couple hot dogs on the grill.  (Our 4th of July picnic happened a little early.)   That got me thinking about meals using these apples rather than dessert.  Next time we make the apples, I am going to try throwing one on a grilled cheese sandwich...some buttered Texas toast, some good cheese, a slice or two of apple and toss it on the grill instead of those hot dogs.  What do you think?


To our U.S. friends, we wish you a fun and safe Independence Day celebration; to our Canadian friends, a belated Happy Canada Day; and to those of you in other parts of the world, may your days ahead bring something for you to celebrate!  And don't forget to leave us a comment for a chance to win a gift card for phone apps.