Saturday, September 26, 2015

Sugar and Spice and Cinnamon are Nice!


Morning, noon, and night, coffee is the number one drink at our house.  The common question in the morning is not, "Do your want coffee with your breakfast?" but, "What do your want to eat with your coffee?"  I just love the stuff; my husband needs it!  He is one of those people that you don't want to encounter in the morning until he has had at least his first cup of coffee.  That is why he gets the job of packing lunches in the morning; this gets him to the kitchen coffee pot first.  Once the coffee is poured, the food that accompanies it really doesn't matter.

We also drink coffee at night, often with a late night snack.  (Yes, we can both drink lots of coffee and go right to sleep with no problem.)  This is where the coffee cake comes in.  I'm not much for wanting to eat sweets with my morning coffee, but with the night time cup it's a different story!  The evening is when my sweet tooth is ramped up and ready to go.  Coffee cake loaded with cinnamon is the perfect complement to a nice bold cup of coffee.

I have used King Arthur flour as well as their recipes for a long time.  I don't think that I have ever tried one of that didn't meet or exceed my expectations.  And, I am a bit nostalgic where King Arthur  baking products are concerned.  Weber and I visited the King Arthur campus when we were in Vermont on our honeymoon.  It was definitely a baker's, and eater's paradise!

The King Arthur Cinnamon Streusel Coffee Cake is pure deliciousness!  It is loaded with cinnamon in that it has a filling as well as a streusel topping.  The cake itself is dense, but not overly sweet, allowing the filling to take the flavor center stage.  This coffee cake is a little labor intensive, but it is more than worth the time that it takes to make it!

Because I make this recipe exactly as directed by King Arthur, I am copying the recipe exactly as they have it printed on their own web page and inserting my own photos.

INGREDIENTS

Streusel topping

Filling

  • 1 cup brown sugar, light or dark
  • 1 1/2 tablespoons ground cinnamon
  • 1 teaspoon unsweetened cocoa powder 

Cake

Directions


  1. 1) Preheat the oven to 350°F. Lightly grease a 9" x 13" pan, or two 9" round cake pans.
  2. 2) Make the topping by whisking together the sugar, salt, flour, and cinnamon. 

  1. Add the melted butter, stirring till well combined. Set the topping aside.

  1. 3) Make the filling by mixing together the brown sugar, cinnamon, and cocoa powder. Note that the cocoa powder is used strictly for color, not flavor; leave it out if you like. Set it aside.


  1. 4) To make the cake: In a large bowl, beat together the butter, salt, sugars, baking powder, and vanilla until well combined and smooth.
  2. 5) Add the eggs one at a time, beating well after each addition.


  1. 6) In a separate bowl, whisk together the sour cream or yogurt and milk till well combined. You don't need to whisk out all the lumps.
  2. 7) Add the flour to the butter mixture alternately with the milk/sour cream mixture, beating gently to combine.


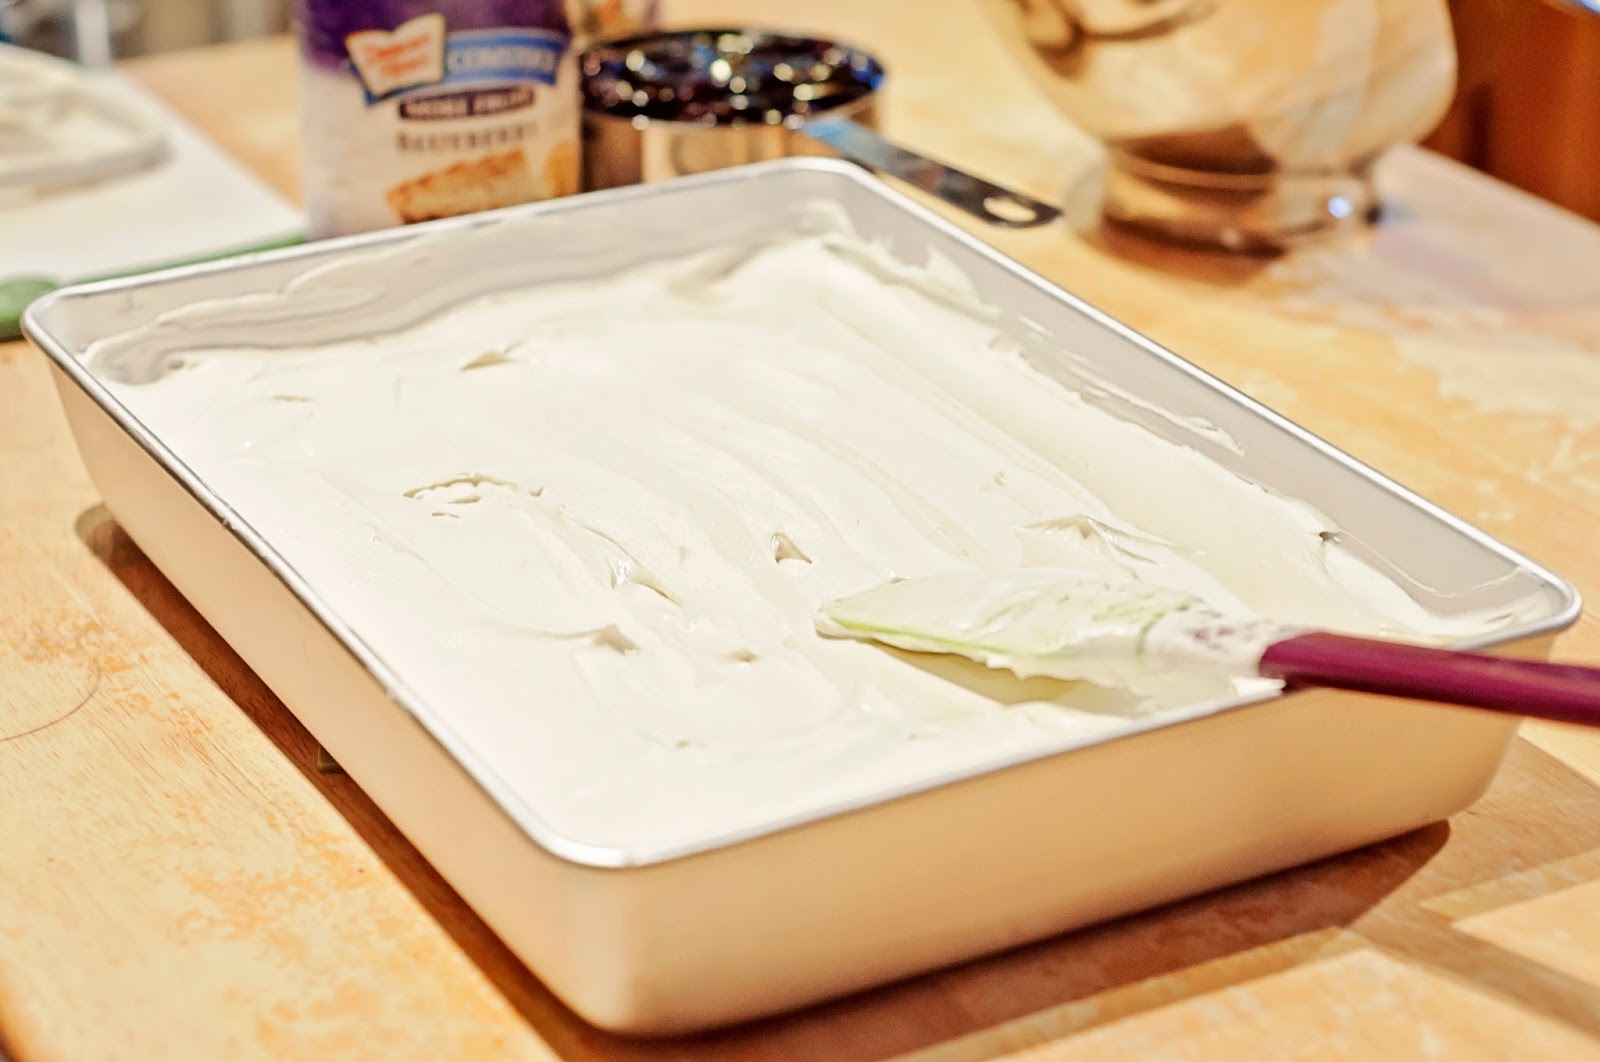
  1. 8) Pour/spread half the batter (a scant 3 cups) into the prepared pan(s), spreading all the way to the edges. If you're using two 9" round pans, spread 1 1/3 cups batter in each pan.
  1. 9) Sprinkle the filling evenly atop the batter.

  1. 10) Spread the remaining batter atop the filling. Use a table knife to gently swirl the filling into the batter, as though you were making a marble cake. Don't combine filling and batter thoroughly; just swirl the filling through the batter. 
  1. 11) Sprinkle the topping over the batter in the pan.


  1. 12) Bake the cake until it's a dark golden brown around the edges; medium-golden with no light patches showing on top, and a toothpick or cake tester inserted into the center comes out clean, about 55 to 60 minutes for the 9" x 13" pan, 50 to 55 minutes for the 9" round pans. When pressed gently in the middle, the cake should spring back. 
  2. 13) Remove the cake from the oven and allow it to cool for 20 minutes before cutting and serving. Serve cake right from the pan.


Tips from our bakers

  • Since butter and sour cream are both key ingredients in this cake, we encourage you to use the best quality you can get. We highly recommend Cabot, a superb Vermont brand available nationally.
  • It's easy to spread half the batter in the pan when you know how much it weighs. If you have a kitchen scale, half the batter weighs about 28 ounces.
  • Want to prepare this coffeecake the night before, then bake in the morning? It's easy; simply cover the unbaked cake with plastic wrap, and refrigerate overnight. Next morning, bake the cake as directed. Start testing for doneness at the end of the suggested baking time; you'll probably have to add 5 minutes or so to the total time, to account for the batter being chilled.
  • Dress it up for guests: Make a glaze with ½ cup confectioners' or glazing sugar and 1 tablespoon milk; drizzle glaze over the cooled coffeecake.


by Tracey G


Another thing Kris and I have in common or share in likes/loves, is, the love of coffee!!! I have been drinking the stuff since I was like 4, lol. Well, not a full cup to myself, but a sip or two from Mom and Dad's cup - and that's where I learned to be able drink mine with either cream and sugar, or just black, lol. Preferably with cream and sugar, but in a pinch - black works just as well, lol.

Which reminds me of a funny story from my childhood coffee-drinking days... My father was concerned with my taking sips off their coffees, so he asked the pediatrician about it - whether or not it was ok for me and the pediatrician answered, with a straight face according to my Mom's retelling, "well, how does she drink it? Black or with cream and sugar?" And my dad thought he actually had to answer that not realizing the doctor was just messing with him, lol. It didn't matter -  the small amounts I was imbibing were ok - no growth stunting or whatever other horrible things could befall me according to coffee drinking lore, lol. ;-)

I also discovered one more thing in the "share column" of likes/loves of Kris and I - our use of King Arthur Flour! I don't remember when I started using it, but once I did I never looked back - any time I buy anything else it's because the store was out of it, lol. It was their gluten-free brownie mix I tried a few posts back and it was yummy! I do have a gluten-free yellow cake mix by King Arthur Flour that I plan on testing some time in near future here on the blog. :-)

Now, on to the Cinnamon Rolls. I found this recipe in my Taste Of Home magazine. (see a theme here? LOL ToH is my all-time favorite food magazine, I've been a subscriber for at least 25 years, which is hard to believe considering I'm only 29, lol;-) )
I found it awhile ago and have been wanting to make it for ages, I love cinnamon rolls and it's very close to the usual recipe I use, only this adds vanilla pudding mix to the dough, and it intrigued me. And what better excuse to make them then to make them for the food aspect of the blog? :-) I didn't realize though, that this endeavor was going to be an all day undertaking - and it really wouldn't be, lol, but when you stop to photograph every little step, it ends up being that way! LOL And I discovered that it seems like a lot steps! But really it wasn't that many and it wouldn't take very long while not taking photos, lol. And in the end, they were super yummy so was worth it! I still don't advise trying to do this on a busy weeknight or anything, that might just prove frustrating, lol

And they go smashingly with coffee ;-)

Of course I forgot to include a few ingredients in the photo, but it wouldn't be right if I didn't, lol. Good grief, someday I'll get everyone in the shot! Anyway, here's the "not pictured": Water, butter, milk and salt. And here's the pictured: flour, yeast, egg, sugar and pudding mix. 

I had to deviate from the combining method a little bit because I use Rapid Rise yeast and it gets combined with the dry ingredients, and not dissolved in the warm water as directed in the recipe. But I will describe it as per the recipe...

In a bowl dissolve the yeast and the sugar in warm water. In another bowl you mix the pudding mix and milk until well blended for 1 minute. Then you let that stand for about a minute more. To the pudding mixture you then add the egg, butter, salt, yeast mixture and about 2 cups of the flour. Beat until smooth, then add enough flour to make a soft dough.

Here's another place I diverge from the recipe - I use my KitchenAid mixer with the dough hook to replace hand kneading, it's easier and takes less time. But again, the recipe's directions state to turn the dough out onto a floured surface and knead until smooth, approximately 6-8 minutes.  

You then place the dough in a greased bowl, turning to grease the top.

Cover and let rise until doubled, about an hour (or less using Rapid Rise yeast)

While the dough is rising, mix the filling ingredients - sugar and cinnamon. It calls for 1 tbsp cinnamon - but I used a bit more because Harry asked if I could make them extra cinnamon-y, lol.

Once dough has risen, punch down....

... and divide in half.

Roll each half into a 18x10-in. rectangle.

Brush each half with 2 tablespoons of butter each, and then sprinkle each with half of the sugar/cinnamon mixture.

Roll up from the long side, pinch seams to seal. Cut into 12 rolls. I got out the ruler to make sure I had them fairly even, and each piece was about 1 1/2-in. wide.

Place all the pieces in a greased 9x13-in. baking pan. 

Cover and let rise until doubled. Preheat oven to 350° F. Bake 20-25 minutes until golden.

 While they are baking, mix up the frosting ingredients - softened butter, vanilla and powdered sugar.

When the rolls are done, spread the still-warm rolls with frosting mixture. Then, eat! LOL

Favorite Cinnamon Rolls

Originally called "Can't-Eat-Just-One Cinnamon Rolls"
courtesy of Taste Of Home
Makes 12

Dough:
I pkg (1/4 oz) active dry yeast
1 tbsp sugar
1/4 c water (110° F)
1 c milk
1/3 c instant vanilla pudding mix (it's about 1/2 of a 3.4-oz pkg)
1 egg
1/4 c butter, melted
1 tsp salt
3 - 3 1/2 c flour

Filling:
3/4 c sugar
1 tbsp cinnamon
1/4 c butter, melted

Frosting:
11/2 c powdered sugar
1/2 c butter, softened
2 tsp vanilla
1 tsp water

1) In a bowl, dissolve yeast and 1 tbsp sugar in warm water. In a large bowl, beat milk and pudding mix on low speed for 1 minute. Let stand 1 minute. Add egg, butter, salt, yeast mixture and 2 cups flour; beat on medium until smooth. Stir in enough flour to form a soft dough.

2) Turn onto a floured surface; knead until smooth, about 6-8 minutes. Place in a greased bowl, turning once to grease the top of the dough. Cover, let rise in a warm place until doubled, about 1 hour.

3) For filling, in a bowl mix sugar and cinnamon. Punch down dough; divide in half. Roll each half into an 18x10-in. rectangle. Brush each with 2 tbsp butter; sprinkle with half of the sugar mixture. Roll up, starting with long side; pinch seam to seal. Cut each into 12 pieces.

4) Place in a greased 9x13-in. baking pan. Cover and let rise in a warm place until doubled, about 45 minutes. Preheat oven to 350° F.

5) Bake 20-25 minutes until golden brown. In a bowl, beat frosting ingredients until creamy. Spread over warm rolls.  


Friday, September 18, 2015

Food Friday - Say Cheese!

from Kris B.


This week's post is less about the recipe and more about what the recipe's say about us.  I suspect that grilled cheese in some form or another is a favorite of all of us.  And if it is not a current favorite, I bet thinking about a grilled cheese sandwich conjures of some fond memories of another time.  Grilled cheese sandwiches have always been a favorite of mine.  When I was a child, my mom made them with good old store brand white bread, American cheese, and a healthy slathering of butter, and then tossed in the skillet and browned on both sides.   Simple, and oh so good!  I still like this "recipe" from my childhood, and though my current method and ingredients for making grilled cheese sandwiches has evolved a bit over the years, the effect is still the same...classic comfort food.

It probably doesn't surprise you that Tracey and I talk a lot about food.  However, what we say about it in our regular conversations with one another is rather humorous.  At least once a week one of us will say, "Well, I've got my Friday post recipe under control, but I have no idea what we are having for dinner tonight."  Or, "I got my recipe made and photos taken and now I'm too tired to cook."  Those comments are often followed by, "I guess I'll just make grilled cheese sandwiches.  And if I have any, I might even pop open a can of soup."  Yes, we both enjoy cooking, but like anything, sometimes you just need a break!  So this week we decided to share our favorite grilled cheese sandwiches.

Though I am a carbohydrate addict, when it comes to grilled cheese sandwiches, it is much less about the bread and all about the cheese for me. Smoked Gouda is my all-time favorite cheese.  Thus it, mixed with extra sharp cheddar, are the preferred stars of my sandwich.  And, for reasons that I cannot explain, I always grate the cheddar and slice the Gouda when I make my sandwiches.  I can't even remember when or why I started that.  I'm sure it has a dramatic effect on the satisfaction level of the sandwich, though.  LOL!


Generally, I prefer "brown" bread, but I still like my grilled cheese on white bread, another phenomenon that I cannot explain.  And not only do I like the white bread, I like it to be slathered, heavily slathered, with butter.  Yep.  This is why these sandwiches are comfort food.  All the things that I don't eat every day.  But, in case you think I am being totally unhealthy here, I do like my grilled cheese sandwiches with a couple slices of tomato.  There!  A vegetable, or, a fruit.  Ha.  The great tomato debate is one that has been going on for a long time.  In 1883, in the first of several cases on the matter presented before the U.S. Supreme Court, The tomato was ruled a vegetable.  Botanically speaking, of course, it is a fruit.  Whatever you want to call it, tomato is an excellent addition to my sandwich!  And, it makes it a tad bit healthy, doesn't it?

Though I do enjoy cooking very much, I am not a big kitchen gadget person.  My personal rule is to have nothing in my kitchen that only serves one purpose.  )We won't talk about the fact that I have three sets of measuring spoons.)  Though I am sometimes mildly impressed by the "one trick wonder" type gadgets, I don't have physical or mental space for them.  I can't function well with a lot of "stuff" around me and there is not room left in my cabinets or pantry.  At this point in my life, if I am going to add something new, something old is going to have to go.  That will be tough though, because all the old things that have made all the various purges thus far in my life are things that I find to be pretty darn useful!

The one thing that I made an exception for with regard to my one use rule is my waffle iron.  Only a waffle iron can make waffles; that's a given.  And a waffle iron can't do anything else, right?  Wrong.  At one point I thought I wanted a sandwich press...until I realized that I could press my sandwiches in the waffle iron...thus giving me "fancy" looking white bread.  LOL!  Seriously, the waffle iron makes a great sandwich press.  The key is to not actually press. :-)  If you push down on the sandwich like you would with a spatula when you make a grilled cheese sandwich in a skillet, you will push holes in the bread, creating a sandwich that can not be picked up because it is oozing cheese from all of its pores.   Just place your sandwich on the waffle iron and close it, adding no additional pressure. Using a wffle iron to cook things other than waffles is no an origional idea.  There are all kinds of recipes out there for creative ways that you can cook all kinds of things with your waffle iron.

So here are the down and dirty details of my favorite grilled cheese sandwich:

INGREDIENTS
My desired amounted of grated sharp cheddar cheese
My desired amount of sliced smoked Gouda
2 slices of "good" white bread
A couple slices of fresh tomato
Some melted butter
A sweet pickle...don't forget the pickle!

Preheat your waffle iron.

Brush one side of each slice of bread with melted butter.  Layer the un-buttered side of one slice with the smoked Gouda, then the tomato, and top with the grated cheddar cheese.  Top with the second slice of bread.  Place the sandwich on the waffle iron.  Resist the urge to make it a sandwich press!  Do not press down.  Cook until the bread reaches your desired level of brown. 

Here are a couple of my variations on this theme.  Add fresh spinach leaves and or bacon in the layer with the tomato.  This way, the cheese holds everything in place.  Another nice touch is to add a little bit of seasoning to the melted butter that you brush on the bread.  I usually use Italian seasoning,  Of course any herbs or spices that are personal favorites will certainly work just fine!

 Serve with a pickle and enjoy!


by Tracey G


When Kris mentioned doing grilled cheeses to my suggestion that I needed something simple and fast this week - I thought it was a great idea! Something a little different than our usual formula, this was more method and ingredients than full blown recipe kind of thing. A fun one to see how alike or different we are in what are our favorites! And from reading her post, I think we are once again, very much alike. We may have chosen different ingredients for this one, but I could have just as easily chosen what she used for hers! ;-)

To be  honest, I love a grilled cheese with just about any kind of cheese - but with a 6 1/2 year old around 99.9% of the time for the making of grilled cheeses, for speediness-sake vs. a debate/argument, I usually use the good old fashioned Kraft American singles and regular bread we always have around. And those are fine with me too - always a favorite and a classic. And with mine, I need a dill pickle - well, make that pickle slices that I put ON my sandwich, meaning between the bread slices with the melty cheese. Best way ever - well, to me anyway, lol. My child doesn't like pickles (some days I truly wonder if he wasn't switched at birth with another child born that day, his pickiness and not liking pickles is just wrong and so the opposite of myself! LOL), so not the "best way ever" to him, lol.

But, when I have the opportunity to have it my way - I jump at it! A local restaurant used to have my favorite lunch meal - they made a grilled cheese with 5 different cheeses and a lovely tomato bisque to go along with it. I don't get quite as extravagant with the cheese, as in using 5 different ones, but I will splurge on one or two good ones for my sandwich. Since this was all about favorites, I went with my favorite - and Harry's favorite too! - way to make my homemade-right-out-of-the-can tomato soup. I do use milk, but will replace a quarter of it with heavy cream if I happen to have some around. It's so much of Harry's favorite, that, every time I make tomato soup, he asks for it my "special creamy way", lol. 


These are my favorite ingredients. Too keep it simple, I stuck with one cheese, one of my favorite cheddar cheeses - and it melts so nicely too, lol. But as I said, I love a grilled cheese with just about any kind of cheese, I love a combo of sharp and mild cheddar as well. White cheddar is my favorite, so that's what I went with. I also like to use garlic in my butter for grilling. As for bread, my favorite bread is a rustic loaf, I do love a good Italian loaf, or Ciabatta. I do try to choose slices without large holes, they tend to let the cheese melt right through, lol.

My method is your typical grilling of the grilled cheese method, lol. I do, however, melt my butter when I am using a rustic bread, and brush it on prior to grilling - it also helps the garlic flavor blend through the butter. I brush one side of each of the slices of bread, place one buttered-side down on a preheated griddle or fry pan, top with cheese and then top with the other slice of bread, with the buttered side up. For my pickle-infused version, I start grilling mine so that the cheese just starts to melt, then I take the top slice of bread off and add my pickle slices, lol, and replace the top slice. Once the one side is nicely  browned, it's time to flip and brown the other side. That about sums it up, lol. Serve them up with your favorite soup - be it tomato or whatever! :-D 


Saturday, September 12, 2015

Food Friday - Black and White

from Kris B.


This is one of those recipes that brings back all kinds of memories for me.  It is one that my mom made all the time.  In fact, I still use the recipe card, written in her hand, that she gave me when I was in college thirty-five many year ago.


I didn't do much "real" cooking during my college days, but because Fudge Pie is so easy, I could make it as a weekend treat for my friends.  In fact, this is also known as "Pudge Pie" thanks to one of my roommates who, on one such occasion, made a slip of the tongue, one that this pie has never lived down!

Whether you know it as Fudge Pie or Pudge Pie, it is an incredibly rich slice of chocolate!  It only takes a small slice to satisfy the cravings of even the most ferocious chocoholic!


INGREDIENTS

1/4 pound butter
1 3/4 squares unsweetened chocolate
2 eggs
1 Cup sugar
1/4 Cup flour
1 tsp vanilla

Preheat oven to 350 degrees.

Melt the butter and chocolate in a double boiler.


Beat together the eggs, sugar and flour.  Add the vanilla. I usually mix this in a four cup measuring cup because it makes it so easy to then pour into the pie plate.


 Add the chocolate mixture to the egg mixture.  Stir well.

Pour into a greased 8 inch pie pan.  Bake for 25 minutes.

I apparently got distracted here at the end because I failed to photograph the last couple steps.  I suspect this goes back to my inability to multi-task.  While I was baking and photographing, I was also trying to get laundry done because we are going out of town this weekend, coordinate with a friend who I am meeting in the airport once we arrive in Philadelphia, and run down my packing list to make sure I haven't forgotten anything.  As long as I haven't packed any vanilla in more than a 3 oz. container or added sunscreen to the pie all should be well!


Thanks for taking the time to stop by a spend a few minutes with us!


By Tracey G


I was at a total loss this week. We discussed chocolate, and pie and the combination of the two, and all I was coming up blank. I told Kris no worries, I would come up with something to compliment what she had in mind. It was a busy week for the both of us, with her getting to escape for some fun out of town, and me dealing with Harry with an ear infection and the start of school this week ;-) And I am still far behind. *sigh* But, I did some flopping around at some recipe sites and found this one,  courtesy of Taste of Home, lol. One thing I do like when I am at a loss for a recipe out of my recipe library, is it pushes me to find and try something new - so I guess, my wins and my epic fails will be shared with everyone, lol. But that's ok, it's how it is in real life, some recipes you make for yourself or the fam are huge winners and some, are awful losers, lol. And you're generally stuck with them at the time good or bad, lol. I liked this one because it played off of Kris's Fudge Pie in the "opposite" sort of way. ;-)

Fortunately this one turned out pretty darn good. It was iffy there though at first, because my pudding-sweetened condensed milk-cold water mixture just didn't come together as I expected. And it never did really smooth out as I'd thought it would. Where the fault lies for that, I'm not sure. It was a different brand of pudding then I am used to using, normally it's the Jell-O brand, or it just could be a natural occurrence of using water and sweetened condensed milk in place of the normal cold milk that's used. I was kind of in a panic that this wasn't going to be good...or pretty or pretty good, lol. But in the end, even though it still has a slightly grainy look, it doesn't "taste" of feel grainy when it was eaten. ;-)

Unfortunately I have no process shots this week, lol. There really wasn't a lot to document and it was 9 p.m. at night when I was finally getting things done. It's been a heck of a week and my Friday was a blur of things going on, so by the time all was said and done, it was night when I was finally getting to work on it!


So, here's all the ingredients except for the water. It involves the ready-made graham tart shells, whipped topping, sweetened condensed milk and white chocolate instant pudding mix.

It's super easy to pull this together, which was a good thing considering I think I was half asleep when I was attempting this, lol. In a large bowl, you whisk the sweetened condensed milk, cold water and pudding mix for 2 minutes. You then let it stand a couple more minutes. Now you refrigerate it for 10 minutes.

At the end of the 10 minutes, you fold in the whipped topping, then, spoon the filling into the tart shells. Then you refrigerate until serving. Garnish as you'd like. I took my cue from the tart shell package with the raspberries and mint leaves. :-) I was just happy I still had some mint kicking around the flower garden, to complete the garnish!


White Chocolate Tarts 

courtesy of Taste of Home

1 14 oz can sweetened condensed milk
1 c cold water
1 3.4 oz package instant white chocolate pudding mix
2 c whipped topping
2 packages (6 count each, total of 12) individual graham cracker tart shells

In a large bowl , whisk the sweetened condensed milk, water and pudding mix for 2 minutes. Let set for 2 minutes or until soft-set. Cover and refrigerate for 10 minutes.

Fold in whipped topping. Spoon approximately 1/3 cup into each tart shell. Refrigerate until serving. Makes 12 servings.


Saturday, September 5, 2015

Food Friday - Feeling Blue

from Kris B.


Feeling blue may be a little strong for my feelings this week, but ithe title worked well with the week’s recipes.  LOL.  For me, feeling a little out of sorts may be more appropriate.  I started back to work full time this week and I did not make the transition from the freedom of my summer schedule to the structure of the academic schedule very gracefully.  Simply stated, I failed grandly at time management; that’s why Food Friday is Food Saturday this week.  I am glad to be back at school because I really do love teaching.  Meeting our new students and catching up with those that are returning is always such a pleasure.  I teach the final three semesters of a four semester sequence of courses.  By the time those students and I have been together that long, we know each other quite well.  On the first day of classes this semester, three of my students who completed the sequence last spring were sitting in the room with this semester’s fourth semester class.  Responding to my somewhat befuddled look, they said, “We are going to miss your class this semester so we thought we’d just come visit.”  It is hard to feel too blue about going back to school when the school year begins like that.

On to this week's recipe...

When it comes to talking about what can be added to cookies, or muffins, or cakes at my house, blueberries are one of the few things on which my husband and I agree.  You heard about our raisin and chocolate chip dilemma a few weeks ago.  But blueberries?  Blueberries are always acceptable!  And pound cake is right up there with angel food cake as one of my favorites.  In case you haven’t noticed already, my tastes are fairly simple.  You just can"t go wrong with pound cake.  Because its ingredients are so basic, it can be made just about any time you have a craving!

The dry and ingredients are flour, sugar, salt and baking powder, pantry staples.


***As an aside…Tracey and I have realized that we promised you guys stories of friendship and photography, as well as food, here.  We are going to try to do a little better job of writing about those things as well.  I’m going to start by sharing a story that comes from shooting the photos for this post.  As I said, I did not plan my week well, so I was trying to get all of this done, cooking, processing phots, and writing, on Friday.  That meant that I needed everything to go smoothly and as I planned.  I had given Tracey a heads up that it would probably be late when I got it all done and that I would be the one to hold up the post for this week.  I got started with the cooking.  Everything is going along well.   Then I took a few photos of the mixer doing its thing.  I glanced at the preview of the photos on my camera.  I then sent the following message to Tracey:
Note to self: Get yourself a glass bowl for your Kitchen Aid mixer because you look like **** reflected in the metal bowl! 
Her response, “LMAO.” 
 This is why we have so much fun working together!  Now back to the important stuff.

Combine tthe dry ingredients with some wet ingredients - eggs, butter, and vanilla -


 If I don’t photograph the butter then the calories from the fat don’t count, right?   

I think that I have mentioned before that I make my own vanilla extract.  All it takes is a few vanilla beans taking up residence in a mason jar of vodka for a few weeks. 

Add  some blueberries…


Mix them all together, 


and you get pure goodness!


Okay, it’s not quite that simple.  There are a few important steps in this recipe that do make the difference between success and…not success with this cake.

INGREDIENTS

1 Cup unsalted butter plus 1 TBS
2 Cups sugar plus 3 TBS
3 Cups all-purpose flour, divided
1 tsp baking powder
1/2 tsp kosher salt
4 large eggs
1 tsp vanilla extract
2 Cups fresh blueberries

Preheat oven to 325 degrees.

Coat a tube pan with 1 TBS butter and then sprinkle in and coat with 3 TBS sugar.  Set aside.

In a bowl, combine 2 cups of the flour, salt, and baking powder.  Set aside.

Cream together the remaining butter and sugar.  Use a stand mixer with a paddle attachment, not the whisk.  Beat on medium speed for 5 minutes.  Yes, 5 minutes!  Then, add the eggs one at a time, followed by the vanilla.  Continue to beat the mixture for another 3 minutes.  

With the mixer on lower, add the dry ingredients, mixing only until the ingredients are incorporated.  Do not over mix!!!

Place the blueberries and the remaining cup of flour in a plastic zipper bag and toss.  Coating the blueberries with flour keeps them from all "sinking" in the cake.  Fold the berries into the batter by hand.

Bake for an hour and 15 minutes, or until a knife inserted in the middle comes out clean.  Let the cake cool for a few minutes before turning out of the pan and continuing to cool on a wire rack.

***  A bit of lemon zest and/or lemon extract is a nice addition to this recipe.


Happy Labor Day, everyone!  
Have a fun a safe holiday weekend.

by Tracey G.


As Kris and I were getting ready for this "Friday's" post, everything seemed to just go downhill in my camp, lol. I ended up having to take Harry to the after-hours clinic at our doctor's office due to ear pain on Thursday evening after a miserable Wednesday night, and come to find out he's got an ugly ear infection. So, the past few nights since, oh, Wednesday, have involved very little sleep, and every time I get something on a roll after he's asleep, he's awake and my work gets put on hold, lol. I am hoping that a couple full days on the antibiotic will start to see some improvement! Poor kid is miserable and the first day of school is Tuesday. What a way to start the year, the doctor wanted to see him back next Friday, so the first week of school he's either going to be late on that day or absent depending on the efficiency at the doctor's office, lol.

So, that's my reason why Food Friday became Food Saturday for me as well!! ;-)

Labor Day weekend reminds me of a special dessert my mom would make, not that she made it, every Labor Day weekend, because I couldn't even tell you if she ever made it on a Labor Day weekend, lol - but simply because it did. Her birthday was just August 22, so I guess she's been on my mind a lot. But anyway, the dessert would be the Stern Reunion Blueberry Torte, my mom was a Stern so was from her side of the family. I didn't call it that because to me, and one of my best friends who I think loved it more than me (if that was possible!), it was simply known as my Mom's Blueberry Torte, lol. The funny thing is, I've never made it. My friend requested it as a wedding gift, lol, a pan of it all for her that she didn't have share - she  may have shared with her new husband, lol, I'll have to ask her one of these days, but she's made it through the years, and I can't believe I never have. It's not like I didn't have the recipe, lol. I couldn't even tell you the last time I'd even had it... So I knew it was time to make it.

As I was making it, I had to laugh - mom only made it for special occasions, holidays and whatnot, so I always thought it was labor intensive so therefore, saved for certain occasions - like the pecan tarts she'd make every Christmas, they were special because that was the only time of year we had them, lol. But the torte was REALLY simple to put together and fast, lol. I was reminded of the old Rice Krispies Treat commercial where the mom dusted herself with flour before she took the treats, wearily, out to the family as if it had been one of the most difficult things to produce, yet she and we knew it was one of the easiest. ;-) I knew mom more as a "cooker" instead of dessert maker/baker kind of person, so whatever she did make as a dessert, I guess would be her signature items, lol, like Blueberry Torte or Pecan Tarts. This truly was one of the things I grew up on, she'd made it ever since I was a kid, and eating it was a total blast from the past - and in such a good and yummy way! 

These are the crust ingredients - bottom then clockwise: chopped walnuts, brown sugar, flour, vegetable shortening and butter. That's it.

Mix all of the ingredients together and press into the bottom of a 9x13" pan. Then bake at 400° F for 15 minutes or until lightly browned. While that's cooling start getting your filling ingredients ready... 

The filling ingredients are pretty simple too - the filling part is made up of: vanilla, powdered sugar, cream cheese and Dream Whip prepared per package directions. The "topping" is a can of blueberry pie filling. It's about 2 cups - so if you wanted to make your own with fresh blueberries sugar, water and cornstarch kind of thing that's the least amount you'd need. I do have a note in my recipe book to use 1-2 cans of filling, so the amount is another one of those things that can be played with to suit your taste ;-) Next time I make it, I am going to use more, likely 2 cans or make my own blueberry filling/sauce. Oh heck, for that matter, you could use whatever pie filling captures your fancy, I would like to try lemon and also make my own fresh peach filling to try on top...or even a raspberry....I guess I could keep going, lol. But you all get the idea. ;-)

With a mixer (either hand held or stationary) combine the powdered sugar, cream cheese and vanilla until smooth. Then, prepare the Dream Whip according to the package directions. If you have the space, you can make the whipped topping ahead of time and refrigerate it until you're ready to use it.

Fold the whipped topping gently into the cream cheese mixture until thoroughly combined...

...then spread the cream cheese filling, evenly, over the cooled crust. Now, at this point, had I read my little notes on the recipe, I would have read the suggestion from Mom that you can refrigerate the torte at this point for awhile - it would have made the pie filling easier to spread over the top. I battled the cream part wanting to be pulled into the pretty pie filling, lol, and that could have been avoided. ;-)

I put the pie filling on in even lines/spoonfuls so that it can then be spread a little easier to cover the top. After you do that, all that's left is to refrigerate at least 2 hours before you serve. Now, again, here's a note on that - one that's not in my book but that I discovered while eating this the same day it's made - the crust is rather hard, lol. But, the next day, it was perfect, easy to cut and easy to eat. Next time I'll remember that - and it even just tasted better, lol. ;-)


Mom's Blueberry Torte (a.k.a The Stern Reunion Blueberry Torte)


Crust:

2 c flour
1/2 c brown sugar, firmly packed
1/2 c vegetable shortening
1/2 c butter, softened
1 c chopped walnuts

Mix together the ingredients. Press into the bottom of a 9x13" baking pan and bake at 400° F for 15 minutes or until lightly browned.

Filling and Topping:

2 pkg Dream Whip whipped topping mix
1 8 oz. pkg cream cheese, softened
1 c powdered sugar
1 tsp vanilla
1-2 cans blueberry pie filling

Mix together the cream cheese, powdered sugar and vanilla until well blended and smooth. Prepare the Dream Whip packages according to package directions. Fold into cream cheese mixture until well blended. Spread over top of cooled crust. Top with pie filling. Refrigerate at least 2 hours before serving.

(you can refrigerate the crust/cream cheese mixture layer before spreading on the pie filling, makes it easier to spread!)