Showing posts with label laughs. Show all posts

Wednesday, January 6, 2016

Tuesday in Texas - Also, Me the Photographer

by Kris B.

In many ways it seems funny to be writing about being “a photographer”  I think of myself more as someone who loves taking pictures.  Photographer sound so professional and I definitely am not a professional, nor do I want to be.  For me, taking pictures is a hobby, something fun, a spiritual discipline, something that is far removed from what I do professionally.  Aside from all that, because I am legally blind, with vision that can not be corrected, photography may not even seem like a realistic hobby!

My first camera was a Kodak 110 Instamatic with those blue flash cubes.  I know some of you remember those.  Right?  Please, someone!  I was in the sixth grade and working on the Girl Scout photography merit badge.  I don’t know that I was particularly interested in photography, in that  I knew nothing about it.  I was primarily interested in accumulating as many merit badges as I could.  The dad of one of my troop members led the teaching.  I remember having a lot of fun and at the end of our time together, he said to me, “You have a good eye for photography.”  “Good” and “eye” were never words that were used about me; I had no idea at that time what he was really saying.  I did, however, continue to take pictures from that point on.  I always had some kind of camera and snapped pictures somewhat inconsistently while I was in high school and college.  I failed, however, to keep up with picture taking when my girls were little.  Looking back, that is one of my biggest regrets.

When the kids were in middle school and playing lots of sports, I decided to start taking pictures again.  My husband bought me an N60, my first Nikon camera, still film.  I took pictures, but I had no idea what I was doing.  I shot on Auto exclusively.  With lots of luck, I took some decent pictures, but luck was all I had.  Developing film was expensive so “practicing” with multiple shots was not practical for me.  Then came digital cameras!!  Because my now ex-husband was a technology geek, he was all for getting me a digital camera, a Nikon D70.  I thought I was in hog heaven, though I still had no idea what to do with all of the buttons.  I had, however, by this point been through many years of graduate school and learned the merits of reading the manual.  Still, I was working mostly by trial and error, a lot of error, but at least now they were cheap errors! Slowly I learned.  For our 25th anniversary, only months before we filed for divorce, lol, my husband gave me a D300.  The new camera and a time of transition in my life is when I became seriously interested in improving my photography skills.

The first serious picture taking I did was for a local theater company.  I took the promo shots for shows as well as stills of the actual productions.  That was a lot of valuable on the spot training!

Denton Community Theater - The Laramie Project May 2007
Fast forward a few years and I discovered Capture Your 365.  In the fall of 2012 I took the Katrina Kennedy’s Capture Your life Through the Lens class; that was exactly what I needed.  I learned how to use most of the buttons on my camera and had some good knowledge to go along with my luck. In January of 2013, I joined the Capture Your 365 community and began taking a photo a day.  It is hard to believe that for 1100 days straight, I have a photo to document my life.  They are not all technically good, or interesting, or even particularly meaningful, but they are my life.  They are not all happy or pretty.  But again, neither is life.  As I look back, I am amazed at how vivid the memories are with each photo.  I can put myself right back on the day, in the moment in which they were taken.

I now shoot with a Nikon D600.  My “go-to” lens is a 24-70mm.  That said, right before Christmas, this lens and my tripod had a “falling out,“ literally.  I sent it back to Nikon for an expensive repair; however, the repair is less than replacing the lens.  So, I have been using other lenses lately, which is good thing.  I love my nifty-fifty and 105mm macro lenses.  I also have a 70-200 zoom, which I don’t use as often as I probably should. My newest lens is an 85mm lens that I really like for portraits.

105mm macro lens
Speaking of portraits, I never thought that I would enjoy taking portraits.  There was a time when I didn’t want any people in any of my photos.  Yes, I am an introvert, but even I know that this is taking the whole introvert thing way too far!  Even in scenes where people were a perfectly natural entity, I would wait until I could shoot and not include a single human being.  Now, I enjoy taking portraits, thanks in a large part to having taken Katrina’s Portraits class during 2015. 

50mm lens
I have even gotten better over the last three years about the dreaded self portrait.  Though in most situations I am not a control freak, I do like being in total control of the photos of me.  If they are self portraits and I am both in front of and technically behind the camera, I can execute them my way.  I can take as much time as I need; I can delete the awful shots before anyone else sees them; and, I can try different things without feeling self conscious.  This is the only way that any photos of me get taken.

January 1, 2014
I also never thought that I would be taking photos of food.  I love to cook and I love to eat, but the thought of photographing food never crossed my mind.  To me, bad food photography is some of the worst bad photography there is.  I was not sure that I was up to the challenge of making food look good.  Tracey and I have a joke about the “brown food photos.”  Should we ever write a cookbook, there will definitely be some discussion about brown food, possibly in the title. lol!  Once you get beyond vegetables, think about how much food is brown!  Now think about how to make it look appealing in a photo.  It is harder than you might imagine.  Add to that the fact that my kitchen is awesome for cooking and terrible for photography.  There really is no good light source at all!

My dark kitchen! - this was taken mid afternoon!
 I have been known to travel all over the house with plates of food in my hand trying to find the best light at any given time of day.  Outside is not off limits either!

Because I was a writer before I became seriously interested in photography, I sometimes have a hard time letting my photos speak for themselves.  I enjoy fitting images and words together.  Many of my photos contain quotes.  With regard to my Photo of the Day images, the text that I choose to include has something to do with my thoughts or feelings on that day.

I am lucky that my husband and my girls are supportive and cooperative when it comes to me and photography.  

Weber - January 2013
CY365 Practice Class

Erin - July 2015
24-70mm lens at 50mm lol!

Brooke - December 2015
85mm lens

There are times when they have had enough and then I turn to the animals and my ever cooperative collection of Lego minifigures.  

So tomorrow will be day 1101 of a photo a day.  I now enjoy photographing both people and food.  And, I have a wonderful friend in Tracey thanks to photography.  I am still struggling to figure out what my personal "style" is with regard to my photography.  I am happy to say that this, however, is one of the best struggles of my life!

105mm macro

Thanks for coming along with us on our journey of food, friendship, and photography!


Saturday, October 10, 2015

Food Friday - Halloween Treats

from Tracey G.


When I saw this recipe, I knew I had to make it - I've had the darn thing for a couple years now and I'd yet to make it - until now. Yeah! Finally!  The dip tastes just like pumpkin pie - it's so yummy! And the pie crust dippers are perfect with it, only next time I think I'd do something a little "stronger" to dip - the cats legs kept breaking off and the tails barely made it off the cookie sheets, lol. Maybe pumpkin cut outs or ghosts or something - but the cats are pretty darn cute, lol. Another good thing about this recipe is it's holiday-versatile, lol. I mean, you could make it around Thanksgiving, using leaf cookie cutters in place of the Halloween themed cutters. Just tint the egg wash the appropriate color for the leaves and you're all set. :-)

This was a pretty easy recipe to execute - which was really nice! Would be a good last minute thing to throw together - I had everything on hand that I needed. I always have pumpkin puree in the freezer (canned is called for in the recipe though, but I always make my own every fall and freeze it), the pie crusts are usually in the freezer and the cream cheese is usually in the fridge, lol. So, this was an easy throw-together for me! :-)

Here's the filling ingredients - Honey, pumpkin pie spice, cream cheese, pumpkin and powdered sugar. I also make my own pumpkin pie spice as well, and that's super easy too - I'll include my recipe in this post as well. :-)

In a large bowl, beat the cream cheese until fluffy (this is not the bowl I beat it in, lol, this is the one I used to store it in the fridge in while the dippers were baking). Add the pumpkin, honey, powdered sugar and pumpkin pie spice.

The dipper ingredients are cinnamon, granulated sugar, milk, refrigerated pie crusts, an egg and black paste food coloring (I used the new Wilton Color Right system Black color). 

Roll out the dough directly on the cookie sheet to 1/8-in thickness...

Cut out the dippers leaving about an inch in between them, just peel the excess dough from between them - you can re-roll the scraps too if you'd like, I did. 

Beat the egg, add milk and food color. Mix the cinnamon with the sugar and set aside. Brush the colored egg mixture over the cats, then sprinkle with some cinnamon sugar. 

Bake at 400°F for 6-7 minutes, or until edges begin to brown. Cook on wire racks. Serve with pumpkin dip!


Pumpkin Pie Dip with Black Cat Dippers

courtesy of Taste of Home

1 8 oz. package cream cheese, softened
1 15 oz. can solid-pack pumpkin
1 cup powdered sugar
1 tbsp pumpkin pie spice
1 tbsp honey

Dippers:
1 pkg (15 oz.) refrigerated pie pastry
1 egg
1 tbsp milk
black paste food coloring
1/4 c granulated sugar
1/2 tsp ground cinnamon

1) In a large bowl, beat cream cheese until fluffy. Add the pumpkin, pumpkin pie spice, honey and powdered sugar; mix until smooth.  Cover and refrigerate until serving.

2) Roll out each pastry sheet directly on an ungreased cookie sheet to 1/8-in. thickness. Cut with floured 2-in. cookie cutter, leaving at least 1 inch in between cutouts. Remove excess dough, and re-roll scraps if desired. Beat the egg with the milk and food coloring; brush over cut outs. Combine the cinnamon and sugar and sprinkle over cutouts.

3) Bake at 400°F for 6-7 minutes or until edges begin to brown. Cool on wire racks. Serve pumpkin dip.

Pumpkin Pie Spice:
Makes about 7 1/2 tsp

4 tsp cinnamon
2 tsp ground ginger
1 tsp ground cloves
1/2 tsp ground nutmeg

Mix all together and store in an airtight container. I have made it before without using ginger and I've also added a bit more clove - because I love clove, lol. Feel free to add or subtract whatever to suit your tastes :-) 


from Kris B.


All I can say is that it is a good thing that Tracey titled this week’s post because if I had done it, it would have been “the agony of defeat.”  LOL!  First of all, time got away from me and I found myself scrambling to get things done at the end of the week.  I had everything planned out, but the execution certainly did not work according to that plan.  That I can actually cope with since I have on ongoing struggle with time management.  And time whoops me in every battle!

The second defeat was in the recipe itself.  Looking back, this is because I didn’t trust my own instincts.

So here’s the story…

A few Sunday’s ago at church, someone had made for coffee hour the good, old fashioned, remind you of your childhood, Rice Krispie treats.  Weber had one and commented as to he couldn’t remember when he had last had one and that he really liked them.  That afternoon, I made a batch of the tried and true off -the-box recipe for us to take in our lunches that week.  When Tracey and I started talking about Halloween treats, I had the idea to just add pumpkin spices to the original Rice Krispie Treats recipe to give them a little festive spirit.  

Knowing that virtually no ideas are really original, I turned to the Internet to see what had been done along these lines.  Of course I discovered that my thoughts were not original; no surprise there.  LOL!  What I did find, is that several recipes added pumpkin purée.  Though I was hesitant about that, I read this blog where the writer chronicled her own process of trying to create pumpkin Rice Krispie treats.  She told of several failed attempts, but finally, by paying careful attention to the cooling process of the marshmallow and pumpkin mixture, was successful.  Being that she had gone through the trial and error, I decided to follow her recipe, with full disclosure.  

Here it is:
Pumpkin Spice Rice Krispie Treats
serves 12
3 tablespoons unsalted butter
1/4 cup canned pumpkin puree
1 (10 ounce) bag mini marshmallows plus one cup
1/4 teaspoon pure vanilla extract
1/4 teaspoon ground cinnamon
Pinch of allspice
Pinch of freshly grated nutmeg
Pinch of kosher salt
6 cups crispy rice cereal
 Butter a 9x13-inch baking dish (or a smaller dish — see Note below).
 In a heavy saucepan or Dutch oven, melt butter over medium-low heat. Add the pumpkin puree and continue to cook until it is warmed through. Fold in 10 ounces of the marshmallows, stirring frequently until almost completely melted. 
Stir in vanilla, cinnamon, allspice, nutmeg, and salt, and remove from heat. 
Allow the marshmallow mixture to cool 10 minutes; fold in the remaining cup of marshmallows.
 Continue to cool the mixture for another 20 to 25 minutes until it is room temperature (failure to cool the mixture will result in soggy rice crispy treats.) Add the puffed rice cereal and stir, using a silicone spatula, until combined. 
Press the mixture into the greased rectangular baking dish. Let set for 30 minutes before cutting and serving.
 • Note: I call for a 9x13-inch dish here, but I often use an 8x11-inch because I like taller treats. Any size in this range should do.

I'll admit that when it comes to cooking I do not always measure ingredients exactly, nor to I always follow suggested timing for things.  I have learned to adjust for me own taste and the quirks of my own oven.  That said, I followed this recipe exactly because I knew that there was a fine line between success and failure.  I actually set a timer for the two different cooling periods.  All seemed well.

After allowing the pan to fully cool, I gave Weber the first square.  His comment, "The flavor is really good, but the Rice Krispies are tough."  Ooh.  Not a good thing.  I tasted them.  He was right, the flavor is good.  What he described as "tough" was actually soggy, masked by the stickiness of the marshmallow mixture.  So, they tasted good, but didn't feel good in your mouth, especially since we all know what Rice Krispie Treats are supposed to taste like both in flavor and texture.

So what did I learn?  I am not one who thinks that I know everything.  I'm far from that.  But, in this case, I knew that the added liquid from the pumpkin purée would change the science of this recipe and I should have followed my initial instinct to only add the pumpkin pie spices.  And honestly, the pumpkin purée adds no additional flavor.  So, if you want to make Pumpkin Spice Rice Krispie treats, skip the "bad guy,"


and follow the basic recipe on the cereal box, 

1. Melt 3 TBS of butter in a heavy sauce pan over low heat.  Add the marshmallows, stirring until completely melted.
 and add 1/4 tsp of cinnamon and a dash of nutmeg and allspice to taste, to the marshmallow mixture.   
2. Stir in 6 Cups of Rice Krispies.
3. Using a buttered spatula, spread the mixture into a buttered 9x15 pan, or a smaller pan for thicker treats.  Let cool completely and then cut into squares. 

Most often the "KISS" method (Keep It Simple Stupid) is best.  Lesson learned.  LOL!

So there you have it, my story of being defeated by Rice Krispie Treats.  If any of you choose to take on the pumpkin puree in this arena, I'd love to know your secrets!


Friday, September 18, 2015

Food Friday - Say Cheese!

from Kris B.


This week's post is less about the recipe and more about what the recipe's say about us.  I suspect that grilled cheese in some form or another is a favorite of all of us.  And if it is not a current favorite, I bet thinking about a grilled cheese sandwich conjures of some fond memories of another time.  Grilled cheese sandwiches have always been a favorite of mine.  When I was a child, my mom made them with good old store brand white bread, American cheese, and a healthy slathering of butter, and then tossed in the skillet and browned on both sides.   Simple, and oh so good!  I still like this "recipe" from my childhood, and though my current method and ingredients for making grilled cheese sandwiches has evolved a bit over the years, the effect is still the same...classic comfort food.

It probably doesn't surprise you that Tracey and I talk a lot about food.  However, what we say about it in our regular conversations with one another is rather humorous.  At least once a week one of us will say, "Well, I've got my Friday post recipe under control, but I have no idea what we are having for dinner tonight."  Or, "I got my recipe made and photos taken and now I'm too tired to cook."  Those comments are often followed by, "I guess I'll just make grilled cheese sandwiches.  And if I have any, I might even pop open a can of soup."  Yes, we both enjoy cooking, but like anything, sometimes you just need a break!  So this week we decided to share our favorite grilled cheese sandwiches.

Though I am a carbohydrate addict, when it comes to grilled cheese sandwiches, it is much less about the bread and all about the cheese for me. Smoked Gouda is my all-time favorite cheese.  Thus it, mixed with extra sharp cheddar, are the preferred stars of my sandwich.  And, for reasons that I cannot explain, I always grate the cheddar and slice the Gouda when I make my sandwiches.  I can't even remember when or why I started that.  I'm sure it has a dramatic effect on the satisfaction level of the sandwich, though.  LOL!


Generally, I prefer "brown" bread, but I still like my grilled cheese on white bread, another phenomenon that I cannot explain.  And not only do I like the white bread, I like it to be slathered, heavily slathered, with butter.  Yep.  This is why these sandwiches are comfort food.  All the things that I don't eat every day.  But, in case you think I am being totally unhealthy here, I do like my grilled cheese sandwiches with a couple slices of tomato.  There!  A vegetable, or, a fruit.  Ha.  The great tomato debate is one that has been going on for a long time.  In 1883, in the first of several cases on the matter presented before the U.S. Supreme Court, The tomato was ruled a vegetable.  Botanically speaking, of course, it is a fruit.  Whatever you want to call it, tomato is an excellent addition to my sandwich!  And, it makes it a tad bit healthy, doesn't it?

Though I do enjoy cooking very much, I am not a big kitchen gadget person.  My personal rule is to have nothing in my kitchen that only serves one purpose.  )We won't talk about the fact that I have three sets of measuring spoons.)  Though I am sometimes mildly impressed by the "one trick wonder" type gadgets, I don't have physical or mental space for them.  I can't function well with a lot of "stuff" around me and there is not room left in my cabinets or pantry.  At this point in my life, if I am going to add something new, something old is going to have to go.  That will be tough though, because all the old things that have made all the various purges thus far in my life are things that I find to be pretty darn useful!

The one thing that I made an exception for with regard to my one use rule is my waffle iron.  Only a waffle iron can make waffles; that's a given.  And a waffle iron can't do anything else, right?  Wrong.  At one point I thought I wanted a sandwich press...until I realized that I could press my sandwiches in the waffle iron...thus giving me "fancy" looking white bread.  LOL!  Seriously, the waffle iron makes a great sandwich press.  The key is to not actually press. :-)  If you push down on the sandwich like you would with a spatula when you make a grilled cheese sandwich in a skillet, you will push holes in the bread, creating a sandwich that can not be picked up because it is oozing cheese from all of its pores.   Just place your sandwich on the waffle iron and close it, adding no additional pressure. Using a wffle iron to cook things other than waffles is no an origional idea.  There are all kinds of recipes out there for creative ways that you can cook all kinds of things with your waffle iron.

So here are the down and dirty details of my favorite grilled cheese sandwich:

INGREDIENTS
My desired amounted of grated sharp cheddar cheese
My desired amount of sliced smoked Gouda
2 slices of "good" white bread
A couple slices of fresh tomato
Some melted butter
A sweet pickle...don't forget the pickle!

Preheat your waffle iron.

Brush one side of each slice of bread with melted butter.  Layer the un-buttered side of one slice with the smoked Gouda, then the tomato, and top with the grated cheddar cheese.  Top with the second slice of bread.  Place the sandwich on the waffle iron.  Resist the urge to make it a sandwich press!  Do not press down.  Cook until the bread reaches your desired level of brown. 

Here are a couple of my variations on this theme.  Add fresh spinach leaves and or bacon in the layer with the tomato.  This way, the cheese holds everything in place.  Another nice touch is to add a little bit of seasoning to the melted butter that you brush on the bread.  I usually use Italian seasoning,  Of course any herbs or spices that are personal favorites will certainly work just fine!

 Serve with a pickle and enjoy!


by Tracey G


When Kris mentioned doing grilled cheeses to my suggestion that I needed something simple and fast this week - I thought it was a great idea! Something a little different than our usual formula, this was more method and ingredients than full blown recipe kind of thing. A fun one to see how alike or different we are in what are our favorites! And from reading her post, I think we are once again, very much alike. We may have chosen different ingredients for this one, but I could have just as easily chosen what she used for hers! ;-)

To be  honest, I love a grilled cheese with just about any kind of cheese - but with a 6 1/2 year old around 99.9% of the time for the making of grilled cheeses, for speediness-sake vs. a debate/argument, I usually use the good old fashioned Kraft American singles and regular bread we always have around. And those are fine with me too - always a favorite and a classic. And with mine, I need a dill pickle - well, make that pickle slices that I put ON my sandwich, meaning between the bread slices with the melty cheese. Best way ever - well, to me anyway, lol. My child doesn't like pickles (some days I truly wonder if he wasn't switched at birth with another child born that day, his pickiness and not liking pickles is just wrong and so the opposite of myself! LOL), so not the "best way ever" to him, lol.

But, when I have the opportunity to have it my way - I jump at it! A local restaurant used to have my favorite lunch meal - they made a grilled cheese with 5 different cheeses and a lovely tomato bisque to go along with it. I don't get quite as extravagant with the cheese, as in using 5 different ones, but I will splurge on one or two good ones for my sandwich. Since this was all about favorites, I went with my favorite - and Harry's favorite too! - way to make my homemade-right-out-of-the-can tomato soup. I do use milk, but will replace a quarter of it with heavy cream if I happen to have some around. It's so much of Harry's favorite, that, every time I make tomato soup, he asks for it my "special creamy way", lol. 


These are my favorite ingredients. Too keep it simple, I stuck with one cheese, one of my favorite cheddar cheeses - and it melts so nicely too, lol. But as I said, I love a grilled cheese with just about any kind of cheese, I love a combo of sharp and mild cheddar as well. White cheddar is my favorite, so that's what I went with. I also like to use garlic in my butter for grilling. As for bread, my favorite bread is a rustic loaf, I do love a good Italian loaf, or Ciabatta. I do try to choose slices without large holes, they tend to let the cheese melt right through, lol.

My method is your typical grilling of the grilled cheese method, lol. I do, however, melt my butter when I am using a rustic bread, and brush it on prior to grilling - it also helps the garlic flavor blend through the butter. I brush one side of each of the slices of bread, place one buttered-side down on a preheated griddle or fry pan, top with cheese and then top with the other slice of bread, with the buttered side up. For my pickle-infused version, I start grilling mine so that the cheese just starts to melt, then I take the top slice of bread off and add my pickle slices, lol, and replace the top slice. Once the one side is nicely  browned, it's time to flip and brown the other side. That about sums it up, lol. Serve them up with your favorite soup - be it tomato or whatever! :-D 


Saturday, September 5, 2015

Food Friday - Feeling Blue

from Kris B.


Feeling blue may be a little strong for my feelings this week, but ithe title worked well with the week’s recipes.  LOL.  For me, feeling a little out of sorts may be more appropriate.  I started back to work full time this week and I did not make the transition from the freedom of my summer schedule to the structure of the academic schedule very gracefully.  Simply stated, I failed grandly at time management; that’s why Food Friday is Food Saturday this week.  I am glad to be back at school because I really do love teaching.  Meeting our new students and catching up with those that are returning is always such a pleasure.  I teach the final three semesters of a four semester sequence of courses.  By the time those students and I have been together that long, we know each other quite well.  On the first day of classes this semester, three of my students who completed the sequence last spring were sitting in the room with this semester’s fourth semester class.  Responding to my somewhat befuddled look, they said, “We are going to miss your class this semester so we thought we’d just come visit.”  It is hard to feel too blue about going back to school when the school year begins like that.

On to this week's recipe...

When it comes to talking about what can be added to cookies, or muffins, or cakes at my house, blueberries are one of the few things on which my husband and I agree.  You heard about our raisin and chocolate chip dilemma a few weeks ago.  But blueberries?  Blueberries are always acceptable!  And pound cake is right up there with angel food cake as one of my favorites.  In case you haven’t noticed already, my tastes are fairly simple.  You just can"t go wrong with pound cake.  Because its ingredients are so basic, it can be made just about any time you have a craving!

The dry and ingredients are flour, sugar, salt and baking powder, pantry staples.


***As an aside…Tracey and I have realized that we promised you guys stories of friendship and photography, as well as food, here.  We are going to try to do a little better job of writing about those things as well.  I’m going to start by sharing a story that comes from shooting the photos for this post.  As I said, I did not plan my week well, so I was trying to get all of this done, cooking, processing phots, and writing, on Friday.  That meant that I needed everything to go smoothly and as I planned.  I had given Tracey a heads up that it would probably be late when I got it all done and that I would be the one to hold up the post for this week.  I got started with the cooking.  Everything is going along well.   Then I took a few photos of the mixer doing its thing.  I glanced at the preview of the photos on my camera.  I then sent the following message to Tracey:
Note to self: Get yourself a glass bowl for your Kitchen Aid mixer because you look like **** reflected in the metal bowl! 
Her response, “LMAO.” 
 This is why we have so much fun working together!  Now back to the important stuff.

Combine tthe dry ingredients with some wet ingredients - eggs, butter, and vanilla -


 If I don’t photograph the butter then the calories from the fat don’t count, right?   

I think that I have mentioned before that I make my own vanilla extract.  All it takes is a few vanilla beans taking up residence in a mason jar of vodka for a few weeks. 

Add  some blueberries…


Mix them all together, 


and you get pure goodness!


Okay, it’s not quite that simple.  There are a few important steps in this recipe that do make the difference between success and…not success with this cake.

INGREDIENTS

1 Cup unsalted butter plus 1 TBS
2 Cups sugar plus 3 TBS
3 Cups all-purpose flour, divided
1 tsp baking powder
1/2 tsp kosher salt
4 large eggs
1 tsp vanilla extract
2 Cups fresh blueberries

Preheat oven to 325 degrees.

Coat a tube pan with 1 TBS butter and then sprinkle in and coat with 3 TBS sugar.  Set aside.

In a bowl, combine 2 cups of the flour, salt, and baking powder.  Set aside.

Cream together the remaining butter and sugar.  Use a stand mixer with a paddle attachment, not the whisk.  Beat on medium speed for 5 minutes.  Yes, 5 minutes!  Then, add the eggs one at a time, followed by the vanilla.  Continue to beat the mixture for another 3 minutes.  

With the mixer on lower, add the dry ingredients, mixing only until the ingredients are incorporated.  Do not over mix!!!

Place the blueberries and the remaining cup of flour in a plastic zipper bag and toss.  Coating the blueberries with flour keeps them from all "sinking" in the cake.  Fold the berries into the batter by hand.

Bake for an hour and 15 minutes, or until a knife inserted in the middle comes out clean.  Let the cake cool for a few minutes before turning out of the pan and continuing to cool on a wire rack.

***  A bit of lemon zest and/or lemon extract is a nice addition to this recipe.


Happy Labor Day, everyone!  
Have a fun a safe holiday weekend.

by Tracey G.


As Kris and I were getting ready for this "Friday's" post, everything seemed to just go downhill in my camp, lol. I ended up having to take Harry to the after-hours clinic at our doctor's office due to ear pain on Thursday evening after a miserable Wednesday night, and come to find out he's got an ugly ear infection. So, the past few nights since, oh, Wednesday, have involved very little sleep, and every time I get something on a roll after he's asleep, he's awake and my work gets put on hold, lol. I am hoping that a couple full days on the antibiotic will start to see some improvement! Poor kid is miserable and the first day of school is Tuesday. What a way to start the year, the doctor wanted to see him back next Friday, so the first week of school he's either going to be late on that day or absent depending on the efficiency at the doctor's office, lol.

So, that's my reason why Food Friday became Food Saturday for me as well!! ;-)

Labor Day weekend reminds me of a special dessert my mom would make, not that she made it, every Labor Day weekend, because I couldn't even tell you if she ever made it on a Labor Day weekend, lol - but simply because it did. Her birthday was just August 22, so I guess she's been on my mind a lot. But anyway, the dessert would be the Stern Reunion Blueberry Torte, my mom was a Stern so was from her side of the family. I didn't call it that because to me, and one of my best friends who I think loved it more than me (if that was possible!), it was simply known as my Mom's Blueberry Torte, lol. The funny thing is, I've never made it. My friend requested it as a wedding gift, lol, a pan of it all for her that she didn't have share - she  may have shared with her new husband, lol, I'll have to ask her one of these days, but she's made it through the years, and I can't believe I never have. It's not like I didn't have the recipe, lol. I couldn't even tell you the last time I'd even had it... So I knew it was time to make it.

As I was making it, I had to laugh - mom only made it for special occasions, holidays and whatnot, so I always thought it was labor intensive so therefore, saved for certain occasions - like the pecan tarts she'd make every Christmas, they were special because that was the only time of year we had them, lol. But the torte was REALLY simple to put together and fast, lol. I was reminded of the old Rice Krispies Treat commercial where the mom dusted herself with flour before she took the treats, wearily, out to the family as if it had been one of the most difficult things to produce, yet she and we knew it was one of the easiest. ;-) I knew mom more as a "cooker" instead of dessert maker/baker kind of person, so whatever she did make as a dessert, I guess would be her signature items, lol, like Blueberry Torte or Pecan Tarts. This truly was one of the things I grew up on, she'd made it ever since I was a kid, and eating it was a total blast from the past - and in such a good and yummy way! 

These are the crust ingredients - bottom then clockwise: chopped walnuts, brown sugar, flour, vegetable shortening and butter. That's it.

Mix all of the ingredients together and press into the bottom of a 9x13" pan. Then bake at 400° F for 15 minutes or until lightly browned. While that's cooling start getting your filling ingredients ready... 

The filling ingredients are pretty simple too - the filling part is made up of: vanilla, powdered sugar, cream cheese and Dream Whip prepared per package directions. The "topping" is a can of blueberry pie filling. It's about 2 cups - so if you wanted to make your own with fresh blueberries sugar, water and cornstarch kind of thing that's the least amount you'd need. I do have a note in my recipe book to use 1-2 cans of filling, so the amount is another one of those things that can be played with to suit your taste ;-) Next time I make it, I am going to use more, likely 2 cans or make my own blueberry filling/sauce. Oh heck, for that matter, you could use whatever pie filling captures your fancy, I would like to try lemon and also make my own fresh peach filling to try on top...or even a raspberry....I guess I could keep going, lol. But you all get the idea. ;-)

With a mixer (either hand held or stationary) combine the powdered sugar, cream cheese and vanilla until smooth. Then, prepare the Dream Whip according to the package directions. If you have the space, you can make the whipped topping ahead of time and refrigerate it until you're ready to use it.

Fold the whipped topping gently into the cream cheese mixture until thoroughly combined...

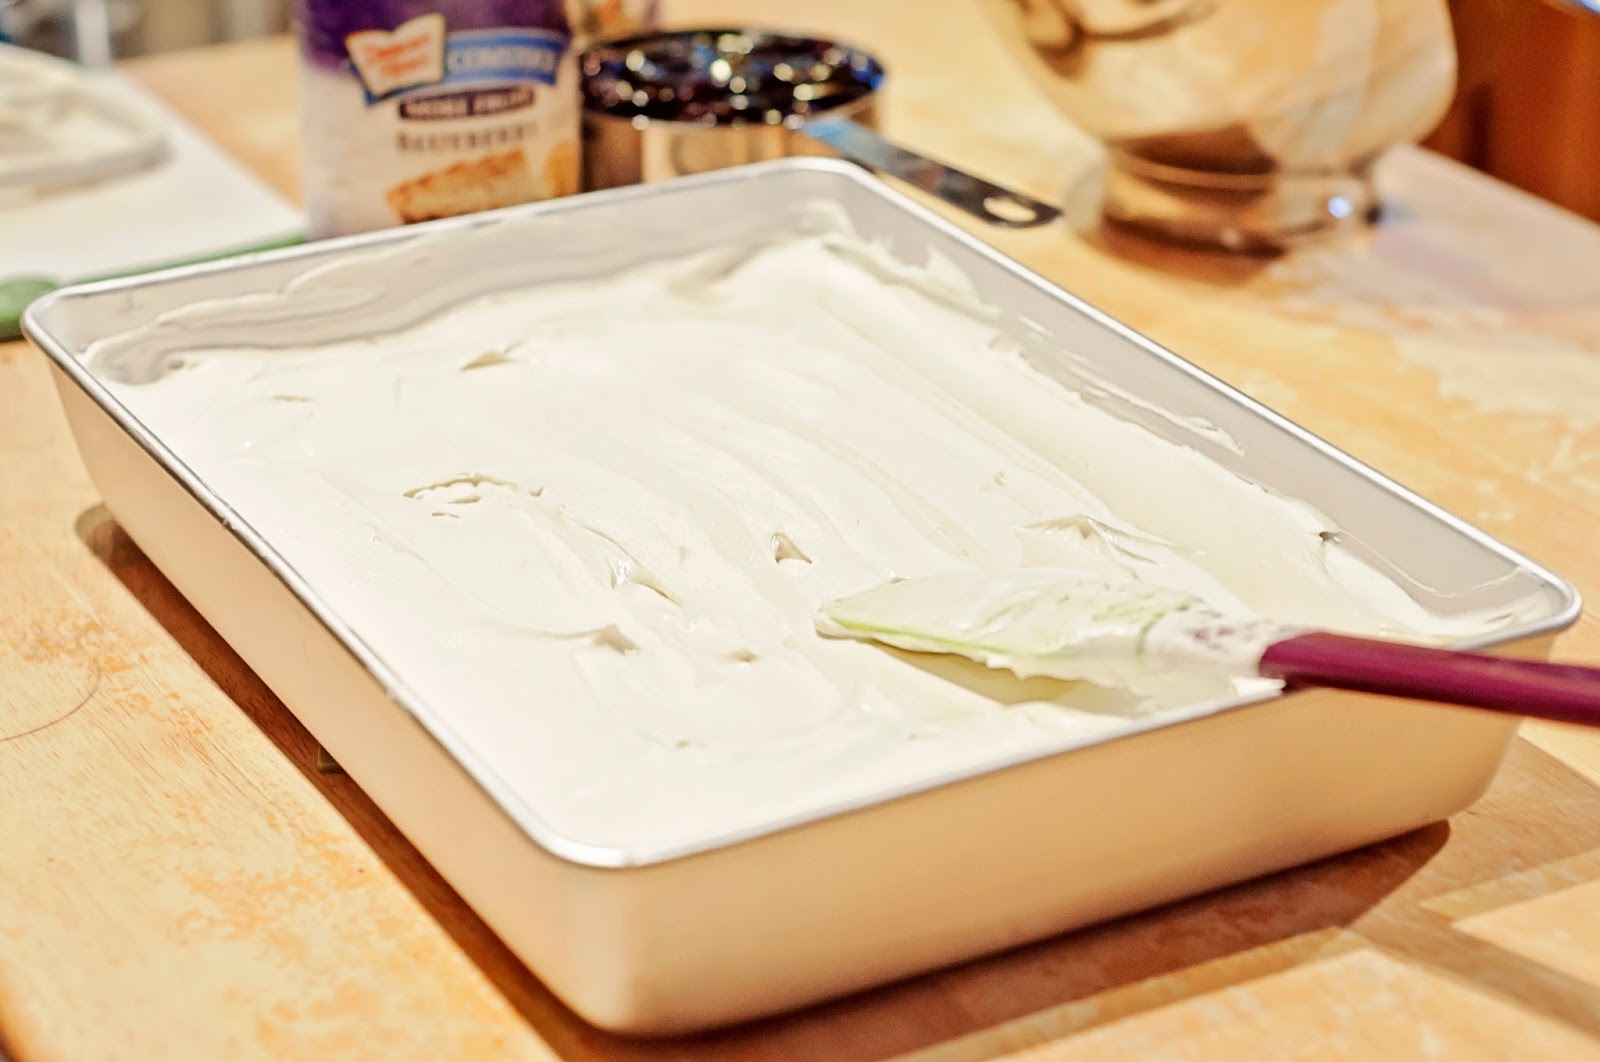
...then spread the cream cheese filling, evenly, over the cooled crust. Now, at this point, had I read my little notes on the recipe, I would have read the suggestion from Mom that you can refrigerate the torte at this point for awhile - it would have made the pie filling easier to spread over the top. I battled the cream part wanting to be pulled into the pretty pie filling, lol, and that could have been avoided. ;-)

I put the pie filling on in even lines/spoonfuls so that it can then be spread a little easier to cover the top. After you do that, all that's left is to refrigerate at least 2 hours before you serve. Now, again, here's a note on that - one that's not in my book but that I discovered while eating this the same day it's made - the crust is rather hard, lol. But, the next day, it was perfect, easy to cut and easy to eat. Next time I'll remember that - and it even just tasted better, lol. ;-)


Mom's Blueberry Torte (a.k.a The Stern Reunion Blueberry Torte)


Crust:

2 c flour
1/2 c brown sugar, firmly packed
1/2 c vegetable shortening
1/2 c butter, softened
1 c chopped walnuts

Mix together the ingredients. Press into the bottom of a 9x13" baking pan and bake at 400° F for 15 minutes or until lightly browned.

Filling and Topping:

2 pkg Dream Whip whipped topping mix
1 8 oz. pkg cream cheese, softened
1 c powdered sugar
1 tsp vanilla
1-2 cans blueberry pie filling

Mix together the cream cheese, powdered sugar and vanilla until well blended and smooth. Prepare the Dream Whip packages according to package directions. Fold into cream cheese mixture until well blended. Spread over top of cooled crust. Top with pie filling. Refrigerate at least 2 hours before serving.

(you can refrigerate the crust/cream cheese mixture layer before spreading on the pie filling, makes it easier to spread!)