Showing posts with label lemon zest. Show all posts

Saturday, May 14, 2016

Food Friday - High In Goodness, Low In Calories

from Kris B.


We are two and half weeks in to our “weight reduction plan.”  With encouragement from another, both of us are doing pretty well staying within our allowed calorie range each day and not feeling hungry.  There does, however, come a time when we want a sweet snack, not a reward necessarily, but a sweet something that we can eat and enjoy and not feel guilty about having had.  It is from this place that we bring you this week’s recipes.

I like cake, but I am not a big fan of frosting.  Even though I have a powerful sweet tooth, most frosting is even too sweet for me.  I often scrape all but a thin layer of the frosting from cake and cupcakes.  I know.  It sounds like a waste; however, often there is someone nearby that has the exact opposite preferences - they love the frosting but not the cake.  It works out for all involved!  Lol!  When I make cake at home, I don’t go to the trouble of making frosting  unless I have to.

A favorite cake at our house is angel food cake.  No one expects it to have frosting.  Perhaps a dollop of whipped cream, and some kind of fruit and it is perfectly dressed and good to go.  Angel food cake is also low in calories abd fat free!  This recipe weighs in at 146 calories per (naked) slice.  Adding fruit and a little whipped cream ups that at little, but this treat still comes in far below the average for most desserts.

INGREDIENTS
12 eggs, whites only) or 1 1/2 cups egg whites)
1 Cup flour
1 1/2 cups sugar, divided
1/4 tsp salt
1 tsp cream of tartar
1 tsp vanilla
1 tsp almond extract
1 TBS lemon juice

Preheat oven to 325 degrees.

In a medium bowl, sift together the flour and half (3/4 cup) of the sugar.

Using an electric mixer, whisk the egg whites until  foamy..  Add the salt and cream of tartar.  Continue to whisk until soft peaks form.  Add the remaining 3/4 cup of sugar a little at a time.  Once stiff peaks have formed, beat in the vanilla, almond extract, and the lemon juice.  

Using a spatula, stir the sifted flour and sugar into the egg white mixture 1/4 cup at a time until all is incorporated.  Evenly spread the batter into an ungreased angel food cake pan (tube pan).

Bake for 50 minutes or until cakes feels slightly springy to the touch and is golden brown.  Remove from oven and invert the pan on a glass bottle to cool.  Once cooled, loosen the cake from the pan with a metal spatula and invert cake onto a plate.


Eat the cake as is, with a little non-dairy whipped cream (if you are watching calories) and fruit.  Or, if you must, drizzle with a glaze or sauce of your choice.

Makes 12 servings

146 calories; 5g protein; 39g carbohydrates; 2g fiber; 29g sugar; 0 fat; 0 cholesterol; 100mg sodium


From Tracey G.


As we come to the end of Week 3 (I've rounded up, lol) in the new Mindful Eating challenge as I like to call it, it's occurred to me that we need some healthy sweets as well occasionally. I'm not a big sweet eater, but sometimes I just gotta have it! Cupcakes, cakes, frosting and so forth. I want to be prepared for such things and have a few healthier alternatives in my bag of tricks. Not that that means I'm not going to enjoy the real deal occasionally, after all there's nothing off limits, it's all about moderation. I would just like a few healthier alternatives to old favorites and some new just-because-they-sound-good healthier things at my disposal.

Recently, I bought myself a subscription to Eating Well magazine, if their magazine is half as informative and helpful as their website, it will be deemed a good move on part! I just got my first issue this past week and this was one of a few recipes in it I decided I was going to try. I did a bit of a hunt around the internet for blueberry pound cake recipes - wanting to see how much this one might differ, and from most of the ones I ran across, this had about half the calories of most, as this comes in at about 303 calories per serving according to the recipe notes. And the 1-inch thick slice - as pictured in my photo, that is considered a serving, is really a pretty good size!

Aside from it being really yummy, it's also a one-bowl recipe - nice! It came together easily, which is always a bonus. I also know it was a hit with my boys - Harry told me that I deserved 63 kisses for it, where he came up with that number as being a good rating is beyond me, but I'll take the kisses and he took a second slice! Hubby asked me if it was easy to put together, which I've come to learn is code for "so, will you make this again because it's really good!"!

I did have to make one major change because I realized I didn't have the ingredient - it calls for 1.5 cups of white whole-wheat flour, I didn't have any, so used unbleached all-purpose. And a minor change was I used frozen blueberries - they aren't the greatest in the stores this time of year fresh, so frozen are always a staple I have on hand. 

Blueberry-Lemon Ricotta Pound Cake

Courtesy of Eating Well Magazine and can be found here: Blueberry-Lemon Ricotta Pound Cake

8 Servings

3/4 cup granulated sugar
5 tbsp unsalted butter, at room temperature
3 large eggs, at room temperature (see tip below*)
3/4 cup part-skim ricotta cheese
2 tbsp lemon zest
2 tbsp lemon juice plus 1 tsp, divided
1 tsp vanilla extract
1 1/2 c white whole-wheat flour
2 tsp baking powder
1/2 tsp salt
2 cups fresh blueberries (I used frozen)
2 tbsp packed confectioner's sugar

1. Preheat oven to 350°F. Coat a 9x5-in. loaf pan with cooking spray and line the bottom with parchment paper.

2. Beat sugar and butter in a large bowl with an electric mixer on medium-high speed until creamy**. Beat in eggs, one at a time, until fully incorporated. Reduce the mixer speed to medium-low and beat in ricotta, lemon zest, 2 tbsp lemon juice and vanilla until just combined. Sprinkle flour on top, then evenly sprinkle baking powder and salt over the flour. With the mixer on low speed, beat until almost combined. Add blueberries and  gently fold into the batter. Transfer to prepared pan.

3. Bake the cake until starting to brown around the edges and a tester inserted in the center comes out clean, about 1 hour. Let cool in the pan on a wire rack for 20 minutes. Run a knife around the edge to loosen the cake, then invert it onto the rack. Carefully turn it right-side up. Let cool completely.

4. Clean the bowl, add confectioner's sugar and whisk in the remaining 1 tsp lemon juice until smooth. Brush the glaze on the cake.

Serves 8: One 1-inch thick slice each

Nutritional information: Calories 303, Fat 11g (Saturated Fat 6g), Cholesterol 96mg, Carbohydrates 45g, Total Sugars 25g (added 21g), Protein 8g, Fiber 3g, Sodium 319 mg, Potassium 124mg

*This is a trick I've used for ages to get eggs right out of the refrigerator to room temperature quickly, that they suggest as well: Place the eggs (in the shell) in a bowl of lukewarm water for about 5 minutes. I usually do that first when I start a recipe that needs room temp eggs, so that by the time I'm ready for them, they are ready for me!


**They do note that for best cake texture to make sure you beat it long enough together to look creamy, and the time it take can vary. I never really did see "creamy", but it still turned out well for me!


Friday, August 28, 2015

Food Friday - Chicken Out


In addition to this week’s recipe, I offer you a few observations on life courtesy of  my experiences with this week’s recipe.

1. Ever thinking that you will be ahead of the game is wasted thinking.  

It seems that no matter how much I plan and schedule and prepare and believe that I have things under control, I don’t.  This week was an object lesson in that.

During the school year, I try to cook ahead, sometimes it is whole meals and sometimes just ingredients so that I can throw together a quick meal when I get home.  On Sunday, I roasted two chickens.  Some of the meat I used immediately to make a chicken chili for a friend, some was for this week’s recipe, and the rest was going in the freezer.  Wednesday, I got the chicken out to make and photograph this week’s Chicken and Shells.  Just as I was starting, the contractor working on our landscaping wanted me to come outside and decide which way I wanted the gate to swing.  I left the ingredients on the counter only to return three minutes later to find the baggie of chicken no longer on the counter, but on the dog bed under my desk where there also sat a very full black lab.  That not only put an immediate stop to this week’s recipe preparation, it also meant that we had nothing for dinner that night, and my husband had no lunch the next day.  This is where planning ahead gets you.  I thought that I was being so clever by scheduling such that I would get the work done for the blog, and dinner, and the next day’s lunch all done at once and I was completely thrown off by an arthritic black lab who has trouble getting up and down stairs, but managed to get up on his hind legs to steal the meat of a whole chicken!  We had Taco Cabana for dinner that night.

2. The whole is usually greater than the sum of the parts.

We usually photograph all of the ingredients and the preparation of our recipes here.  I did that with this recipe, but the photos weren’t…well, they just weren’t pretty.  Technically they were OK, but that’s it.  Gorgonzola cheese is not pretty.  Flour and cream are not pretty.  And the there’s the whole meat thing.  

I can’t bring myself to photograph meat, especially raw meat.  I do eat meat, but not very often and I have to admit that I don’t cook it very well.  When we eat meat at home, most often it is prepared on the grill, and not by me.  Going back to the chicken mentioned earlier, my husband does all of the cutting and de-boning.  I just can’t do it.  Yeah, I am a walking contradiction!

3. Multitasking…

I can’t do it!  If I could, I probably would have done something differently and protected the chicken from the supposed arthritic dog.  Also, my inability to multitask clouds my opinion about the ease of preparation of this recipe.  It probably is not terribly time consuming, but when you stop and attempt to photograph each step along the way, it seems more cumbersome to prepare than it probably actually is.  In my defense, I have yet to burn anything because I have been more concerned with photographs than cooking, so maybe there is hope that I may one day become an efficient multi-tasker.

4. I have found my photographic calling - garlic portraiture!


As I said, most of the ingredients used today were not visually appealing to me.  The garlic was the exception…and the garlic keeper.  The garlic keeper is one of the relatively few things that I kept from dad’s home.  It sat on the counter.  Always.  And it always contained garlic that my dad had grown in his garden.  That’s why I kept it.  Now it sits on my counter, with garlic…that I buy at the grocery store.  Some day, I will grow my own garlic as my dad did.

Pasta shells are kind of pretty too.


When you attempt to share a new recipe every week, you realize how repetitive your eating patterns are!  I always thought that I cooked a variety of things, but as Tracey and I put our heads together mapping out the recipes for the coming weeks, we realize that we are now sharing new found recipes rather than personal favorites.  Such is the case with my contribution this week.  Chicken and Shells is in the current issue of Cuisine at Home magazine.  I love this magazine!  It is now the only cooking magazine for which I still have a subscription.

And (finally) the recipe…

Chicken and Shells

INGREDIENTS:

1 pound medium pasta shells
2 boneless, skinless chicken breast seasoned with salt and pepper
5 TBS olive oil, divided
2 TBS all-purpose flour
2 TBS minced fresh garlic
1 1.2 Cups low-sodium chicken broth
1 1/2 Cups heavy cream
10 oz. Gorgonzola, crumbled
2 sprigs fresh rosemary
1 Cup fresh bread crumbs
1/4 grated Parmesan cheese
2 TBS chopped fresh parsley
1 tsp minced lemon zest

Preheat oven to 350 degrees.  Coat a 9x13 baking dish with cooking spray.

Cook the pasta according to the package directions.  Drain and transfer it to a large bowl.

Saute the chicken in 2 TBS of olive oil over medium heat until an instant read thermometer inserted into the thickest part registers 165 degrees, *about 6 mines on each side.  (*It took about eight minutes on each side for mine to be cooked through.)  remove from the pan, let cool, and then shred.

Using medium heat, add another TBS of olive oil to the pan used to cook the chicken.  Which in the flour and garlic.  Cook for one minute.  Gradually whisk in the garlic and the cream, then add the Gorgonzola and the rosemary sprigs.  Do not strip the the rosemary leaves.  Add the entire sprig to infuse the sauce with the herb flavor.  Return the chicken to the sauce.  Bring to a boil then reduce the heat to medium-low and simmer until thick, about ten minutes.

Remove the rosemary sprigs.
Combine the sauce with the pasta.  Transfer to the prepared baking dish.

Combine breadcrumbs, Parmesan cheese, parsley, lemon zest, and remaining 2 TBS of olive oil.  Sprinkle this mixture over the pasta.

Bake for 20 minutes or until golden brown.

In the interest of full disclosure, I did not use the parsley or the lemon zest in the topping.  I forgot to buy the parsley and decided that the lemon zest wasn’t necessary without it.  Other than that, I made the recipe exactly as it was in the magazine.

And we are having it for dinner tonight.


By Tracey G


Thinking on Kris's post, I have to say that every time I've tried, as well, to be ahead of the game, it seems to be a fail in one way or another. It's either on a small scale, or a rather epic fail as in the smart black lab who did not waste an opportunity for some yummy cooked chicken when it arose, lol.

 I had this week's recipe that I'm sharing, all done and prepared on Wednesday, but it never fails that something prevents me from stringing more than 2 minutes together to get the shots processed, and then put together with words in a manner that makes sense, lol before Friday afternoon or like today, Friday evening. I guess this is the life of having a 6 yr old in your home, lol. That's where my minutes go, most of the time happily, some of the time not so happily, lol. I am hoping that when school starts this year, I will do better than last year in time management.

 It was all new to me last year, I had no idea what to expect, and I will admit I felt lost 90% of the time without Harry around. I feel like I wandered aimlessly through my days. (same feeling after my mom passed away and I was no longer driving her to dialysis 3 days a week, and being her caregiver with her living with me - was a culture shock when I lost her) By the time I started getting the hang of being home, alone, during the day, it was June and school was out. LOL I had just started to get a taste of how I could structure my day and boom, all wiped away with summer vacation, lol. But this year - I am hoping that I can hit the school year running and balance trying to be as involved in his school and class stuff as possible along with my self-imposed work from home projects that I adore, namely this blog, my photography and being a part of the Capture Your 365 Creative Team and CY365 community in general! But, we'll see.... I think Kris and I have learned, or at least have been reminded over and over that planning ahead has not always equaled actually being ahead! :-)

Now, as far as this week's food offering, I don't think I have run across any recipe, ever, that has surprised me as much as this one. I never expected such flavor from such simple ingredients as are found in this recipe, in this combination. And it's almost criminal how uncomplicated and effortless this dish is, lol, but yet, tastes like you put hours into it! It's gone through some changes, and that sounds funny when I think about it, but it had a few other things as toppings along with the cheese, but I found that if I boiled it down to the basics, it was yummier and easier as less ingredients were needed to get it done.

And here we are - the ingredients. Yep. Just 3. Boneless skinless chicken breasts, prepared pesto and provolone cheese. Usually I use shredded, but this was all I could get my hands on and it worked just fine of course, lol. :-) 

Preheat your oven to 400°F. While it's preheating, time to put this together. Start by placing the chicken breasts in a 9x13 inch baking pan. The recipe calls for 4 breasts, but sometimes I only use 3 so I downsize my pan a bit. This go around I had 5 pieces of chicken.

Once the chicken is arranged in the pan, spoon the pesto over the chicken breasts. The recipe calls for 1/2 cup. I ended up using the whole 8 oz jar this time because I wasn't thinking and contaminated it all with raw chicken by using the same spoon to scoop it out of the bowl and to spread it around on the chicken, lol. Normally I just measure out what's needed and proceed from there, but in the sake of saving a step, I dumped the whole thing into the bowl (for the photos first) and scooped - fully intending on using that 2nd spoon I'd gotten for the spreading, lol, not one for both... Oh well, the pesto is the best part and it was just as yummy with all of it as only a 1/2 cup, lol. 

Once you get the pesto evenly spread on the chicken, it's time to bake it. Usually takes about 35-45 minutes for the chicken breasts to be cooked thoroughly, but I always get out my meat thermometer and check at the end of 35-40 minutes or so to see where I'm at with doneness. 

After you've baked your chicken and it's the correct temperature for proper doneness (which according to foodsafey.gov is 165°F and can be found here:foodsafety.gov Safe Minimum Cooking Temperatures), it's time to put on the cheese! Now, here's where I normally use the shredded provolone, but as you can see the deli-style slices worked just fine. Pop them back into the oven for 1-2 min or until the cheese is melted.

Once the cheese is melted and as browned as you'd like, pull it out and let it rest for about 5 minutes  (I've let it sit for 10 minutes before and had no ill consequences, lol) before serving. 

I served this batch with a garlic-buttered noodle that had some green beans mixed in, it was a bit of overload on green, lol, but it's one of the few vegetables Harry will eat these days, so I work them in a lot, lol. It is one of my favorite ways to do a quick side dish though, while the noodles are cooking I toss in a handful or two of frozen cut green beans, so that when the noodles are done, so are the beans and they're already tossed together that way - and then you can season any way you like :-) 

Pesto Baked Chicken

serves 4
Preheat oven to 400°F

4 boneless skinless chicken breasts, about 6 oz each
1/2 c prepared pesto
1 c (4 oz) shredded provolone cheese

Place chicken breasts in an ungreased 9x13-inch baking dish, spoon pesto over chicken.

Bake, uncovered, at 400°F for about 35-45 minutes or internal temperature in the thickest part of the chicken breast reaches 165°F. Remove from oven and sprinkle with cheese. Bake 1-2 minutes longer or until the cheese is melted. Let stand about 5 minutes before serving. 


Thursday, August 20, 2015

Food Friday - After School Snacks

from Kris B.


We all remember those days of getting home from school and rushing to the kitchen because we were starved.  A cookie or two and a glass of milk and then it was off to do homework while mom fixed dinner.  

School lunch schedules never seem to take into account the body's normal hunger patterns.  Lunch often happens way too early in the day, making for extremely long afternoons!  Even as an adult, I still get home from school in the afternoon's hungry.  The problem is that it is nearly 5:00 at that point and I am the one who has to fix dinner!  I often find myself say, "I'll just have a little something to eat before I start cooking."  Well, that often turns into more than "a little something" and by the time dinner is ready, I don't really want it.  This is a terribly bad cycle!

These Peanut Butter Snack Bites are just enough to curb the appetite and take the hunger edge away before fixing dinner.  They have some protein, carbohydrates, fruit, and some sweetness to boost what is for me the inevitable afternoon slump.  And, rather than the childhood favorite of an accompanying glass of milk, it is an afternoon cup of coffee.  Another dose of caffeine helps with the much needed pick-me-up as well.  These may not be the absolute healthiest afternoon snack, but they certainly aren't the worst, either!

INGREDIENTS

2 TBS butter
2/3 Cup natural peanut butter
1/4 Cup powdered sugar
3 TBS honey
1/2 tsp vanilla
1 1/2 Cups Rice Krispies
1 Cup quick cooking oats
*1/4 Cup mini chocolate chips
*1/4 raisins
1/4 Cup finely chopped, lightly salted peanuts


This recipe makes me thankful for my 1980's Tupperware measuring spoon set that has 1/4  and 1/3 measures.  Normally I don't like recipes that require every measuring device that I own, but because you have to work sort of quickly as far as mixing the ingredients, pre-measuring and lining up all of the ingredients works best here.

You probably all know this, but in case you don't, here is a tip that is helpful when using a couple of these ingredients.  To ens ure that you get the full measure of the honey and peanut butter, or any other ingredient that may stick to the sides of the measuring cup, coat the measuring cup or spoon with a light coating of cooking spray.  This allows the "clingy" ingredients to slide right out and none is lost or wasted by sticking.

Melt the butter in a medium saucepan.  Remove it from the heat and stir in the peanut butter, powdered sugar, honey, and vanilla.  Once these are well-mixed add the Rice Krispies and the oatmeal.  

Let the mixture cool completely and then add the raisins and the chocolate chips.


* Because nothing is simple at my house, I make two batches of these - one with only chocolate chips, and one with only raisins, using 1/2 cup of each.  Though I like chocolate covered raisins alone, I really don't care for chocolate and raisins in my cookies.  So I opt for just the chocolate.  Big surprise.  LOL!  My husband also like chocolate covered raisins, but doesn't want chocolate in his cookies, so his batch is made with only raisins.  Because these are so simple to make, doing it twice is no big deal.

Once cooled, shape the mixture into balls.  I use a small cookie scoop to maintain uniformity of size.  Roll each ball in the chopped peanuts.  


Makes about 24 balls.

Store in the refrigerator.

As an aside, Tracey and I often discuss when and how we are shooting these blog photos.  As you may have noticed, the lighting in my kitchen is TERRIBLE!  Tracey has said the same thing about hers as well.  We all know how important good light is to good photos.  We all also know that bad food photos are some of the worst bad photography there is!  These two things make shooting the photos for these posts super challenging for me.  It is forcing me to better my photography skills...at least I am hoping they are improving a little bit.  We remodeled our kitchen a few years ago, before i was addicted to photography, land long before I thought that I would ever engage in food photography.  If I had known then what I know now, I would have designed the kitchen layout to maximize the light for photos rather than for ease of cooking. LOL.  Hindsight is always 20/20!


 by Tracey G


These are one of my favorite treats - a snack that I think works for any time of day, they're not too sweet and nicely tangy and lemony - which for me works anytime. So, as an after-school snack, they're perfect! Maybe not a whole lot of nutritional value, lol, but they sure do taste good and make you smile - and that can be very important after a long day at school, in any grade or any level, whether student, teacher or parent! :-)

I've searched for years for one that I like, last one I had tasted too "eggy" to me, the lemon kind of got lost in all the egginess of the flavor. So, after a bit of searching around, I found this recipe, and with a few tweaks that made it mine and to get it just the way I liked it and wanted it, this is the result, and I couldn't be happier. And apparently neither could Harry because he's been eating way more of these than he ever did of the old recipe! :-D And they are so easy! I actually had everything on hand - usually there's a couple ingredients I need to pick up for whatever treat I'm making, but not this one. Had everything I needed and it came together quickly, longest parts were taking the photos and the cooling time before the dusting of powdered sugar and eating! LOL

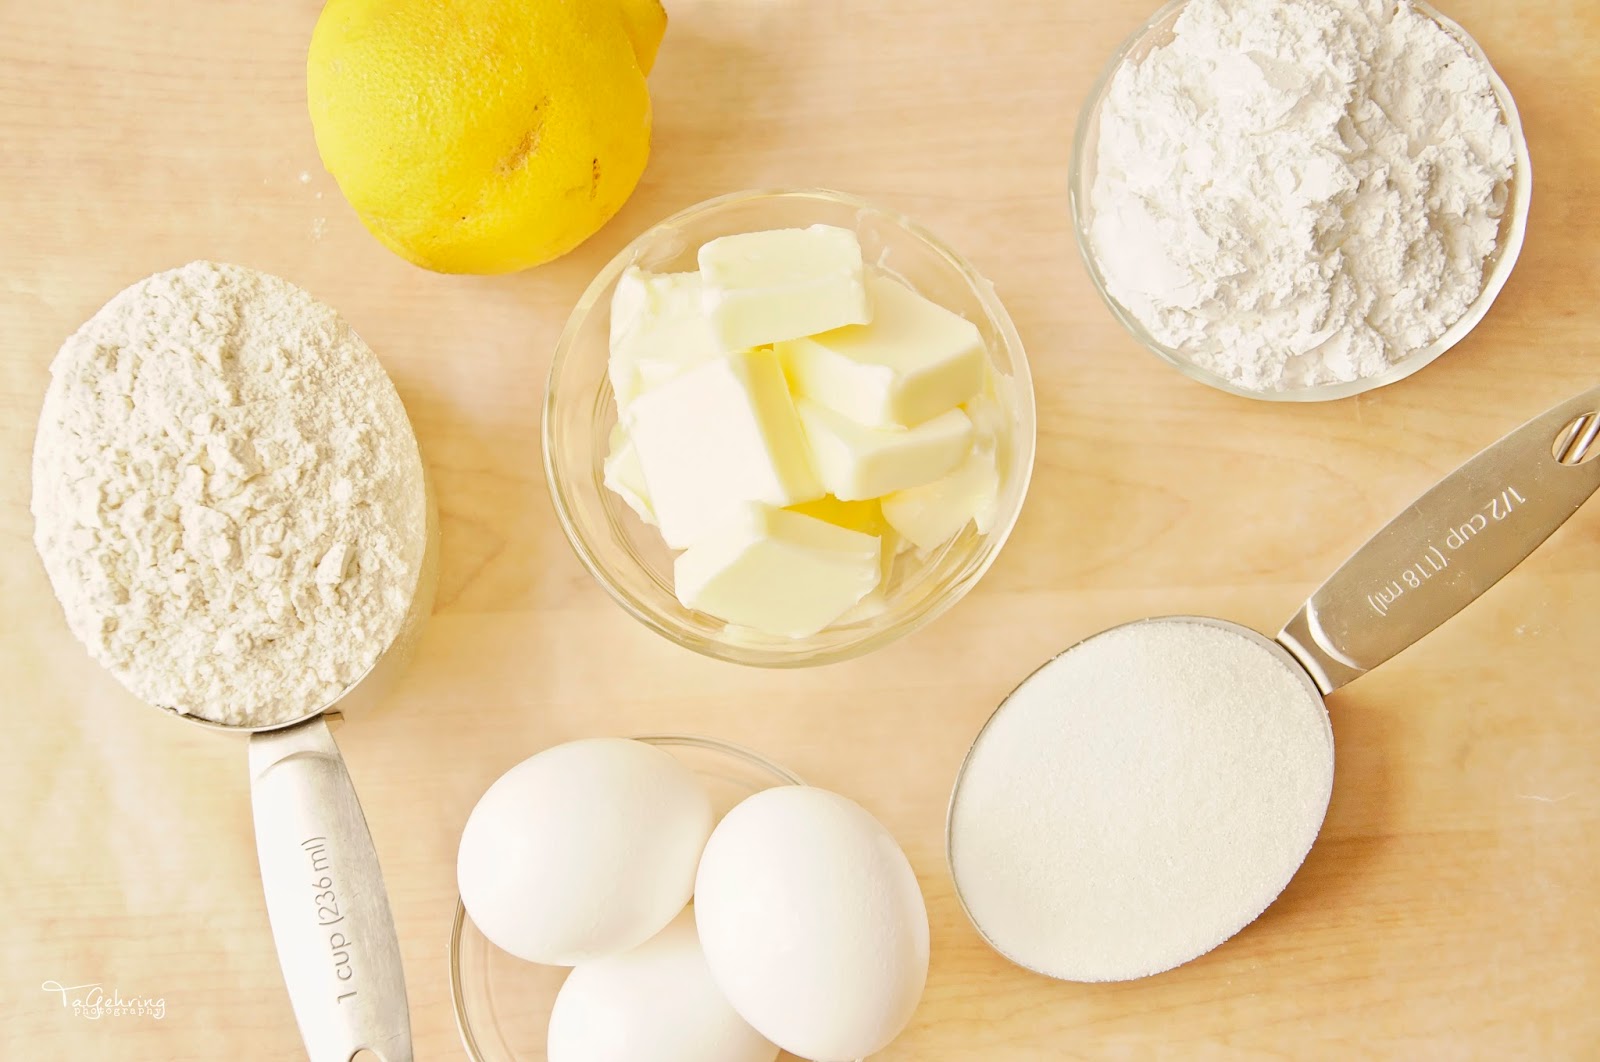
I actually got every ingredient  this time in the photo! LOL The players in this recipe are: flour, lemon juice and zest, powdered sugar, granulated sugar, eggs and butter. That's it. Pretty simple and even if I don't have fresh lemons on hand, which I pretty much always do, but I could even make it with bottled lemon juice and skip the zest. Not that I'd want to, but hey, if a craving hit - anything's in play and fair to use! ;-) 

Preheat the oven to 350°. In a bowl, beat the butter and powdered sugar...

...until smooth and well combined.

Gradually add in the flour until a soft dough forms. Press the dough in the bottom of a greased 9x13" baking pan. Bake 18-20 minutes or until lightly browned. 

Pour the egg mixture over the hot crust.

Bake 20-25 minutes or until lightly browned and lemon mixture is set. Cool completely on a wire rack, then dust with additional powdered sugar. Cut into squares and store the leftovers in the refrigerator - if there are any, lol.


Lovely Lemon Bars


3/4 c butter, softened
2/3 c powdered sugar
1 1/2 c + 3 tbsp all-purpose flour, divided
3 eggs
1 1/4 c sugar
1/3 c lemon juice
zest from one lemon (or more if you prefer!)
additional powdered sugar for dusting

 1) Preheat oven to 350°. In a large bowl, beat butter and powdered sugar until well blended and smooth. Gradually add in 1-1/2 cups flour. Press into the bottom of a greased 9x13 inch baking pan. Bake 18-20 minutes or until crust is golden brown.

2) Meanwhile, in a small to medium sized bowl, whisk eggs, granulated sugar, flour, lemon juice and lemon zest until frothy. Pour over hot crust.

3) Bake 20-25 minutes or until lightly browned and lemon mixture is set. Cool completely on wire rack, dust with additional powdered sugar. Cut into squares. Yield is about 4 dozen.